JeepParts
My Garage
My Account
Cart
OEM 2003 Jeep Wrangler Dimmer Switch
Light Dimmer Switch- Select Vehicle by Model
- Select Vehicle by VIN
Select Vehicle by Model
orMake
Model
Year
Select Vehicle by VIN
For the most accurate results, select vehicle by your VIN (Vehicle Identification Number).
2 Dimmer Switches found


2003 Jeep Wrangler Turn Signal Switch Part Number: 5016709AD
Product Specifications- Other Name: Switch - Multifunction; Multi Purpose Switch; Signal Switch; Multifunction Left Stalk for Interior/Exterior Lights & Turn Signal Controls.
- Replaces: 5016709AB, 5016709AC
- Item Weight: 1.10 Pounds
- Item Dimensions: 6.6 x 6.3 x 10.8 inches
- Condition: New
- Fitment Type: Direct Replacement
- SKU: 5016709AD
- Warranty: This genuine part is guaranteed by Mopar's factory warranty.


2003 Jeep Wrangler Turn Signal Switch Part Number: 5016708AD
Product Specifications- Other Name: Switch - Multifunction; Multi Purpose Switch; Signal Switch; Multifunction Left Stalk for Interior/Exterior Lights & Turn Signal Controls
- Replaces: 5016708AC
- Item Weight: 1.10 Pounds
- Item Dimensions: 11.6 x 5.5 x 5.0 inches
- Condition: New
- Fitment Type: Direct Replacement
- SKU: 5016708AD
- Warranty: This genuine part is guaranteed by Mopar's factory warranty.
2003 Jeep Wrangler Dimmer Switch Parts and Q&A
- Q: How to Service a Dimmer Switch While Ensuring Safety Precautions on 2003 Jeep Wrangler?A: You must disconnect and isolate the battery's negative cable to start servicing the turn signal switch and wait two minutes before the air bag system is ready. You should begin by taking off the steering column opening cover on the instrument panel, then remove the two screws holding the lower shroud to the upper one. If your steering wheel tilts, lower it into the lowest position and make sure the release lever is still in that direction. Take the upper and lower shrouds off, then cut the wires from the multi-function switches on the left and the right from the receptacles they are plugged into. After that, unscrew the assembly from the upper steering column housing by undoing the two screws holding it in place and take it out. Release the small screws that attach the right multi-function switch to the left bracket, then pull the right switch control stalk away from the pins. Pull out the right multi-function switch and the combination flasher from the left multi-function switch. Attach the flasher into the left multi-function switch, turn the right switch to the left and use the two inner pins to line up all pieces before installation. Put the small screws from the switch into the holes until they are 2 Nm (20 in. lbs.) tight. Put the multi-function switch assembly into the upper part of the steering column and hold it with two screws, tightening them by 2 Nm (20 in. lbs.). Reconnect each side of the wire harness between the switches, followed by positioning the two shrouds so their tabs engage with the steering column. Add two screws into the low shroud at 2 Nm (18 in. lbs.) to attach it to the upper shroud. Should the chair have a tilt, skew the column up and secure it, cover the steering wheel opening and reconnect the negative cable to the battery.
Related 2003 Jeep Wrangler Parts
 2003 Jeep Wrangler Clock Spring
 2003 Jeep Wrangler Ignition Switch
 2003 Jeep Wrangler Headlight Switch
 2003 Jeep Wrangler Brake Light Switch
 2003 Jeep Wrangler Antenna Cable
 2003 Jeep Wrangler Ignition Lock Cylinder
 2003 Jeep Wrangler Back Up Light Switch
 2003 Jeep Wrangler Door Jamb Switch
 2003 Jeep Wrangler Ignition Lock Assembly
 2003 Jeep Wrangler Intake Manifold Temperature Sensor
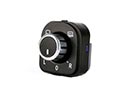 2003 Jeep Wrangler Mirror Switch
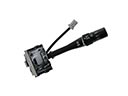 2003 Jeep Wrangler Wiper Switch