JeepParts
My Garage
My Account
Cart
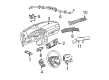
OEM 2004 Chrysler Pacifica Clock Spring
Spiral Cable Clock Spring- Select Vehicle by Model
- Select Vehicle by VIN
Select Vehicle by Model
orMake
Model
Year
Select Vehicle by VIN
For the most accurate results, select vehicle by your VIN (Vehicle Identification Number).
1 Clock Spring found

2004 Chrysler Pacifica Clockspring Part Number: 56044805AC
$243.60 MSRP: $360.00You Save: $116.40 (33%)Product Specifications- Other Name: Air Bag Clockspring
- Replaces: 56044805AB, 56044805AA
- Item Weight: 1.20 Pounds
- Item Dimensions: 6.9 x 4.1 x 4.2 inches
- Condition: New
- Fitment Type: Direct Replacement
- SKU: 56044805AC
- Warranty: This genuine part is guaranteed by Mopar's factory warranty.
2004 Chrysler Pacifica Clock Spring Parts and Q&A
- Q: How to Effectively Replace and Install a Clock Spring in a Steering Column on 2004 Chrysler Pacifica?A: Turn the steering wheel completely straight before you start the procedure. First put the front wheels directly in front and then pull out the driver air bag from the steering wheel and gently remove the steering wheel from the steering column. Remove the shrouds on each side of the steering column and pull out the two instrument panel wire harness connectors from the receptacles found below the clock spring case on the back of the column. Remove the two screws attaching the clock spring case to the multi-function switch mounting housing and replace the entire clock spring if it proves defective, has been injured or the driver air bag has been deployed. If you use the original clock spring, secure the rotor to the case to keep it centered until you are ready to put it back; if centering is gone, you'll need to center it again before putting it in. Align the front wheels in the middle at first, then hold the centered clock spring rotor and case still as you push the clock spring down onto the upper shaft of the steering column. Set the three outer pins within the lower clock spring rotor hub onto the three matching holes in the top edge of the turn signal cancel cam, realizing that the outermost pin is oblong and can be placed only in the corresponding hole. Place and attach the one pin and two mounting ears from the clock spring case into the holes of the multi-function switch mounting housing and tighten the two clock spring mounting screws to 2.5 Nm (22 in. Lbs.). Match the clock spring's two instrument panel wire harness connectors to their receptacles under the steering column on the back of the clock spring housing. Finally, set the upper and lower steering column shrouds in place. Patch the lower tilting steering column shroud to the multifunction switch housing using a screw tightened to 2 Nm (17 in. Lbs.). Should a clock spring be replaced, disengage the plastic locking pin that holds the rotor in place inside the clock spring case. Install the steering wheel at the end of the steering column, hook the driver air bag to the wheel and keep the battery negative cable disconnected until you are finished. Take time to test that everything works properly on the car before you close the hood.
Related 2004 Chrysler Pacifica Parts
 2004 Chrysler Pacifica Fuse Box
 2004 Chrysler Pacifica Camshaft Position Sensor
 2004 Chrysler Pacifica TPMS Sensor
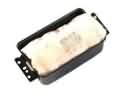 2004 Chrysler Pacifica Air Bag
 2004 Chrysler Pacifica Air Bag Control Module
 2004 Chrysler Pacifica Air Bag Sensor
 2004 Chrysler Pacifica Brake Light Switch
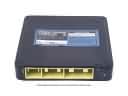 2004 Chrysler Pacifica Engine Control Module
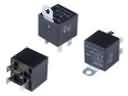 2004 Chrysler Pacifica Fuel Pump Relay
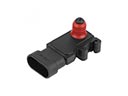 2004 Chrysler Pacifica MAP Sensor
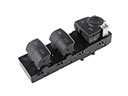 2004 Chrysler Pacifica Power Window Switch
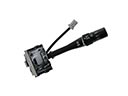 2004 Chrysler Pacifica Wiper Switch