JeepParts
My Garage
My Account
Cart
OEM 2004 Dodge Durango Catalytic Converter
Cat. Converter- Select Vehicle by Model
- Select Vehicle by VIN
Select Vehicle by Model
orMake
Model
Year
Select Vehicle by VIN
For the most accurate results, select vehicle by your VIN (Vehicle Identification Number).
3 Catalytic Converters found

 Product Specifications
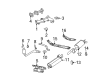
- Other Name: Converter - Catalytic; Catalytic Converter, Right; Exhaust Y Pipe; Exhaust Pipe; Converter & Pipe
- Position: Passenger Side
- Condition: New
- Fitment Type: Direct Replacement
- SKU: 52855188AA
- Warranty: This genuine part is guaranteed by Mopar's factory warranty.

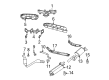
2004 Dodge Durango Catalytic Converter Part Number: 52855404AA
Product Specifications- Other Name: Converter - Catalytic; Exhaust Pipe; Converter & Pipe; Converter Catalytic
- Item Weight: 18.50 Pounds
- Item Dimensions: 50.4 x 18.2 x 8.5 inches
- Condition: New
- Fitment Type: Direct Replacement
- SKU: 52855404AA
- Warranty: This genuine part is guaranteed by Mopar's factory warranty.
 Product Specifications
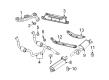
- Other Name: Converter - Catalytic; Catalytic Converter, Left; Exhaust Pipe; Converter & Pipe; Converter Catalytic
- Position: Driver Side
- Item Weight: 11.80 Pounds
- Item Dimensions: 38.1 x 13.9 x 15.6 inches
- Condition: New
- Fitment Type: Direct Replacement
- SKU: 52855267AA
- Warranty: This genuine part is guaranteed by Mopar's factory warranty.
2004 Dodge Durango Catalytic Converter Parts and Q&A
- Q: How to Safely Remove and Install a Catalytic Converter on 2004 Dodge Durango?A: Before removing the catalytic converter, lift and support the car, then soak all exhaust bolts and nuts with leopard Rust Penetrant and wait 5 minutes. Untie the oxygen sensor connectors, followed by removing the bolts that hold the catalytic converter to the manifold (5) and remove the clamp that attaches the catalytic converter to the exhaust pipe(s) (1). If you see tack welds, grind them, then remove the clamp holding the flange to the muffler or pipe extension before you can remove the catalytic converter. During an inspection, make sure the converter's stainless steel body does not show signs of bowing or distortion from excessive heat and that any attached heat shield is neither bent nor loose. Sometimes, if you suspect the catalyst has internal damage, hitting the bottom with a rubber mallet can show if the core is damaged. Ensure there are no burrs on the catalytic converter pipe, place the converter into the exhaust pipe until it sits right and ensure the alignment tang is seated all the way down in the right slot. If you noticed other loose areas during the removal process, use the correct steps to secure them back. Put the clamp and nuts onto the system at the catalytic converter-to-extension pipe joint and tighten them to a torque of 41 Newton meters (about 30 foot pounds). Once your car is set at the lower level, turn on the engine and look for exhaust leaks, then take care of any repairs or adjustments on the exhaust and put some space between the pipes and the panels.
Related 2004 Dodge Durango Parts
 2004 Dodge Durango Muffler
 2004 Dodge Durango Canister Purge Valve
 2004 Dodge Durango Exhaust Manifold
 2004 Dodge Durango PCV Valve
 2004 Dodge Durango Exhaust Manifold Gasket
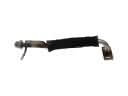 2004 Dodge Durango EGR Tube
 2004 Dodge Durango EGR Valve Gasket
 2004 Dodge Durango Exhaust Clamp
 2004 Dodge Durango Exhaust Hanger
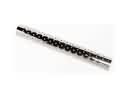 2004 Dodge Durango Exhaust Heat Shield
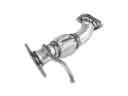 2004 Dodge Durango Exhaust Pipe
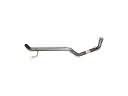 2004 Dodge Durango Tail Pipe