JeepParts
My Garage
My Account
Cart
OEM 2006 Dodge Durango Catalytic Converter
Cat. Converter- Select Vehicle by Model
- Select Vehicle by VIN
Select Vehicle by Model
orMake
Model
Year
Select Vehicle by VIN
For the most accurate results, select vehicle by your VIN (Vehicle Identification Number).
3 Catalytic Converters found

2006 Dodge Durango Catalytic Converter Part Number: 52855410AC
Product Specifications- Other Name: Converter - Exhaust; Exhaust Pipe; Converter & Pipe
- Replaces: 52855410AB
- Item Weight: 35.40 Pounds
- Item Dimensions: 23.0 x 29.2 x 20.3 inches
- Condition: New
- Fitment Type: Direct Replacement
- SKU: 52855410AC
- Warranty: This genuine part is guaranteed by Mopar's factory warranty.

2006 Dodge Durango Catalytic Converter Part Number: 52855504AB
Product Specifications- Other Name: Converter - Exhaust; Exhaust Pipe; Converter & Pipe; Pipe And Converter Exhaust
- Replaces: 52855504AA
- Item Weight: 27.50 Pounds
- Item Dimensions: 59.1 x 15.0 x 14.9 inches
- Condition: New
- Fitment Type: Direct Replacement
- SKU: 52855504AB
- Warranty: This genuine part is guaranteed by Mopar's factory warranty.
2006 Dodge Durango Catalytic Converter Part Number: 52855505AB
Product Specifications- Other Name: Converter - Exhaust; Exhaust Pipe; Converter & Pipe; Pipe And Converter Exhaust
- Item Weight: 11.80 Pounds
- Item Dimensions: 36.2 x 15.7 x 19.0 inches
- Condition: New
- Fitment Type: Direct Replacement
- SKU: 52855505AB
- Warranty: This genuine part is guaranteed by Mopar's factory warranty.
2006 Dodge Durango Catalytic Converter Parts and Q&A
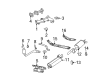
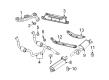
- Q: How to Maintain and Fix a Catalytic Converter on 2006 Dodge Durango?A: When repairing or replacing a catalytic converter, first jack up the vehicle, apply Mopar Rust Penetrant to all exhaust bolts and nuts and then wait 5 minutes. Remove the oxygen sensor electrical connectors to keep them from being broken and take out the bolts and clamp (1) connecting the catalytic converter (3) to the exhaust pipe(s) (2). Where present, files away any tacked joins in the welds and let go the clamp fastening the flange to the muffler or extension pipe before you remove the catalytic converter. Check the converter's stainless steel housing for signs it is pushing in from the heat and make sure the heat shield hasn't become loose or bent. When damages to the inside of the catalyst are suspected, gently tapping it with a rubber mallet on the bottom will often make the damaged core appear. Make certain there are no burrs, then place the assembly of the catalytic converter (3) into the exhaust pipe (2) with the alignment tang fully inside the alignment slot. Clamp the catalytic converter assembly (3) to the exhaust manifold and work on fastening flange nuts (5) and bolts (4); do not tighten them at this stage. Should other parts of the exhaust system have come loose, tighten them as explained in the manual. As you link the catalytic converter to the extension, secure the clamp (1) in place and use nuts, but hold back on the tightening. Secure the catalytic converter assembly (3) so there is at least a 25 mm (1 inch) gap between the assemblies and make sure the bars in the muffler isolators (4) are all within an approximate 42 mm (1.65 inch) distance from each other. Still inside the engine, make the required adjustments, then set the torque on the manifold bolts to 33 Nm (25 ft. lbs.) and on the clamp nuts to 61 Nm (45 ft. lbs.). At the last stage, lower the vehicle, crank the engine and check for leaks from the exhaust system. Repair any that you find.
Related 2006 Dodge Durango Parts
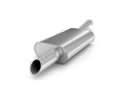 2006 Dodge Durango Muffler
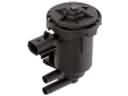 2006 Dodge Durango Canister Purge Valve
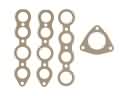 2006 Dodge Durango Exhaust Manifold
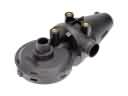 2006 Dodge Durango PCV Valve
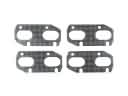 2006 Dodge Durango Exhaust Manifold Gasket
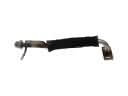 2006 Dodge Durango EGR Tube
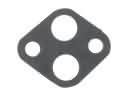 2006 Dodge Durango EGR Valve Gasket
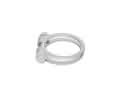 2006 Dodge Durango Exhaust Clamp
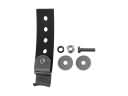 2006 Dodge Durango Exhaust Hanger
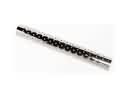 2006 Dodge Durango Exhaust Heat Shield
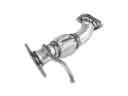 2006 Dodge Durango Exhaust Pipe
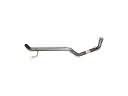 2006 Dodge Durango Tail Pipe