JeepParts
My Garage
My Account
Cart
OEM 2006 Jeep Grand Cherokee Rack And Pinion
Steering Rack And Pinion- Select Vehicle by Model
- Select Vehicle by VIN
Select Vehicle by Model
orMake
Model
Year
Select Vehicle by VIN
For the most accurate results, select vehicle by your VIN (Vehicle Identification Number).
1 Rack And Pinion found


2006 Jeep Grand Cherokee Steering Gear Part Number: 52089292AE
$554.08 MSRP: $834.00You Save: $279.92 (34%)Ships in 1-2 Business DaysProduct Specifications- Other Name: Gear - Rack And Pinion; Rack and Pinion Assembly; Steering Gearbox; Gear Assembly; Gear Rack And Pinion
- Replaces: 52089292AD, 52089292AC, R2089292AE
- Item Weight: 30.50 Pounds
- Item Dimensions: 60.9 x 10.3 x 6.7 inches
- Condition: New
- Fitment Type: Direct Replacement
- SKU: 52089292AE
- Warranty: This genuine part is guaranteed by Mopar's factory warranty.
2006 Jeep Grand Cherokee Rack And Pinion Parts and Q&A
- Q: How to Service and Repair a Rack and Pinion Steering System on 2006 Jeep Grand Cherokee?A: The first thing to do while servicing or repairing the rack and pinion is to have the front wheels pointing straight ahead and the steering wheel at the center and locked. After draining the power steering, get rid of the connecting bolt that holds the shaft to the pump gear. Remove the oil drip tray and next lift out the pressure and return pipes near the rack and pinion. Lift the car, then get rid of the front tires. Open the tie rod end jam nuts, take off the outer tie rod nut and use puller #8677 to uncouple the tie rod from the knuckle. First, remove the front splash shield and then - for 4X4 vehicles - remove the front axle. Then, remove the two rack and pinion mounting bolts, move the rack and pinion all the way over to the right side for room, lower it, turn it to the very left and then take it out of the vehicle. If access is required, take out the outer tie rod ends from the rack and pinion. First, set the new outer tie rod ends in compensation and then put the rack and pinion back into your vehicle in the same way as it came out. Screw in the rack and pinion mounting nuts and tighten them with a torque of 244 Nm. After installing the splash shield in front, place some loosened jam nuts on the outer tie rod ends. Join the outer tie rod ends to the knuckle and turn the tie rod end nut till you reach 95 Nm. Couple the pressure and return lines to the rack and pinion and tighten them to 28 Nm. Replace the oil filter drip tray, put the column coupler shaft in the bottom coupling and then bolt it on using the new bolt set to 49 Nm. For 4X4 models, put the front axle housing unit back in and afterward attach the wheel and tire assembly. Take out the axle support, lower the vehicle all the way down and lose the steering wheel lock. You should finish by filling the power steering pump and setting the toe.
Related 2006 Jeep Grand Cherokee Parts
 2006 Jeep Grand Cherokee Steering Wheel
 2006 Jeep Grand Cherokee Power Steering Pump
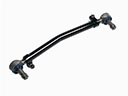 2006 Jeep Grand Cherokee Drag Link
 2006 Jeep Grand Cherokee Power Steering Hose
 2006 Jeep Grand Cherokee Power Steering Reservoir
 2006 Jeep Grand Cherokee Steering Column
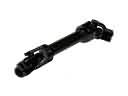 2006 Jeep Grand Cherokee Steering Shaft
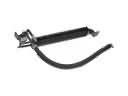 2006 Jeep Grand Cherokee Power Steering Cooler
 2006 Jeep Grand Cherokee Steering Column Cover
 2006 Jeep Grand Cherokee Steering Gear Box