JeepParts
My Garage
My Account
Cart
OEM 2006 Jeep Grand Cherokee Wiper Motor
Windshield Wiper Motor- Select Vehicle by Model
- Select Vehicle by VIN
Select Vehicle by Model
orMake
Model
Year
Select Vehicle by VIN
For the most accurate results, select vehicle by your VIN (Vehicle Identification Number).
1 Wiper Motor found

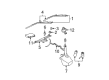
2006 Jeep Grand Cherokee Wiper Motor Part Number: 55156325AE
Product Specifications- Other Name: Motor, Liftgate Wiper; Back Glass Wiper Motor; Rear Motor
- Replaces: 55156325AC, 55156325AB, 55156325AD
- Condition: New
- Fitment Type: Direct Replacement
- SKU: 55156325AE
- Warranty: This genuine part is guaranteed by Mopar's factory warranty.
2006 Jeep Grand Cherokee Wiper Motor Parts and Q&A
- Q: How to Maintain a Wiper Motor on 2006 Jeep Grand Cherokee?A: You should start by disconnecting and isolating the negative battery cable for servicing the wiper motor. Pull the rear wiper arm from the rear wiper motor output shaft and then remove the nut holding the output shaft and bezel to the outer liftgate panel. Next, remove the bezel from the shaft of the rear wiper motor. After that, separate the trim panel from the liftgate and unplug the liftgate harness at the rear wiper motor. Loose the two screws attaching the motor bracket to the rear liftgate first, then slide the motor out of place to take out the two mounting screws and the motor itself. For mounting, place both the wiper motor and its bracket into the back of the liftgate with only their two screws gently loosened. Put the motor's output shaft through the outer-panel hole and lock it with the two screws onto the bracket's keyed holes. Install the bezel onto the top of the motor by first fitting it through the mounting hole in the liftgate outer panel. Attach and attach the nut that fixes the bezel and the output shaft to the liftgate outer panel using 5 N.m (43 in. lbs.) of torque. Two screws inside the liftgate secure the mounting bracket for the motor. Tighten these screws to 6 N.m (50 in. lbs.) from the top of the liftgate. Replace the connector from the wiper motor receiver onto the liftgate wire harness, attach the trim panel to the liftgate's inner panel, connect the rear wiper arm to the output shaft and then connect the negative battery cable again.
Related 2006 Jeep Grand Cherokee Parts
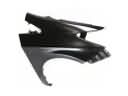 2006 Jeep Grand Cherokee Fender
 2006 Jeep Grand Cherokee Windshield Washer Nozzle
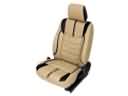 2006 Jeep Grand Cherokee Seat Cover
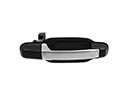 2006 Jeep Grand Cherokee Door Handle
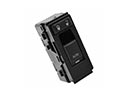 2006 Jeep Grand Cherokee Door Lock Switch
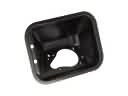 2006 Jeep Grand Cherokee Fuel Filler Housing
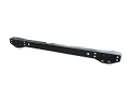 2006 Jeep Grand Cherokee Rear Crossmember
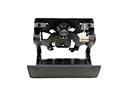 2006 Jeep Grand Cherokee Tailgate Handle
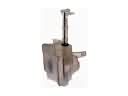 2006 Jeep Grand Cherokee Washer Reservoir
 2006 Jeep Grand Cherokee Windshield Wiper
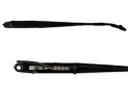 2006 Jeep Grand Cherokee Wiper Arm
 2006 Jeep Grand Cherokee Wiper Blade