JeepParts
My Garage
My Account
Cart
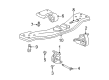
OEM 2006 Jeep Liberty Engine Mount
Engine Motor Mount- Select Vehicle by Model
- Select Vehicle by VIN
Select Vehicle by Model
orMake
Model
Year
Select Vehicle by VIN
For the most accurate results, select vehicle by your VIN (Vehicle Identification Number).
11 Engine Mounts found


2006 Jeep Liberty Front Mount, Passenger Side Part Number: 52129268AE
$104.29 MSRP: $194.00You Save: $89.71 (47%)Ships in 1-2 Business DaysProduct Specifications- Other Name: Insulator - Engine Mount; Engine Mount, Left, Right; Engine Mount Bracket; Motor Mount; Front Insulator; Insulator
- Position: Passenger Side
- Replaces: 52129268AD, 52129268AC
- Item Weight: 5.00 Pounds
- Item Dimensions: 9.6 x 7.9 x 4.5 inches
- Condition: New
- Fitment Type: Direct Replacement
- SKU: 52129268AE
- Warranty: This genuine part is guaranteed by Mopar's factory warranty.


2006 Jeep Liberty Front Mount Part Number: 52129011AD
$66.06 MSRP: $99.15You Save: $33.09 (34%)Product Specifications- Other Name: Insulator - Engine Mount; Engine Mount Bracket; Motor Mount; Insulator Engine Mount
- Replaces: 52129011AC
- Item Weight: 3.70 Pounds
- Item Dimensions: 6.8 x 4.3 x 4.3 inches
- Condition: New
- Fitment Type: Direct Replacement
- SKU: 52129011AD
- Warranty: This genuine part is guaranteed by Mopar's factory warranty.


2006 Jeep Liberty Front Mount Part Number: 52129374AC
$64.84 MSRP: $97.40You Save: $32.56 (34%)Ships in 1-2 Business DaysProduct Specifications- Other Name: Insulator - Engine Mount; Engine Mount Bracket; Motor Mount; Insulator Engine Mount
- Replaces: 52129374AB
- Item Weight: 4.10 Pounds
- Item Dimensions: 7.1 x 5.2 x 5.0 inches
- Condition: New
- Fitment Type: Direct Replacement
- SKU: 52129374AC
- Warranty: This genuine part is guaranteed by Mopar's factory warranty.

2006 Jeep Liberty Transmission Mount Part Number: 52129040AD
$36.48 MSRP: $105.00You Save: $68.52 (66%)Ships in 1-2 Business DaysProduct Specifications- Other Name: Insulator - Transmission Support; Automatic Transmission Mount; Engine Mount Bracket; Transfer Case Mount; Motor Mount; Rear Mount
- Replaces: 52129040AB, 52129040AC
- Item Weight: 6.70 Pounds
- Condition: New
- Fitment Type: Direct Replacement
- SKU: 52129040AD
- Warranty: This genuine part is guaranteed by Mopar's factory warranty.


2006 Jeep Liberty Rear Mount Part Number: 52129170AH
$96.70 MSRP: $146.00You Save: $49.30 (34%)Product Specifications- Other Name: Support - Transmission Support; Engine Mount Bracket; Motor Mount
- Replaces: 52129170AF, 52129170AD, 52129170AG, 52129170AE
- Item Weight: 5.30 Pounds
- Item Dimensions: 14.0 x 4.8 x 4.6 inches
- Condition: New
- Fitment Type: Direct Replacement
- SKU: 52129170AH
- Warranty: This genuine part is guaranteed by Mopar's factory warranty.
2006 Jeep Liberty Front Mount, Driver Side Part Number: 52129269AE
Product Specifications- Other Name: Insulator - Engine Mount; Engine Mount, Left; Engine Mount Bracket; Motor Mount; Front Insulator
- Position: Driver Side
- Replaces: 52129269AD, 52129269AC
- Item Weight: 4.30 Pounds
- Item Dimensions: 8.1 x 7.5 x 5.4 inches
- Condition: New
- Fitment Type: Direct Replacement
- SKU: 52129269AE
- Warranty: This genuine part is guaranteed by Mopar's factory warranty.

2006 Jeep Liberty Rear Mount Part Number: 52129033AE
Product Specifications- Other Name: Bracket - Transmission Mount; Engine Mount Bracket; Motor Mount
- Condition: New
- Fitment Type: Direct Replacement
- SKU: 52129033AE
- Warranty: This genuine part is guaranteed by Mopar's factory warranty.


2006 Jeep Liberty Trans Crossmember Part Number: 52129089AE
Product Specifications- Other Name: Support - Transmission; Transmission Crossmember; Crossmember Transmission
- Replaces: 52129089AC
- Item Weight: 18.40 Pounds
- Item Dimensions: 36.8 x 7.4 x 2.4 inches
- Condition: New
- Fitment Type: Direct Replacement
- SKU: 52129089AE
- Warranty: This genuine part is guaranteed by Mopar's factory warranty.

2006 Jeep Liberty Trans Crossmember Part Number: 52129090AC
Product Specifications- Other Name: Support - Transmission; Transmission Crossmember; Crossmember Transmission
- Item Weight: 18.80 Pounds
- Item Dimensions: 36.0 x 7.3 x 2.3 inches
- Condition: New
- Fitment Type: Direct Replacement
- SKU: 52129090AC
- Warranty: This genuine part is guaranteed by Mopar's factory warranty.
 Product Specifications
- Other Name: Insulator - Engine Mount; Engine Mount, Right; Engine Mount Torque Strut; Engine Mount Bracket; Motor Mount; Insulator; Insulator Engine Mount
- Position: Passenger Side
- Item Weight: 4.50 Pounds
- Item Dimensions: 6.7 x 6.1 x 5.4 inches
- Condition: New
- Fitment Type: Direct Replacement
- SKU: 52129014AC
- Warranty: This genuine part is guaranteed by Mopar's factory warranty.

2006 Jeep Liberty Front Bracket, Driver Side Part Number: 52129015AC
Product Specifications- Other Name: Insulator - Engine Mount; Engine Mount, Left; Engine Mount Torque Strut; Engine Mount Bracket; Motor Mount; Insulator; Insulator Engine Mount
- Position: Driver Side
- Replaces: 52129015AB
- Item Weight: 4.40 Pounds
- Item Dimensions: 7.1 x 5.9 x 6.8 inches
- Condition: New
- Fitment Type: Direct Replacement
- SKU: 52129015AC
- Warranty: This genuine part is guaranteed by Mopar's factory warranty.
2006 Jeep Liberty Engine Mount Parts and Q&A
- Q: How to Service and Repair a Rear Engine Mount on 2006 Jeep Liberty?A: Before repairing or servicing the rear engine mount, first take out the negative cable from the battery and raise the vehicle up to support the transmission. Undo the nuts connecting the support cushion to the crossmember and remove the crossmember. With the vehicle's manual transmission, first, loosen or remove the cushion nuts and the cushion and then remove the bolts fastening the bracket to the transmission. When using an automatic transmission, lose the bolts that hold the support cushion to the transmission and then pull those parts away for 4WD or from the adaptor bracket for 2WD. For vehicles with just two traction wheels, remove the bolts that hold the transmission support adaptor bracket and pull out the bracket as well. Attach the mount (1) to the transmission, install and tighten the bolts (2), place the crossmember under the vehicle and fit the mount through bolt and nut to hold it. Screw the bolts on the crossmember-to-sill to 41 Nm (30 ft. lbs.). Then, lower the vehicle, take off the transmission support and connect the battery's negative cable back to the engine. For automatic transmission, fasten the transmission mount to the transmission with bolts, position the crossmember, remove the transmission support, bring the vehicle down on its wheels and rejoin the negative cable to the battery.
Related 2006 Jeep Liberty Parts
 2006 Jeep Liberty Cylinder Head
 2006 Jeep Liberty Intake Valve
 2006 Jeep Liberty Oil Pan
 2006 Jeep Liberty Oil Pan Gasket
 2006 Jeep Liberty Rocker Arm
 2006 Jeep Liberty Transmission Mount
 2006 Jeep Liberty Engine Mount Bracket
 2006 Jeep Liberty Lash Adjuster
 2006 Jeep Liberty Oil Filler Cap
 2006 Jeep Liberty Piston Ring Set
 2006 Jeep Liberty Timing Cover
 2006 Jeep Liberty Valve Stem Seal