JeepParts
My Garage
My Account
Cart
OEM 2007 Chrysler Pacifica Front Cross-Member
Front Engine Cross Member- Select Vehicle by Model
- Select Vehicle by VIN
Select Vehicle by Model
orMake
Model
Year
Select Vehicle by VIN
For the most accurate results, select vehicle by your VIN (Vehicle Identification Number).
2 Front Cross-Members found

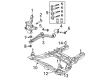
2007 Chrysler Pacifica Engine Cradle, Front Part Number: 4743689AH
Product Specifications- Other Name: Crossmember - Front Suspension; Engine Cradle, Front; Cradle Front Suspension
- Position: Front
- Item Weight: 88.00 Pounds
- Item Dimensions: 52.5 x 47.9 x 15.7 inches
- Condition: New
- Fitment Type: Direct Replacement
- SKU: 4743689AH
- Warranty: This genuine part is guaranteed by Mopar's factory warranty.

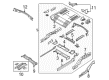
2007 Chrysler Pacifica Floor Crossmember Part Number: 5054618AA
Product Specifications- Other Name: Crossmember - Front Floor; Floor Pan Crossmember, Rear; Crossmember Front Floor
- Item Weight: 19.60 Pounds
- Item Dimensions: 56.1 x 14.6 x 7.4 inches
- Condition: New
- Fitment Type: Direct Replacement
- SKU: 5054618AA
- Warranty: This genuine part is guaranteed by Mopar's factory warranty.
2007 Chrysler Pacifica Front Cross-Member Parts and Q&A
- Q: How to Install a Front Cross-Member on 2007 Chrysler Pacifica?A: Install the front cross-member by mounting the tuned mass dampers first on vehicles with a 3.8L engine, tightening each mounting bolt to 68 Nm (50 ft. lbs.). After that, place the stabilizer bar on the engine cradle and beneath the vehicle, set up the cradle and fixture. Gradually lower the vehicle as you match the engine front and rear mount studs with the thru-holes in the cradle. Following the mark on the page, put the four cradle-to-body bolts back to their places and tighten them to 163 Nm (120 ft. lbs.). Remove the underneath support bracket from the engine compartment by dismantling the rear lift bracket, then linking the coolant temperature sensor to the engine and lastly, taking off the front support/lift bracket and adding the dipstick fastener. Lift the car with a hoist and take out the driveline support table. Slider installation and front and rear mount-to-cradle nuts should be tightened to 54 Nm (40 ft. lbs.). After that, install the power steering rack and pinion mounting bolts. Screw bolt (2) into the left side of the engine cradle to hold the power steering hydraulic return hose clamp and install the routing clamp bolt at the cooling loop for the hydraulic hose. Tie the pressure hose to the engine cradle using the tie-strap clip (1). Push the hose clamps together and attach them using the mounting screw to hold the hydraulic hoses to the cradle on the right. Situate the brake support brackets onto the cradle and bolt them and then place the brake lines into the support plastic brackets and fasten them. Fix the fascia in place, set the lower control arms and attach the control arm's cradle bolts. Connect sway bar links (3) to the attaching points on the struts, snug the link-to-strut nuts to a torque of 88 Nm (65 ft. lbs.). Repeat the repositioning of the wheel speed sensor harness onto the support bracket after the front suspension is attached and then add the front tire/wheel assemblies. Then, connect the solenoid/pressure switch, add the screw to 4 Nm (35 in. lbs.) tightness and finally hook the battery cable to the negative terminal. The final step is to square up the driving plane with your stance.
Related 2007 Chrysler Pacifica Parts
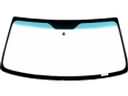 2007 Chrysler Pacifica Windshield
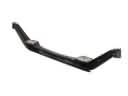 2007 Chrysler Pacifica Axle Beam
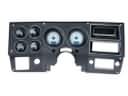 2007 Chrysler Pacifica Dash Panels
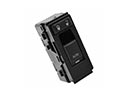 2007 Chrysler Pacifica Door Lock Switch
 2007 Chrysler Pacifica Floor Pan
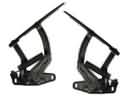 2007 Chrysler Pacifica Hood Hinge
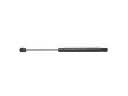 2007 Chrysler Pacifica Lift Support
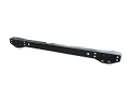 2007 Chrysler Pacifica Rear Crossmember
 2007 Chrysler Pacifica Rear Door Striker
 2007 Chrysler Pacifica Shift Indicator
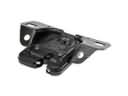 2007 Chrysler Pacifica Trunk Lid Latch
 2007 Chrysler Pacifica Windshield Wiper