JeepParts
My Garage
My Account
Cart
OEM 2008 Jeep Commander Instrument Cluster
Speedometer Instrument Cluster- Select Vehicle by Model
- Select Vehicle by VIN
Select Vehicle by Model
orMake
Model
Year
Select Vehicle by VIN
For the most accurate results, select vehicle by your VIN (Vehicle Identification Number).
2 Instrument Clusters found

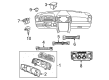
2008 Jeep Commander Instrument Cluster Part Number: 5172417AH
Product Specifications- Other Name: Cluster - Instrument Panel; Cluster Assembly
- Item Weight: 7.60 Pounds
- Item Dimensions: 22.8 x 8.6 x 8.9 inches
- Condition: New
- Fitment Type: Direct Replacement
- SKU: 5172417AH
- Warranty: This genuine part is guaranteed by Mopar's factory warranty.

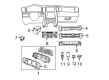
2008 Jeep Commander Instrument Cluster Part Number: 5172400AH
Product Specifications- Other Name: Cluster - Instrument Panel; Cluster Assembly
- Item Weight: 7.40 Pounds
- Item Dimensions: 21.7 x 8.8 x 8.6 inches
- Condition: New
- Fitment Type: Direct Replacement
- SKU: 5172400AH
- Warranty: This genuine part is guaranteed by Mopar's factory warranty.
2008 Jeep Commander Instrument Cluster Parts and Q&A
- Q: How to Install an Instrument Cluster on a Dashboard on 2008 Jeep Commander?A: Take off the load clips from the a-pillars, attach them to the sides of the panel with screws and then install the whole instrument panel assembly. Place the instrument panel in the car, easily attaching it to the a-pillars using the load clips. The next step is to put in the right side bolts, tightening both to 11 Nm (95 in. lbs.) and then install the two fenceline nuts and the defroster grille. Place the driver's side pedal support studs into the slots on the instrument panel reinforcement first, then put the center stack brackets ahead of the duct work. Turn the instrument panel around and fit the tube brackets into the open area for the radio, running the tubes through the HVAC. Then, attach the HVAC by screwing the bottom of the column to the panel close to the center console. Set the bolt into the HVAC blower motor housing and use the screw for the glove box opening that goes to the blower motor housing support. Pull the lower glove box hinges over the pinned spindles, turn them up, push the locking tabs down and shut the glove box tightly. Secure the stabilizer on the side of the box compartment, the antenna cable from the radio and run the right side wires through the stabilizer. Set up the proper hush panel trim, the proper trim for the cowl and reignite the door seal in its place. Install the trim on the right side door sill, put the seat and right a-pillar trim into place, anchor the bolts and then fit the door seal in. Screw the two bolts in the left side until you reach 11 Nm (95 in. lbs.) and then place the end cap for the right side bone. Put the two nuts on the studs above the column and turn them until you reach the 12 Nm (105 in. lbs.) mark, then connect the left bulk connectors, the fuse block connectors and the white connector to the pedal with the adjustment. Place the grounds in the steering column and attach the bolts and afterwards add the left cowl trim panel and nut. Install the left door sill, taking care not to move the steering wheel past 90° or you might damage the Clock Spring. After putting in the column cross bolt and tightening it to 12 Nm (105 in. lbs.), place the steering column shaft at the slip joint, lift up the column and connect the bolts, tightening them to 12 Nm (105 in. lbs.). Slide the exterior coupler onto the steel column and use a new bolt, then tighten it to around 49 Nm (36 ft. lbs.). Set the multi-function switch connector in place, add the top and bottom shroud pieces to the column, fit the two assembly halves together and bolt the shrouds in place with the three included bolts. Open the steering column cover lower hinge and, after lining up the pins with the holes on the steering wheel, pull the cover up, pressing the upper clips into place. Put in the hush panel, link the column electrical cables and fit the column cover. Attach the a-pillar trim and the bolts and place the door seal back, before you position the left side end cap and secure the seat in place. Fit the center support nut onto the stud, set the two HVAC bolts in the radio opening, attach the radio to the bolts and put the radio bezel on the radio. Fit both center support brackets and nuts, secure them to 12 Nm (105 in. lbs.), fit the center wire harness in place and attach its electronic connectors. After sandwiching the backside, fix the center bezel, add the screw where the lower bin is if it exists, fit the defroster vents, secure the duct and install the shifter unit. Place the wire harness back, set the hanger hangers in their proper place and add the ground and screw. Plug in the center harness at the electrical connectors, fit the floor duct into place, put the console into the vehicle and secure with screws. After linking the electrical connector, put the rear cover over the console, then set everything in place with the shifter bezel and the trim ring.
Related 2008 Jeep Commander Parts
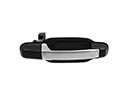 2008 Jeep Commander Door Handle
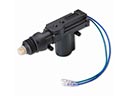 2008 Jeep Commander Door Lock Actuator
 2008 Jeep Commander Shift Knob
 2008 Jeep Commander Door Lock Cylinder
 2008 Jeep Commander Rear Door Striker
 2008 Jeep Commander Seat Cover
 2008 Jeep Commander Seat Cushion
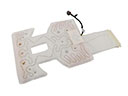 2008 Jeep Commander Seat Heater
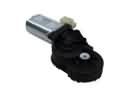 2008 Jeep Commander Seat Motor
 2008 Jeep Commander Seat Switch
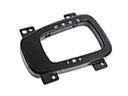 2008 Jeep Commander Shift Indicator
 2008 Jeep Commander Windshield Wiper