JeepParts
My Garage
My Account
Cart
OEM Chrysler 300M Exhaust Manifold
Engine Exhaust Manifold- Select Vehicle by Model
- Select Vehicle by VIN
Select Vehicle by Model
orMake
Model
Year
Select Vehicle by VIN
For the most accurate results, select vehicle by your VIN (Vehicle Identification Number).
2 Exhaust Manifolds found

Chrysler 300M Exhaust Manifold, Passenger Side Part Number: 4792456AC
$280.06 MSRP: $417.00You Save: $136.94 (33%)Ships in 1-2 Business DaysChrysler 300M Exhaust Manifold, Passenger Side Part Number: 4792457AC
$366.07 MSRP: $415.00You Save: $48.93 (12%)Ships in 1-2 Business Days
Chrysler 300M Exhaust Manifold
Choose OEM Exhaust Manifold that meet Chrysler factory standards. Chrysler designs and tests every component for precision and durability. Each Exhaust Manifold follows strict manufacturing steps to lock in quality and fit. If your Chrysler 300M matters to you, OEM parts make the smart choice. You'll get the exact look, feel, and performance you expect. Shop genuine 300M parts at the highly competitive prices online. Enjoy a manufacturer's warranty, a hassle-free return policy, and rapid delivery. No more guesswork with off brands. Get genuine parts with exact fit and true factory performance. Shop with confidence today at JeepPartsDeal.com.
The Exhaust Manifold is such a part that plays a very important role regarding the performance and durability of any car. The Exhaust Manifold is used for the management of the hot exhaust gases from the car's engine to the exhaust system; it has a critical function of minimizing intake reversion which is counterproductive to efficiency. Made of materials like cast iron or stainless steel for instance, Exhaust Manifold is usually designed in a very solid way to support high temperatures and minimize cases of rusting and other related problems. Designed for Chrysler 300M, it is compatible with the latter's various modifications improving its availability as it can complement numerous configurations of this legendary sports sedan. Adding to the performance, the Exhaust Manifold Design helps in achieving efficiency in flow of the exhaust gas which inturn caters to the improvement of the engine efficiency and therefore has an impact on safety drive. First, it is the Exhaust Manifold which is superb for sustaining good engine performance, thus defining it as a special feature in the market for automobiles. If you are an owner of Chrysler 300M car, Exhaust Manifold will be a perfect choice for you as it provides reliability, performance and compatibility for your car. In conclusion, Exhaust Manifold remains a clear testimony of the brand's vision and devotion to quality and innovation in every automobile it is present in.
Chrysler 300M Exhaust Manifold Parts and Q&A
- Q: How to Maintain Your Exhaust Manifold Effectively on Chrysler 300M?A:The first step toward servicing the exhaust manifold is to remove the negative cable from the remote jumper terminal and then raise the vehicle with a hoist. Taking out the exhaust, unscrew the bolt that holds the converter pipe support to the transaxle mount, remove the A/C belt and bring the vehicle partially down. Take out the air cleaner housing and air inlet tube, then loosen and take out the clamp from the exhaust manifold connector, avoiding reusing it. Then, loosen and remove the bolts that hold the air conditioning compressor to the engine, put the compressor aside and take out the engine oil dipstick tube and the air conditioning compressor bracket. Take out the electrical connector for your Oxygen Sensor, then remove the sensor. After that, unsure and take the heat shield out by undoing the bolts connecting it to the exhaust manifold. Once the rest of the exhaust assembly is detached, take off the exhaust manifold attaching bolts and the manifold. When mounted, place the exhaust manifold and tighten the center bolts to 23 Nm (200 inch lbs.) and mount the heat shields securing them with bolts tightened to 12 Nm (106 inch lbs.). Place the oxygen sensor onto the manifold, attach its electrical connector, put on the air conditioning compressor bracket and lastly attach the oil dipstick tube to the engine. Put back the air conditioning compressor, Drive Belt and a new V-Band clamp, securing the clamp to 11 Nm (100 inch lbs.) Lift the vehicle on the hoist, set in place the exhaust system and screw the nut attaching the converter pipe support to the transaxle output mount to 47 Nm (35 ft. lbs.). Set the suspension to a low position, replace the air cleaner housing and air inlet tube and attach the negative cable once more. The procedure for the left exhaust manifold is like that of the right: remove the negative cable, raise the car with a hoist, remove the exhaust and detach the strap holding the converter pipe bolt at the transaxle. Take off the V-Band clamp at the exhaust manifold connector, but don't reuse it, then remove the bracket for the connector harness and disconnect the oxygen sensor connector to take out the sensor from the manifold. Lift out the heat shield, then unscrew the bolts holding it in place. Repeat this with the manifold and its attaching bolts. First, put the exhaust manifold in place and tighten the bolts in the middle going outward to 23 Nm (200 inch lbs.) and then set the heat shields and tighten their bolts to 12 Nm (105 inch lbs.). Install the sensor in the manifold, attach the electrical connector, attach the connector bracket to the brace and secure a new V-Band clamp (torque it to 11 Nm / 100 inch lbs.). After raising the vehicle, attach the nut securing the converter pipe support to the mount on the transaxle; tighten it to 47 Nm (35 ft. lbs.), install the exhaust system, lower the vehicle and attach the negative cable again.
- Q: How to Service and Repair the Right Exhaust Manifold on Chrysler 300M?A:Threshold coordinates for a correct exhaust manifold. Disconnect the negative cable from the remote jumper and raise the vehicle on a hoist. Lower the vehicle after you have removed the exhaust, taken off the converter pipe support attaching bolt at the transaxle mount and freed the A/C belt. The next step is to take out the air cleaner housing and air inlet tube and after that unscrew and remove the V-Band clamp from the exhaust manifold connection, making sure not to use it again. Get rid of the bolts that secure the A/C compressor, remove the compressor from the engine and pull out the oil dip tube and the compressor bracket. Disconnect the electrical connector of the Oxygen Sensor and get rid of the sensor. Then open up the heat shield bolts and remove the heat shields. After that, take out the bolts connected to the exhaust manifold, then remove the entire exhaust manifold and the gasket. Inspect the exhaust manifolds for any signs of damage or cracks, test how flat the manifold is and look for anything that could show the exhaust manifold gasket has been damaged or deformed. In addition, see if the mounting surface of the cylinder head is flat using a straightedge and a thickness gauge. During installation, set the exhaust manifold onto the cylinder head, bottoming out the manifold, then tighten the bolts in a sequence from the middle to the outside, using 23 Nm (200 in. lbs.) of force. Fasten the heat shields on with 12 Nm (105 in. lbs.) of torque and set the oxygen sensor in the manifold, attaching the wiring connector. Attach the A/C compressor mounting bracket, replace the engine oil dipstick tube and set the A/C compressor with its new Drive Belt. Fit a new V-Band clamp, tighten it to 11 Nm (100 in. lbs.) and raise the vehicle on the hoist in order to install the exhaust system. Secure the nut connecting the converter pipe support to the transaxle mount with 47 Nm (35 ft. lbs.) of torque, lower the vehicle, insert the air cleaner housing and tube and hook the negative cable last.

Related Chrysler 300M Parts
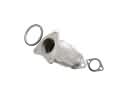 Chrysler 300M Catalytic Converter
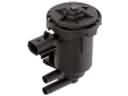 Chrysler 300M Canister Purge Valve
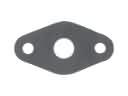 Chrysler 300M EGR Tube Gaskets
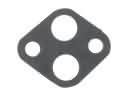 Chrysler 300M EGR Valve Gasket
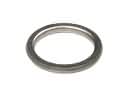 Chrysler 300M Exhaust Flange Gasket
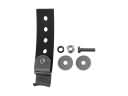 Chrysler 300M Exhaust Hanger
 Chrysler 300M Exhaust Heat Shield
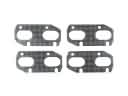 Chrysler 300M Exhaust Manifold Gasket
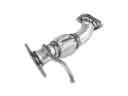 Chrysler 300M Exhaust Pipe
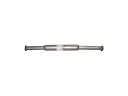 Chrysler 300M Exhaust Resonator
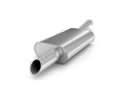 Chrysler 300M Muffler
 Chrysler 300M Vapor Canister