JeepParts
My Garage
My Account
Cart
OEM Chrysler Concorde Clock Spring
Spiral Cable Clock Spring- Select Vehicle by Model
- Select Vehicle by VIN
Select Vehicle by Model
orMake
Model
Year
Select Vehicle by VIN
For the most accurate results, select vehicle by your VIN (Vehicle Identification Number).
7 Clock Springs found


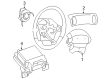
Chrysler Concorde Clockspring Part Number: 4698304AC
$253.12 MSRP: $320.88You Save: $67.76 (22%)Ships in 1-2 Business Days


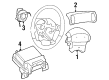
Chrysler Concorde Clockspring Part Number: 4698304
$290.93 MSRP: $368.81You Save: $77.88 (22%)Ships in 1-2 Business Days
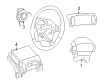
Chrysler Concorde Clockspring Part Number: 4698304AD
$346.80 MSRP: $439.64You Save: $92.84 (22%)Ships in 1-2 Business Days


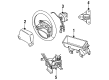
Chrysler Concorde Clockspring Part Number: 4698304AB


Chrysler Concorde Clockspring Part Number: 4600104

Chrysler Concorde Clockspring Part Number: 4600102
Chrysler Concorde Clockspring Part Number: 4649400AC
Chrysler Concorde Clock Spring
Choose OEM Clock Spring that meet Chrysler factory standards. Chrysler designs and tests every component for precision and durability. Each Clock Spring follows strict manufacturing steps to lock in quality and fit. If your Chrysler Concorde matters to you, OEM parts make the smart choice. You'll get the exact look, feel, and performance you expect. Shop genuine Concorde parts at the highly competitive prices online. Enjoy a manufacturer's warranty, a hassle-free return policy, and rapid delivery. No more guesswork with off brands. Get genuine parts with exact fit and true factory performance. Shop with confidence today at JeepPartsDeal.com.
Chrysler Concorde Clock Spring Parts and Q&A
- Q: How to Remove and Install a Clock Spring Assembly on Chrysler Concorde?A:Before taking out the Clock Spring Assembly, first turn the front wheels ahead, then twist the Steering Wheel all the way to its right and secure with the ignition cylinder lock. When the negative Battery Cable remote terminal is removed from the remote battery post, wait two minutes for the reserve capacitor to discharge before taking out the non-deployed module. Take out the speed control switch backcover screws and pull out all the wire connections. After that, unscrew the bolts securing the Driver air bag Module, remove it and separate the air bag and horn wires. Eliminate the steering wheel, the tilt wheel release button and the upper and lower shrouds of the steering column in order to expose the Clock Spring wiring. Take out the 2-way and 4-way connectors from the Clock Spring and instrument panel wiring harness and remove both screws that attach to the Clock Spring, but if anything is wrong with it, simply replace the whole assembly as it cannot be repaired. While installing, remember the steering wheel is set at a half turn to the right and the column is secured with the ignition cylinder lock. The Clock Spring should be found on the steering shaft; with it in place, push down on the rotor until it is correctly seated, screw it to the steering column and tighten the two screws to 24 in. lbs. (2.7 N.m). Join the Clock Spring with the instrument panel harness and adjust the cables to ensure they fit properly and that the locking tabs are properly joined. Set the shrouds for the steering column into place, keeping all the cables inside and put the tilt wheel release lever into place if your car is so equipped. Pull all wires up through the big opening in the hub near the steering wheel, place the steering wheel making sure the flat areas match with the Clock Spring, then tighten the steering wheel nut to 61 N.m (45 ft. lbs.). Press the ignition lock up and turn the steering wheel back to the upward position (at 180 degrees counterclockwise). Send the speed control wires under and behind the tabs holding the air bag module, connect the horn and air bag leads to the air bag module, install the module and tighten the bolts to 7-9 N.m (65-85 in. lbs.). Link the speed control wires to the switches, place them in the right spots and tighten the screws to about 1.5 N.m or 13 in. lbs. Then, do not link the negative battery cable to the remote terminal and go through the correct steps for the air bag System Check.
- Q: How to Maintain and Fix a Clock Spring on Chrysler Concorde?A:Place the Clock Spring Assembly system on a level surface, about 12 to 24 inches from the table at the front wheels' center, by pulling out from the seatbelts and rotating the Steering Wheel to the left. Open the hood and unhook the cold side Battery Cable from the remote terminal on the main battery post, allowing two minutes for the reserve capacitor to discharge before you remove the air bag that hasn't deployed. Disengage the screws that hold the speed control switch on the back of the steering wheel and remove all the wire connections, except for any remote radio switches. Now, remove the air bag bolts, hoist the drive air bag rail and unplug the air bag and horn connectors, as well as the 4-way wire connector if there are remote radio switches. You need to pull out the steering wheel, tilt wheel release lever and upper and lower steering column shrouds to get to the Clock Spring wiring. Disconnect both 2-way and 4-way cables from the Clock Spring and instrument panel harness, remove the 2 screws holding the assembly to the steering shaft and note that a bad Clock Spring should be replaced, since it cannot be repaired. When doing installation, turn the steering wheel a half turn to the right and confirm the column is locked with the ignition cylinder lock. Position the rotor against the Clock Spring on the steering shaft, then push it down until seated and attach it to the top of the steering shaft with two screws torqued to 24 in. lbs. (2.7 Nm). Secure the Clock Spring to the instrument panel harness while routing them properly and securing any locking tabs, after that shroud the steering column and make sure wires do not get trapped outside. If you have a tilt wheel release lever, connect it, then draw all wires through the large opening in the steering hub. Attach the steering wheel so that the flats on the hub match the Clock Spring, tighten the nut to tension of 61 Nm (45 ft. lbs.) and verify the leads are not getting pressed when you tighten the nut. With the Ignition Lock Cylinder, unlock the steering column and turn the wheel to upright (180 degrees counterclockwise). The route speed control harness should go underneath and at the back of the air bag mounting tabs, while you place the 4-way harness connector from the steering wheel to the Clock Spring, if your car has remote radio controls, inside the tab in the middle of the steering wheel back cover. Connect the horn lead wire and air bag lead wire to the air bag module, fit it into position and use 7 - 9 Nm (65-85 in. lbs.) torque on the bolts. After that, connect the motor speed wires to the switches and install the switches with screws that are tightened to 1.5 Nm (13 in. lbs.). Do not connect the negative battery cable remote terminal until after the air bag system has been checked and its issues identified.


Related Chrysler Concorde Parts
 Chrysler Concorde Air Bag Control Module
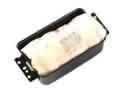 Chrysler Concorde Airbag
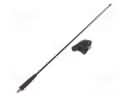 Chrysler Concorde Antenna
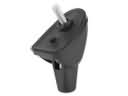 Chrysler Concorde Antenna Base
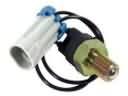 Chrysler Concorde Back Up Light Switch
 Chrysler Concorde Body Control Module
 Chrysler Concorde Dimmer Switch
 Chrysler Concorde Headlight Switch
 Chrysler Concorde Relay
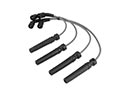 Chrysler Concorde Spark Plug Wire
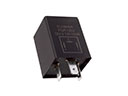 Chrysler Concorde Turn Signal Relay
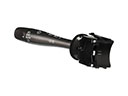 Chrysler Concorde Turn Signal Switch