JeepParts
My Garage
My Account
Cart
OEM Chrysler Concorde Shock Absorber
Suspension Shock Absorber- Select Vehicle by Model
- Select Vehicle by VIN
Select Vehicle by Model
orMake
Model
Year
Select Vehicle by VIN
For the most accurate results, select vehicle by your VIN (Vehicle Identification Number).
1 Shock Absorber found


Chrysler Concorde Strut, Rear Part Number: 4895001AF
Chrysler Concorde Shock Absorber
Choose OEM Shock Absorber that meet Chrysler factory standards. Chrysler designs and tests every component for precision and durability. Each Shock Absorber follows strict manufacturing steps to lock in quality and fit. If your Chrysler Concorde matters to you, OEM parts make the smart choice. You'll get the exact look, feel, and performance you expect. Shop genuine Concorde parts at the highly competitive prices online. Enjoy a manufacturer's warranty, a hassle-free return policy, and rapid delivery. No more guesswork with off brands. Get genuine parts with exact fit and true factory performance. Shop with confidence today at JeepPartsDeal.com.
Shock Absorber is one of the famous and essential part of Chrysler Concorde's suspension system. Intended for the maximization of shock impulses and isolation along with providing better control and stability, this Shock Absorber is beneficial in providing a comfortable drive over any type of road surface. Chrysler Concorde brand car models that were manufactured between 1993 and 2004 use different types of Shock Absorbers; the twin-tube and mono-tube Shock Absorbers. Twin-tube Shock Absorbers are simple to make while mono-tube makes better heat control and increased performance. Further innovation of the shock absorber is done through the PSD and ASD where the shock absorber increases in sensitivity to positioning and acceleration, thus increasing the efficiency and the safety of the car. The Shock Absorbers of Chrysler Concorde work efficiently because the car's structure is cab-forward that ensures a comfortable ride. In the Shock Absorber there are good compatibility options in different models of Concorde makes it possible to operate it in a way that it adjusts to the type of road and offers the optimal performance. Thus, as an affirmation of the company's policy of delivering quality and ingenuity in engineering, the Shock Absorber now stands out as an indispensable component in Concorde driving, ensuring that owners get the optimal out of their car.
Chrysler Concorde Shock Absorber Parts and Q&A
- Q: How to Remove and Assemble a Shock Absorber on Chrysler Concorde?A:The strut has to be removed from the vehicle to open it or put it back together, using a strut spring compressor, PSE W-7200 tool or a similar tool to compress the coil spring. Note where you have service the struts so that you can keep the parts from getting mixed up. Hold the full length of the strut assembly in position so that the strut clevis faces outside and the steering arm is not blocked by the compressor sleeve, place a strut clamp on the coil spring and then remove the original strut shaft nut. Remove all the tension from the upper mount by working the coil spring down; then use Strut Nut Socket, Special Tool 6864 and hold the strut shaft while taking out the retaining nut. Take out the upper mount, then the clamp and strut from the coil spring. As you reassemble any of the seat, bearing, upper spring isolator, dust boot or coil spring, line up the seat bearing's flat to the front of the strut face. Relieve the tension from the coil spring, then pluck out the jounce bumper cup, jounce bumper and lower spring isolator from the strut shaft and the lower spring seat. Go through each part of the strut assembly to confirm there's no damage and fix any that are broken. When assembling, insert the coil spring into the compressor with it in place, then put on the upper spring isolator and dust shield on the seat and bearing and finally snap the seat and bearing over the coil spring. Place the lower spring isolator on the strut, next put on the jounce bumper and jounce bumper cup on the shaft. Press the strut down to the bottom of the coil spring until the spring's seat connects with the strut. Put the right upper mount on the strut shaft, loosely install the retaining nut and tighten it to 94 Nm (70 ft. lbs.) with Strut Nut Socket and a torque wrench. As you let out the tension from the coil spring, make sure the upper mount, seat and bearing are in the right place and attached, then remove the clamp and put the strut propulsion unit on the car.

Related Chrysler Concorde Parts
 Chrysler Concorde Axle Beam Mount
 Chrysler Concorde Axle Support Bushings
 Chrysler Concorde Control Arm
 Chrysler Concorde Control Arm Bushing
 Chrysler Concorde Steering Knuckle
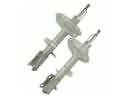 Chrysler Concorde Strut Housing
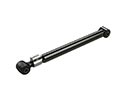 Chrysler Concorde Suspension Strut Rod
 Chrysler Concorde Sway Bar Bushing
 Chrysler Concorde Sway Bar Link
 Chrysler Concorde Sway Bar Link Bushing
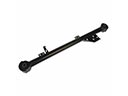 Chrysler Concorde Trailing Arm
 Chrysler Concorde Wheel Hub