JeepParts
My Garage
My Account
Cart
OEM Chrysler Town & Country A/C Clutch
Air Conditioning Clutch- Select Vehicle by Model
- Select Vehicle by VIN
Select Vehicle by Model
orMake
Model
Year
Select Vehicle by VIN
For the most accurate results, select vehicle by your VIN (Vehicle Identification Number).
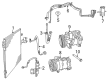
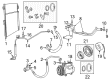
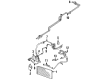
12 A/C Clutches found


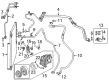
Chrysler Town & Country Clutch Coil Part Number: 5003681AA
$185.30 MSRP: $279.00You Save: $93.70 (34%)Ships in 1-2 Business Days
Chrysler Town & Country Clutch Part Number: 68087441AC
$159.47 MSRP: $242.00You Save: $82.53 (35%)Ships in 1-2 Business Days
Chrysler Town & Country Coil - A/C Clutch Part Number: 5140461AB
$122.73 MSRP: $257.00You Save: $134.27 (53%)Ships in 1-2 Business DaysChrysler Town & Country Clutch Part Number: 68087443AC
$154.97 MSRP: $234.00You Save: $79.03 (34%)Ships in 1-2 Business Days
Chrysler Town & Country Clutch Kit Part Number: 4797376
$16.03 MSRP: $20.64You Save: $4.61 (23%)
Chrysler Town & Country Clutch Kit Part Number: 68087440AA
$36.25 MSRP: $53.25You Save: $17.00 (32%)Ships in 1-2 Business Days
Chrysler Town & Country Clutch Kit Part Number: 68032119AA
$41.78 MSRP: $61.40You Save: $19.62 (32%)Ships in 1-2 Business Days
Chrysler Town & Country Pulley Part Number: 5140469AA
$57.78 MSRP: $73.25You Save: $15.47 (22%)Ships in 1-2 Business Days

Chrysler Town & Country Clutch Kit Part Number: 5066225AA

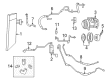
Chrysler Town & Country Clutch Kit Part Number: 68031615AA

Chrysler Town & Country Clutch Kit Part Number: 4797388
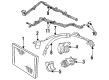
Chrysler Town & Country Clutch Part Number: 4740026
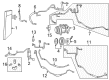
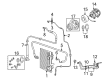
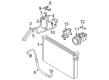
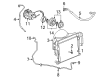
Chrysler Town & Country A/C Clutch
Choose OEM A/C Clutch that meet Chrysler factory standards. Chrysler designs and tests every component for precision and durability. Each A/C Clutch follows strict manufacturing steps to lock in quality and fit. If your Chrysler Town & Country matters to you, OEM parts make the smart choice. You'll get the exact look, feel, and performance you expect. Shop genuine Town & Country parts at the highly competitive prices online. Enjoy a manufacturer's warranty, a hassle-free return policy, and rapid delivery. No more guesswork with off brands. Get genuine parts with exact fit and true factory performance. Shop with confidence today at JeepPartsDeal.com.
The Chrysler Town & Country A/C Clutch is one of the important system of the car which deals with the air conditioning system of the car and is highly reputed for their efficiency. This A/C Clutch is used to digitise engine energy that is used to power the A/C compressor; it engages as soon as the air conditioning system is switched on. Its design enables the easy running of the belt drive and at the same time protects the engine from additional force which in turn increases the efficiency and reliability of the system. The Chrysler Town & Country AC Clutch also covers different generations of this famous minivan, which guarantees the drivers comfortable temperature settings. Being a rugged component that does not stick or slip, the A/C Clutch reduces problems that may hinder proper functionality of the A/C and high fuel consumption. The Chrysler Town & Country has developed from one model to another, and its A/C Clutch element is as progressive as the latest engineering anticipated in auto market area. Chrysler Town & Country A/C Clutch is designed with an aim of making it easy to use as well as perform in way that improves the safety of the automobile being operated. It has become a tradition of Chrysler Company to work on inventions of A/C Clutch that has proved the reality of its slogan of delivering stylish and quality automobiles that can suit the E-Class Chrysler Town & Country vehicles for family use.
Chrysler Town & Country A/C Clutch Parts and Q&A
- Q: How to Install an A/C Clutch on Chrysler Town & Country?A:Ending the dowel pin at the back of the compressor clutch field coil should be positioned into the hole in the A/C compressor and the field coil needs to be secured onto the compressor to avoid it getting pinched. Before installing, be sure to replace the snap ring with a new one so that the eyelets are positioned either left or right of the dowel pin. Make sure the field coil is secure by seating its snap ring in place using A/C Snap Ring Pliers 9764 or equal tools. As you attach the pulley and bearing, be sure not to hurt the friction surfaces and place the new snap ring with the bevel edge facing the pulley side. When the original parts are used, fix the old shim(s) to the compressor shaft; if new shims are fitted, add two 2.54 mm trial shims first. Pick up the clutch plate and place it on the front of the A/C compressor. Then tighten the shaft bolt to 19 Nm. With the grip handled, inspect the air gap in several places and make adjustments to the shims, if the gap is not between 0.35 - 0.60 mm. Run the wire from the compressor clutch field coil connector behind the bracket, set the connector into place on the bracket and fit the engine harness connector. After that, place the air blowers on their fans, install the shroud as well and connect the negative battery lead.
- Q: How to Remove and Replace an A/C Clutch on Chrysler Town & Country?A:Start by disconnecting the negative battery cable, taking off the accessory Drive Belt and raising the vehicle before touching the compressor clutch assembly. Remove the engine wire harness from the connector on the clutch field coil that sits atop the A/C compressor. With engines of 3.3L and 3.8L, separate the wire harness connector retainer from the bracket at the top of the A/C compressor. For cars with a 2.4L, 2.5L or 2.8L, loosen all the compressor bolts except the one on the top left which you should only loosen to allow the front of the A/C compressor to tilt downward. On the 3.3L and 3.8L engines, take off the two bolts and two nuts holding the A/C compressor to the engine, unfasten the mounting ear from the center mount stud, tip the compressor so you can access the clutch and tighten the upper left bolt again. Ease out the compressor clutch coil connector, along with the wire, before removing the bolt on the compressor shaft and make sure to use a band wrench or strap wrench to hold the clutch in place. Do not adjust the clutch between the clutch plate and the pulley and bearing assembly to protect the parts. Do not fail to notice the clutch shim(s) when removing the central hub, since they can most likely be used again. Tap the clutch plate gently with a plastic mallet so it comes loose from the splines on the compressor shaft and after that, take out the clutch plate and shim(s). Carefully use Snap Ring Pliers 9764 or bring in an alternate with the same purpose, to remove the securing snap ring from the front of the A/C compressor, then take off the pulley and bearing assembly. With the car and engine on, set Snap Ring Pliers 9764 or its equivalent to remove the bougie holding the clutch field coil to the front of the A/C compressor and move the coil aside.


Related Chrysler Town & Country Parts
 Chrysler Town & Country A/C Accumulator
 Chrysler Town & Country A/C Compressor
 Chrysler Town & Country A/C Compressor Cut-Out Switches
 Chrysler Town & Country A/C Condenser
 Chrysler Town & Country A/C Expansion Valve
 Chrysler Town & Country A/C Service Cap
 Chrysler Town & Country Blend Door Actuator
 Chrysler Town & Country Blower Motor
 Chrysler Town & Country Blower Motor Resistor
 Chrysler Town & Country Evaporator
 Chrysler Town & Country Heater Core
 Chrysler Town & Country HVAC Pressure Switch