JeepParts
My Garage
My Account
Cart
OEM Chrysler Voyager A/C Hose
Air Conditioning Hose- Select Vehicle by Model
- Select Vehicle by VIN
Select Vehicle by Model
orMake
Model
Year
Select Vehicle by VIN
For the most accurate results, select vehicle by your VIN (Vehicle Identification Number).
26 A/C Hoses found


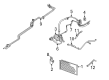
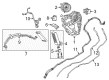
Chrysler Voyager Discharge Hose Part Number: 5005241AA
$43.04 MSRP: $61.85You Save: $18.81 (31%)Ships in 1-3 Business Days
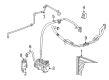
Chrysler Voyager Discharge Hose Part Number: 5005211AC
$9.93 MSRP: $67.45You Save: $57.52 (86%)Ships in 1-2 Business Days
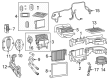
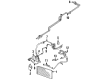
Chrysler Voyager Suction Hose Part Number: 68533021AB
$324.95 MSRP: $731.00You Save: $406.05 (56%)Ships in 1-2 Business Days
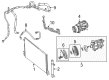
Chrysler Voyager Center Suction Hose Part Number: 68322290AA
$103.14 MSRP: $157.00You Save: $53.86 (35%)
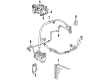
Chrysler Voyager Discharge Hose Part Number: 68227756AD
$103.58 MSRP: $158.00You Save: $54.42 (35%)Ships in 1-2 Business Days
Chrysler Voyager Liquid Line Part Number: 68542122AC
$313.82 MSRP: $479.00You Save: $165.18 (35%)
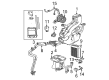
Chrysler Voyager A/C Hoses, Front Part Number: 5005243AF
$182.77 MSRP: $265.00You Save: $82.23 (32%)Ships in 1-2 Business Days
Chrysler Voyager A/C Hoses Part Number: 5003839AA
$97.54 MSRP: $127.53You Save: $29.99 (24%)

Chrysler Voyager Discharge Hose Part Number: 4677472
$64.44 MSRP: $82.95You Save: $18.51 (23%)
Chrysler Voyager A/C Hoses Part Number: 5066634AA
$18.48 MSRP: $23.42You Save: $4.94 (22%)Ships in 1-2 Business Days
Chrysler Voyager Discharge Hose Part Number: 4677470
$19.62 MSRP: $24.87You Save: $5.25 (22%)Ships in 1-2 Business Days
Chrysler Voyager Discharge Hose Part Number: 4677165
$73.59 MSRP: $93.29You Save: $19.70 (22%)Ships in 1-2 Business Days
Chrysler Voyager A/C Hoses Part Number: 5066505AA
$103.08 MSRP: $130.68You Save: $27.60 (22%)Ships in 1-2 Business DaysChrysler Voyager A/C Hoses Part Number: 5005240AD
$182.46 MSRP: $186.00You Save: $3.54 (2%)Ships in 1-2 Business Days

Chrysler Voyager A/C Hoses Part Number: 5066523AA


Chrysler Voyager A/C Hoses Part Number: 5066506AA


Chrysler Voyager A/C Hoses Part Number: 4796561
Chrysler Voyager Front Suction Hose Part Number: 68322289AE
$414.49 MSRP: $604.00You Save: $189.51 (32%)
Chrysler Voyager A/C Hoses Part Number: 5066633AA

Chrysler Voyager A/C Hoses, Rear Part Number: 5066520AA
| Page 1 of 2 |Next >
1-20 of 26 Results
Chrysler Voyager A/C Hose
Choose OEM A/C Hose that meet Chrysler factory standards. Chrysler designs and tests every component for precision and durability. Each A/C Hose follows strict manufacturing steps to lock in quality and fit. If your Chrysler Voyager matters to you, OEM parts make the smart choice. You'll get the exact look, feel, and performance you expect. Shop genuine Voyager parts at the highly competitive prices online. Enjoy a manufacturer's warranty, a hassle-free return policy, and rapid delivery. No more guesswork with off brands. Get genuine parts with exact fit and true factory performance. Shop with confidence today at JeepPartsDeal.com.
The Chrysler Voyager A/C Hose is one of the components of the vehicle AC supremacy that is revered for dynamism and efficiency. This A/C Hose is a necessary part of a car as it allows the flow of refrigerant, the same it means when the outside temperature is high, the interior of the car will be cool as required. Resistant to high pressures, the Chrysler Voyager A/C Hose has aluminum fitting ends that are crimped tightly and ensure the prevention of tank leakage, and efficient passage of refrigerant. Ability to fit in the climate control systems of various Voyager models has a plus factor in its favor as it blends with them. The Chrysler Voyager A/C Hose goes beyond just being functional as it is instrumental in boosting the efficiency of the functional aspects of the automobile and the safety it provides. By ensuring that the air conditioning system function properly the A/C Hose helps in better control of fatigue caused by heat thereby increasing concentration on the roads. The Chrysler Voyager A/C Hose has some unique features the make it very dependable in the market; this is due to the fact that is very well built and very well designed. Chrysler Voyager contains more than 12 million units sold all over the world, the A/C Hose continued the tradition of creating demand among families and individuals, proving the excellent quality and performance.
Chrysler Voyager A/C Hose Parts and Q&A
- Q: How to Service and Repair an A/C Hose Suction Line on Chrysler Voyager?A:Choose a low side service port near the compressor and, for vehicles with a rear air conditioner, remove the suction line hose and tube extension. Cut off the air cleaner top and snorkel, take out the drain tube from the wiper module drain and remove the screw securing the suction line fitting to the compressor before breaking the fitting away from the compressor. Take off the seal and put plugs or tape over the open holes on the suction line fitting. Loosen the holding screw for the suction line routing clip, detach the nut joining the suction and liquid line fittings to the expansion valve, unhook the fittings and throw away their seals. After opening the fittings, use tape or plugs to cover them up again. If there is a rear air conditioner, raise the vehicle, cut the tie strap by the underbody plumbing connections, disconnect the suction line extension fitting and cast away the underbody seal. Lower the car, put the suction line into the engine compartment, remove any plugs or sealing tape, place clean refrigerant oil on new rubber O-rings and install them over the grease on the fittings. Join the liquid line and suction line back to the expansion valve, fasten the nut with 23 Nm (17 ft. lbs.) of torque force and secure the retainer for the routing clip. Pull the tape or plug off the compressor intake opening, put grease on a new O-ring and connect the suction line fitting to the compressor, tightening the nut to 23 Nm (17 ft. lbs.). Attach the drain tube, reassemble and install the air cleaner parts and link the battery negative cable back. For vehicles with a rear air conditioner, lift it a second time, take off the tape or plugs from the suction line and underbody fitting, moisten an O-ring seal and attach the fittings again while tightening to 23 Nm (17 ft. lbs.). Insert a tie strap, lower the vehicle to its proper position, remove all refrigerant and then charge it.
- Q: How to Replace an A/C Hose in HVAC System for Liquid Hose on Chrysler Voyager?A:Merely take out the refrigerant and remove the black cable from the battery before swapping the A/C liquid hose/line. Pull the air cleaner housing from the right side first, then remove two big screws from the front fascia and where the radiator sight shields attach to the radiator closure panel crossmember and finally take out five small screws from the front fascia grille inserts. Take out the radiator sight shield and take off the nut securing the liquid line on the condenser. Unconnect the fitting from the condenser outlet port and throw away the seal. After covering the opened liquid line fitting and the condenser outlet port on the back of the compressor, squeeze the retainer to disconnect the liquid line routing clip, remove the screw at the front, take off the fitting from the filter-drier and toss out the seal. Cover or seal up the liquid line fitting and filter-drier inlet hole with tape before you remove the front section of the front liquid line. On the rear end, recover the refrigerant and take out the battery, remove the air cleaner housing and detach the drain tube from the wiper module drain. Remove the A/C pressure transducer from its fitting in the front liquid line rear section, release the nut that holds the A/C ground strap to the right front strut tower weld stud and remove the terminal from the ground strap eyelet. Get rid of the screw holding the rear liquid line section fitting to the filter-drier, split the connection from the outlet port of the filter-drier, then throw out the seal. Cover or seal the openings with something, then unscrew the nut holding the suction line and liquid line fittings to the expansion valve and take them off, tossing the seals. Once the back seat air conditioner is optional, with the seat up, cut the tie strap near the underbody plumbing attachments, disconnect the front flexible line from the underbody line and get rid of the seal before blocking or taping those bits. Move the vehicle down and then take out the front liquid line rear part. For installation, place the front part of the liquid line into the engine compartment, remove any tape or plugs, add lubrication to a new rubber O-ring seal with clean refrigerant oil and then fasten the fitting to the filter-drier inlet port, tightening it to 2 Nm (16 in. lbs.). Set in the retainer for the liquid line routing clip, put together the liquid line fitting with the condenser and tighten the nut until it measures 23 Nm (17 ft. lbs.). Afterward, install the radiator sight shield again, screw it in and replace the air cleaner housing. Finally, hook the negative cable back to the battery. Remove all gas from the open system and then top up the refrigerant. In the back section, add the assembly to the engine compartment, cut out the tape or unplug the fitting, lubricate each O-ring and link the assembly to the expansion valve, tightening the nut to 23 Nm (17 ft. lbs.). Take off the tape or plugs at the filter-drier outlet and liquid line section fitting, grease a fresh O-ring smoothly and fasten the fittings together again with a screw turned to a 2 Nm (16 in. lbs.) torque setting. Attach the ground strap to the A/C again and tighten its nut to 12 Nm (106 in. lbs.). After that, replace the A/C pressure transducer and join the drain tube back to it. Install the air cleaner housing once more and then link it back to the battery negative cable. If you have a rear air conditioner, raise the vehicle, disconnect and remove tape or plugs from the fitting at the rear section extension and the underbody liquid line, lubricate a new O-ring seal, connect the fittings and tighten to the required torque. Replace the tie strap, bring the vehicle down, empty the refrigerant air conditioning system and then refill it.


Related Chrysler Voyager Parts
 Chrysler Voyager A/C Accumulator
 Chrysler Voyager A/C Compressor
 Chrysler Voyager A/C Compressor Cut-Out Switches
 Chrysler Voyager A/C Expansion Valve
 Chrysler Voyager A/C Service Cap
 Chrysler Voyager A/C Switch
 Chrysler Voyager A/C System Valve Core
 Chrysler Voyager Blower Control Switches
 Chrysler Voyager Blower Motor
 Chrysler Voyager Cabin Air Filter
 Chrysler Voyager Evaporator
 Chrysler Voyager HVAC Pressure Switch