JeepParts
My Garage
My Account
Cart
OEM Dodge Intrepid Timing Chain
Engine Timing Chain- Select Vehicle by Model
- Select Vehicle by VIN
Select Vehicle by Model
orMake
Model
Year
Select Vehicle by VIN
For the most accurate results, select vehicle by your VIN (Vehicle Identification Number).
3 Timing Chains found


Dodge Intrepid Timing Belt Part Number: 4663635
$141.63 MSRP: $209.00You Save: $67.37 (33%)


Dodge Intrepid Timing Chain Part Number: 4663674AD
$40.34 MSRP: $57.20You Save: $16.86 (30%)Ships in 1-2 Business Days


Dodge Intrepid Timing Chain Part Number: 4740275
$56.14 MSRP: $71.16You Save: $15.02 (22%)Ships in 1-2 Business Days
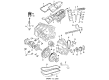
Dodge Intrepid Timing Chain
Choose OEM Timing Chain that meet Dodge factory standards. Dodge designs and tests every component for precision and durability. Each Timing Chain follows strict manufacturing steps to lock in quality and fit. If your Dodge Intrepid matters to you, OEM parts make the smart choice. You'll get the exact look, feel, and performance you expect. Shop genuine Intrepid parts at the highly competitive prices online. Enjoy a manufacturer's warranty, a hassle-free return policy, and rapid delivery. No more guesswork with off brands. Get genuine parts with exact fit and true factory performance. Shop with confidence today at JeepPartsDeal.com.
Dodge Intrepid Timing Chain Parts and Q&A
- Q: How to Inspect and Install Timing Chain Sprockets and Guides on Dodge Intrepid?A:All the sprockets and chain guides should be inspected, with worn ones being replaced. Follow the right steps when installing a crankshaft sprocket. Once the big chain guide has been removed, put in both the right and left side short chain guides and tighten the bolts to 28 Nm (250 in. lbs.). Set the mark on the crankshaft sprocket to match the mark on the oil pump housing and oil the timing chain and guides on the engine before putting it in. Attach the left side primary chain sprocket to the chain so that the timing mark is located between the plated timing links and pull the primary chain down with the sprocket through the left cylinder head opening. During installation, let the camshaft sprockets float on the hub, then put the left side camshaft sprocket in place over the hub and make sure the link from the timing plate aligns with the crankshaft timing mark. First, put the primary chain on the water pump sprocket, match up the timing mark on the right camshaft sprocket with the link on the timing chain's plate and then position it loosely on the camshaft hub. See to it that every timing link on the chain is properly aligned with the marks on all sprockets. Fit the left side lower chain guide and tension arm, tighten their nuts to 28 Nm (250 in. lbs.) and while removing the cover of the chain guide, check and change the O-ring on the oil ring if it is worn. Install the chain guide access plug into the left side cylinder head, then tighten it to 20 Nm (15 ft. lbs.). Attach the tensioner's check ball end to the shallow end of Special Tool 8186, then gently depress the tensioner until the oil escapes. Open the top of Special Tool 8186 and insert the cylinder plunger into the part of the tool with more depth. Use downward force to reset the timing chain tensioner. Reset the tensioner carefully or else jamming may occur. Setting the tensioner into the right cylinder head, put the tensioner retaining plate at the proper location and tighten the bolts to 12 Nm (105 in. lbs.). Place the camshaft damper where it belongs on the bank, then insert a 3/8 hip extension with a breaker bar into the intake camshaft drive hub and turn the cam until the camshaft hub sits over both the damper and sprocket attaching holes on the bank. Secure the sprocket bolts with your fingers, then tighten them to 28 Nm (250 in. lbs.). Place a 3/8" square extension with a breaker bar into the left camshaft drive hub and rotate clockwise until you can put the sprocket attaching bolts in. Tighten the bolts to 28 Nm (250 in. lbs.). Turn the engine clockwise for a bit to stretch out the timing chain if required. Very gently raise the tensioner arm toward the tensioner and then gently release it to see if the tensioner is activated. After the oil pan and gasket are in place, install the timing chain cover, the crankshaft vibration damper and both cylinder head covers, then the Camshaft Position Sensor and connect its electrical connector and finally attach the upper Intake Manifold. Upon initial start-up, the motor may seem noisy with a reset tensioner in place, but this noise disappears after just a few seconds.
- Q: How to Remove a Timing Chain on Dodge Intrepid?A:Before getting to the timing chain, begin by removing the upper Intake Manifold, then take off the cylinder head covers, the Crankshaft vibration damper and the timing chain cover. When putting timing marks together, rotate the engine by turning the crankshaft to prevent harm to your valves and pistons. Place the sprocket timing mark on the crankshaft at the line marked on the oil pump housing which happens to be 60° I am referring to ATDC for the #1 cylinder. While the cylinder heads are on, no rotation of the camshaft or crankshaft should take place before you identify the correct placement to locate the crankshaft. Remove the primary timing chain tensioner from the cylinder head on the right, then leave it open and remove the Camshaft Position Sensor and chain guide access plug from the left cylinder head. When taking out the camshaft sprocket bolts, know that the camshafts will turn clockwise. The process should start with removing the bolts for the camshaft sprocket, then the camshaft damper if there is one and the sprocket. Once the pin has come out, take out the left side camshaft sprocket attaching bolts and the sprocket. Then, take out the lower chain guide and tensioner arm and after that, the primary timing chain. Please check the part on timing chain and sprockets removal if you want to take out the crankshaft sprocket.


Related Dodge Intrepid Parts
 Dodge Intrepid Oil Filter
 Dodge Intrepid Cam Gear
 Dodge Intrepid Camshaft
 Dodge Intrepid Crankshaft Timing Gear
 Dodge Intrepid Cylinder Head
 Dodge Intrepid Cylinder Head Gasket
 Dodge Intrepid Motor And Transmission Mount
 Dodge Intrepid Oil Pump
 Dodge Intrepid Piston
 Dodge Intrepid Rocker Arm
 Dodge Intrepid Rocker Arm Pivot
 Dodge Intrepid Valve Stem Seal