JeepParts
My Garage
My Account
Cart
OEM Dodge Magnum Rear Crossmember
Rear Suspension Crossmember- Select Vehicle by Model
- Select Vehicle by VIN
Select Vehicle by Model
orMake
Model
Year
Select Vehicle by VIN
For the most accurate results, select vehicle by your VIN (Vehicle Identification Number).
3 Rear Crossmembers found


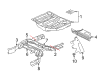
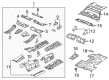
Dodge Magnum Rear Crossmember Part Number: 4780812AD
$324.95 MSRP: $580.00You Save: $255.05 (44%)Ships in 1-3 Business Days
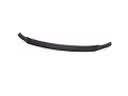
Dodge Magnum Upper Crossmember, Rear Part Number: 4780806AF
$46.03 MSRP: $264.00You Save: $217.97 (83%)Ships in 1-2 Business Days
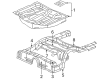
Dodge Magnum Rear Crossmember Part Number: 4780800AA
$338.77 MSRP: $499.00You Save: $160.23 (33%)Ships in 1-3 Business Days
Dodge Magnum Rear Crossmember
Choose OEM Rear Crossmember that meet Dodge factory standards. Dodge designs and tests every component for precision and durability. Each Rear Crossmember follows strict manufacturing steps to lock in quality and fit. If your Dodge Magnum matters to you, OEM parts make the smart choice. You'll get the exact look, feel, and performance you expect. Shop genuine Magnum parts at the highly competitive prices online. Enjoy a manufacturer's warranty, a hassle-free return policy, and rapid delivery. No more guesswork with off brands. Get genuine parts with exact fit and true factory performance. Shop with confidence today at JeepPartsDeal.com.
A fundamental part of Dodge Magnum vehicles exists in the Dodge Magnum Rear Crossmember which stands out as a reliable and powerful component maintaining Dodge Magnum vehicle structure integrity. Operation of the Dodge Magnu does not compromise efficiency or safety because this Rear Crossmember sustains engine and transmission weight to provide optimal alignment and stability. This Rear Crossmember exists in multiple forms to serve Dodge Magnum vehicles by enduring daily usage and protecting against rust and damaging events that threaten vehicle integrity. The brand Magnum Rear Crossmember supports the drivetrain functionality while maintaining safe and effective handling characteristics of the vehicle. The car Rear Crossmember excels in the automotive market because of its strong construction which provides safety benefits to drivers focused on durability. The product design demonstrates excellence in quality maintenance since it can endure everyday responsibilities as well as intense driving situations. Through different decades of production the car has shown constant dedication to engineering through its Rear Crossmember design. The car Rear Crossmember brings enhanced driving experiences to both urban conditions and interstate routes so all the automaker model owners should consider this feature essential.
Dodge Magnum Rear Crossmember Parts and Q&A
- Q: How to install a Rear Crossmember on Dodge Magnum?A:First, place the rear crossmember on a jack and then secure it. Fasten one side knuckle to the rear suspension crossmember, with the links and Parking Brake Cable included and hold it down with a nut and bolt, but don't tighten it yet. Do the steps above for the second side knuckle as well. Put nuts and bolts on each side of the crossmember for the tension links and compression links, but don't tighten them for now. Slide the toe link cam bolt through the crossmember and link, then put the washer and nut on it, holding the bolt from turning and again, do not tighten the nut at this point. Set up the spring links by bolting and attaching the nuts and push the rear parking brake cable through the crossmember brackets to secure it properly. Install the J-nuts and screws for the parking brake cable routing guide, next attach the stabilizer bar with cushions and retainers, but now attach the cushion retainer mounting bolts without tightening. Hook the stabilizer bar ends to the stabilizer links with bolts and nuts, just leaving them loose. Tighten the cushion retainer mounting bolts for 60N.m (44 ft.lbs). Secure the crossmember to the bushings first, with the differential mounting bolts assembly, then slide the entire unit under the new crossmember and insert these bolts from back to front. Adjust the crossmember, fit the body mounting points and spring links and affix the left bolts just to hold them in place for now. Slowly roll down the jack so Coil Springs can be installed and isolators are correctly placed. Fish the coil spring from its package and slide it into the spring pocket, then lift the jack and move it along until the bottom ring of the shock aligns with the spring link and makes contact. Put in the bottom shock mounting bolt and nut, but don't tighten them. If your vehicle has AWD, always place spacers on top of the right crossmember mount bushings before you raise the crossmember. Lift the crossmember to install the right mounting bolts and tighten them enough to be firm, but not so much that they're tight. Remove the bolts from the left coil spring mount and gently lower the jack to complete installation of the left spring and check the isolators are in place. Repeat the coil spring installation on the left side and after that, raise the crossmember on the left and add the left side mounting bolts, making sure they are not too loose. Line up the crossmember so the mounts fall where the body's stickers indicate and check that the space between the tension link and weld flange is at least 12 mm. Fasten all four crossmember mounting bolts to a torque of 180 N.m (133 ft.lbs.) and then remove the jack. Fix the fuel filler tube in place and attach the left rear wheel speed sensor cable's cable to the routing clips. Fasten the left and right parking brake cables together at the equalizer and then fit the J-nut onto the cable bracket for both cables. Place the routing bracket locating pin into the crossmember and screw it in place. Put a half shaft through the hub and bearing, then insert the hub nut without tightening it. After the rear axle differential is installed, apply 213 N.m (157 ft.lbs.) of torque to the hub nut and a helper should press the brake pedal. Fit the rear exhaust system and support the vehicle so that the front tires are on the floor, resting a jack stand below the rear suspension link. Screw up the camber link, tension link, compression link, spring link, Shock Absorber lower mounting bolt and stabilizer link bolts until they reach their recommended torque values. Jack the vehicle up, remove the jack stands, set the wheel and tire back on and tighten all wheel mounting nuts to 150 N.m (110 ft.lbs.). Set the vehicle low, link the negative terminal of the battery, push the brakes firmly, then do a wheel alignment and watch for the right thrust angle factor. Secure the toe link cam bolt nut to 108 N.m (80 ft.lbs.) by turning it while gripping the cam bolt to prevent movement.
- Q: How to Service a Rear Crossmember on Dodge Magnum?A:To work on the rear cross-member, first unplug and separate the battery negative cable from the battery post, then raise the vehicle and keep it elevated with stands. Take out the wheel mounting nuts and tire and wheel assembly on both sides of the rear. When the helper applies the brakes to stop rotation, you should remove the hub nut from the half shaft. After that, take off the rear exhaust system and the differential and slide the half shaft out of the hub and bearing on each axle. Partially undo the parking brake connection from the rear right side to the front and from the rear left side to the equalizer, leaving the equalizer in place on the front cable. Open the front Parking Brake Cable routing bracket screw on top of the rear crossmember flange and bring out the J-nut. When using standard or premium disc brakes, stop the guide pins from moving and take out the caliper guide pin bolts. Lift the Brake Caliper off its support, then position it up in the suspension by guiding it with a threaded wire or cord. Pushing pistons back into caliper bores should be done only with a trim stick or other similar item. If you have the SRT8 brake discs, slide the trim stick between the brake and rotor and then slowly push the brake down until you feel both pistons are all the way down in the caliper. Raise the spring link using a transmission jack or similar, high enough to access the lower caliper mounting bolt above the compression link, then remove the caliper assembly on both ends. Pull the entire brake caliper with pads off the knuckle and brake rotor, then use a wire or bungee cord to hang it away so it is out of the way. After taking the jack out from under the spring link, connectors for the wheel speed sensor must be taken out from the back of the body wiring harness connector on the luggage compartment floor. Unconnect the left wheel speed sensor cable from the clips close to the body connector and follow the crossmember to the rear. Detach the lower shock absorber mounting bolt and bolt nut from both rear sides and mark where the rear crossmember bolts are situated on the body at all mount locations. With an additional set of jack stands, lift the engine cradle's front end by placing them under it and then use a regular utility jack in the center of the rear crossmember to raise it until it touches the crossmember. Take out the fuel filler tube and on AWD vehicles, be careful not to lose the spacers between the mounts and the hull when you unbolt them. First, remove the bolts that hold the crossmember at both ends with a wrench, then slowly lower the crossmember using the jack until it is accessible for link and bar fasteners. Take off the bolts and nuts that connect the stabilizer bar to the stabilizer link, then unwind the bolts attaching each cushion and retainer to the crossmember and remove the whole bar and cushions assembly. Take out the Coil Springs and isolators from the spring perches and then over the cable strand of each parking brake cable, put a 13 mm 12-point box wrench onto the cable retainer at that crossmember bracket and pull the cable out. Take out the screw securing the parking brake cable guide to the crossmember and remove the J-nuts from the same area. Don't forget to remember which bolt is fastening which component and in what orientation when prepping to remove any rear suspension link. Loosen the bolt fastening the spring link to the crossmember and while you keep the toe adjustment cam from rotating, remove its matching nut at the crossmember. Rearward the cam bolt so the toe link leaves the crossmember and link, unscrew the bolt and nut from the toe link on the crossmember, remove the bolt and nut securing the tension link to the crossmember, unscrew the bolt and nut for the camber link on the crossmember last. Raise the knuckle with its links and cable for the parking brake attached to the rear suspension crossmember, then take out the crossmember from the jack.


Related Dodge Magnum Parts
 Dodge Magnum Spoiler
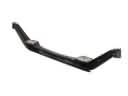 Dodge Magnum Axle Beam
 Dodge Magnum Brake Booster Vacuum Hose
 Dodge Magnum Door Latch Assembly
 Dodge Magnum Floor Pan
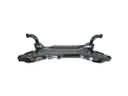 Dodge Magnum Front Cross-Member
 Dodge Magnum Fuel Door
 Dodge Magnum Liftgate Lock Actuator
 Dodge Magnum Rear Passenger Door Handle Latch
 Dodge Magnum Seat Cushion
 Dodge Magnum Trunk Lid Latch
 Dodge Magnum Window Run