JeepParts
My Garage
My Account
Cart
OEM Dodge Stratus Control Arm
Suspension Arm- Select Vehicle by Model
- Select Vehicle by VIN
Select Vehicle by Model
orMake
Model
Year
Select Vehicle by VIN
For the most accurate results, select vehicle by your VIN (Vehicle Identification Number).
19 Control Arms found


Dodge Stratus Upper Control Arm, Rear Passenger Side Part Number: 4895276AC
$190.41 MSRP: $321.00You Save: $130.59 (41%)Ships in 1-2 Business Days


Dodge Stratus Upper Control Arm, Rear Passenger Side Part Number: 4782978AA
$216.58 MSRP: $307.00You Save: $90.42 (30%)Ships in 1-2 Business Days

Dodge Stratus Upper Control Arm, Rear Lower Driver Side Part Number: 4782979AA
$281.08 MSRP: $286.00You Save: $4.92 (2%)Ships in 1-2 Business Days


Dodge Stratus Lower Control Arm, Front Passenger Side Part Number: 4764500AG
$707.79Ships in 1-2 Business Days

Dodge Stratus Lower Control Arm, Rear Passenger Side Part Number: MR369665
$24.96 MSRP: $71.60You Save: $46.64 (66%)Ships in 1-2 Business Days
Dodge Stratus Lower Control Arm, Rear Driver Side Part Number: MR369664
$24.96 MSRP: $71.60You Save: $46.64 (66%)Ships in 1-2 Business Days
Dodge Stratus Upper Control Arm, Front Driver Side Part Number: 4782975AE
$131.33 MSRP: $174.00You Save: $42.67 (25%)Ships in 1-2 Business DaysDodge Stratus Upper Control Arm, Rear Driver Side Part Number: 4895277AC
$211.12 MSRP: $315.00You Save: $103.88 (33%)Ships in 1-2 Business Days
Dodge Stratus Lower Control Arm Part Number: 4616923
$352.34 MSRP: $498.00You Save: $145.66 (30%)Ships in 1-2 Business DaysDodge Stratus Upper Control Arm, Front Passenger Side Part Number: 4782974AE
$121.10 MSRP: $160.00You Save: $38.90 (25%)Ships in 1-2 Business DaysDodge Stratus Lower Control Arm Part Number: 4616922
$234.57 MSRP: $280.00You Save: $45.43 (17%)Ships in 1-2 Business Days

Dodge Stratus Lower Control Arm Part Number: MR554376
Dodge Stratus Lower Control Arm Part Number: MR554375
Dodge Stratus Lower Control Arm Part Number: MR455738


Dodge Stratus Lower Control Arm Part Number: MR369796


Dodge Stratus Upper Control Arm Part Number: 4656240
Dodge Stratus Control Arm
Choose OEM Control Arm that meet Dodge factory standards. Dodge designs and tests every component for precision and durability. Each Control Arm follows strict manufacturing steps to lock in quality and fit. If your Dodge Stratus matters to you, OEM parts make the smart choice. You'll get the exact look, feel, and performance you expect. Shop genuine Stratus parts at the highly competitive prices online. Enjoy a manufacturer's warranty, a hassle-free return policy, and rapid delivery. No more guesswork with off brands. Get genuine parts with exact fit and true factory performance. Shop with confidence today at JeepPartsDeal.com.
The Control Arm is an important part that affects the performance of the Dodge Stratus - a mid-size car manufactured between 1995 and 2005. Being the intermediate component between vehicle's frame and wheels, the Control Arm sustains and helps to adjust shocks and springs and further contributes to the proper wheel functioning in terms of road conditions. This functionality is very crucial in checking and achieving correct wheel alignment, correct handling and wear of tires which in effect has a direct impact in the overall efficiency and safety of the vehicle. The Control Arm can be used on different kinds of Stratus cars, thus the coupe and sedan, which means it will be beneficial for many drivers. For instance, the more modern Stratus models boast of having even more rigid cast iron or aluminum Control Arms; the company sourced lighter and stronger material which increased the vehicle's performance. Furthermore, there is Stratus Control Arm on the Dodge Stratus that has special bushings and ball joint mechanisms to help the system to pivot easily and thus enrich the handling. Because of this precision coupled with fine engineering, Control Arm brand stands out in the market and is commendable for anyone willing to improve the performance of his/her car. As a superior, safe, and high performing control arm for the Dodge Stratus, it is an uncompromisable part for every Dodge Stratus owner who would like to enhance the performance of his or her car.
Dodge Stratus Control Arm Parts and Q&A
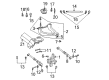
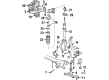
- Q: How to remove the front suspension's lower control arm on Dodge Stratus?A:Before taking out the lower control arm from the front suspension, raise the vehicle and remove the tire and wheel. Unscrew the nut that links the tie rod to the Steering Knuckle, grabbing the tie rod stud with a socket and using a wrench on the nut. Hold the Remover, Special Tool C-3894-A and pull the outer tie rod from the steering knuckle. After that, take out the cotter pin and castle nut from the lower ball joint stud. You should not use any device between the steering knuckle and the lower ball joint; the recommended way is to turn the steering knuckle parallel to the ground and hit its boss with a hammer to pull it away from the lower ball joint, s without hitting either the lower control arm or the ball joint grease seal. Be careful when taking the steering knuckle outward, so you don't damage the driveshaft inner C/V joint. Separate the clevis from the lower arm by taking out the shock absorber clevis, lower Control Arm Bushing, nut and thru-bolt. Shine a light to see the nut on the other side of the stabilizer bar link. Then, while using an allen wrench, pull the stud out so it doesn't turn. Unbolt the bushing clamp of the closest stabilizer bar from the body and the front crossmember and then carefully lower that side of the stabilizer bar from the bottom suspension piece. Next up, get rid of the bolt attaching the lower control arm to the front suspension crossmember located at its rear, then do the same for one at the front. When separating the lower control arm from the crossmember, make sure you do not damage the seal of the lower ball joint rubbing against the steering knuckle. First, unbolt the front crossmember lip from the front of the lower control arm, then the rear lip so the control arm stays level and doesn't scrape against the bushing mounted on the crossmember.
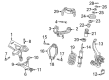
- Q: How to Install the Front Suspension's Upper Control Arm on Dodge Stratus?A:While installing the upper control arm on the front suspension, make sure the arm is fixed by its center bolts on the upper bracket, so the heads point toward the coil spring and will not damage anything. Turn the two upper control arm bolts into the matching bushings on the mounting bracket, again turning the heads toward the coil spring. Following this, attach the bolt nuts to the control arm mounting, place the control arm perpendicular and tighten them to 95 Nm (70 ft. lbs.). Fit the control arm and upper mounting bracket to the coil spring and then attach the front shock assembly into the vehicle.


Related Dodge Stratus Parts
 Dodge Stratus Ball Joint
 Dodge Stratus Sway Bar Link
 Dodge Stratus Axle Support Bushings
 Dodge Stratus Control Arm Bushing
 Dodge Stratus Lateral Link
 Dodge Stratus Shock Absorber
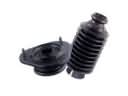 Dodge Stratus Shock and Strut Boot
 Dodge Stratus Steering Knuckle
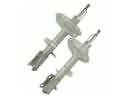 Dodge Stratus Strut Housing
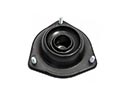 Dodge Stratus Strut Mounts
 Dodge Stratus Sway Bar Link Bushing
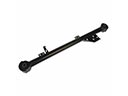 Dodge Stratus Trailing Arm
Browse Dodge Stratus Control Arm by Years
2006
2005
2004
2003
2002
2001
2000
1999
1998
1997
1996
1995