JeepParts
My Garage
My Account
Cart
OEM Dodge Stratus Fuel Rail
Engine Fuel Rail- Select Vehicle by Model
- Select Vehicle by VIN
Select Vehicle by Model
orMake
Model
Year
Select Vehicle by VIN
For the most accurate results, select vehicle by your VIN (Vehicle Identification Number).
6 Fuel Rails found


Dodge Stratus Fuel Rail Part Number: 4663433
$50.80 MSRP: $64.40You Save: $13.60 (22%)Ships in 1-2 Business Days

Dodge Stratus Fuel Rail Part Number: MD352589


Dodge Stratus Fuel Rail Part Number: 4591988AA


Dodge Stratus Fuel Rail Part Number: 4591480AG

Dodge Stratus Fuel Rail Part Number: MD319816

Dodge Stratus Fuel Rail Part Number: 4669806AC
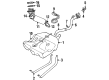
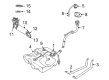
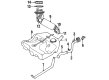
Dodge Stratus Fuel Rail
Choose OEM Fuel Rail that meet Dodge factory standards. Dodge designs and tests every component for precision and durability. Each Fuel Rail follows strict manufacturing steps to lock in quality and fit. If your Dodge Stratus matters to you, OEM parts make the smart choice. You'll get the exact look, feel, and performance you expect. Shop genuine Stratus parts at the highly competitive prices online. Enjoy a manufacturer's warranty, a hassle-free return policy, and rapid delivery. No more guesswork with off brands. Get genuine parts with exact fit and true factory performance. Shop with confidence today at JeepPartsDeal.com.
Dodge Stratus Fuel Rail Parts and Q&A
- Q: How to Service and Repair a Fuel Rail on Dodge Stratus?A:Before fixing the fuel rail, set the pressure of the fuel system to zero and remove the negative battery cable. Remove the wiring harness from the fuel rail support bracket and next take off the fuel rail support bracket. Take out the wiring harness by separating it from the brackets that hold it under the fuel rail and unplug the Fuel Injector wiring connectors. After that, undo the connectors from the fuel injectors and take out the speed and throttle cables from the fuel rail. Disconnect the fuel hose quick connect fitting, cover the under connections with a shop towel and wrap shop towels around all the hoses to stop any gasoline spilling. After that, take out the fuel rail by eliminating its attached bolts and making sure to avoid damaging the injector O-rings. As part of installation, ensure that the injector holes are free of any debris and quickly replace any broken O-rings. Put some clean engine oil on the O-rings of the injectors, push the injector tips into their ports and push the entire assembly into their slots. Install two fuel rail mounting bolts into the Intake Manifold and tighten to 11.9 N.m (105 in. lbs.) torque and install the remaining fuel rail mounting bolt on the cylinder head, tightening to 22 N.m (195 in. lbs.) torque. Connect the connectors to the fuel injectors, set the fuel rail support bracket in place and leave every bolt slightly loose for now. Apply 28.3 N.m (250 in. lbs.) of torque to the three fasteners of the intake manifold and the two bolts to the fuel rail with 8.5 N.m (75 in. lbs.) torque. Attach the wiring harness to its position on the engine, thread the throttle and speed control cables through the fuel rail bracket and secure the negative battery cable. Use the DRB III to send pressure to the fuel system and look for leaks at the end.

Related Dodge Stratus Parts
 Dodge Stratus Fuel Filter
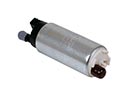 Dodge Stratus Fuel Pump
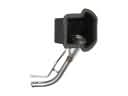 Dodge Stratus Fuel Filler Neck
 Dodge Stratus Fuel Injector
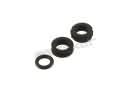 Dodge Stratus Fuel Injector Seal
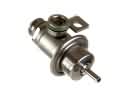 Dodge Stratus Fuel Pressure Regulator
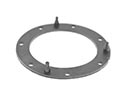 Dodge Stratus Fuel Pump Gasket
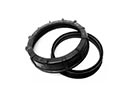 Dodge Stratus Fuel Pump Seal
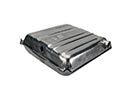 Dodge Stratus Fuel Tank
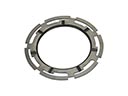 Dodge Stratus Fuel Tank Lock Ring
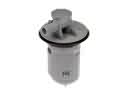 Dodge Stratus Fuel Tank Vent Valve
 Dodge Stratus Gas Cap