JeepParts
My Garage
My Account
Cart
OEM Jeep Grand Cherokee Thermostat
Engine Coolant Thermostat- Select Vehicle by Model
- Select Vehicle by VIN
Select Vehicle by Model
orMake
Model
Year
Select Vehicle by VIN
For the most accurate results, select vehicle by your VIN (Vehicle Identification Number).
9 Thermostats found


Jeep Grand Cherokee Thermostat (Not Including Gaskets) Part Number: 52028186AC
$38.76 MSRP: $56.70You Save: $17.94 (32%)Ships in 1-2 Business Days


Jeep Grand Cherokee Thermostat Housing Part Number: 68253514AA
$197.65 MSRP: $296.00You Save: $98.35 (34%)


Jeep Grand Cherokee Front Cover Part Number: 68174083AA
$38.87 MSRP: $56.85You Save: $17.98 (32%)

Jeep Grand Cherokee Thermostat Housing Part Number: 4893926AH
$64.34 MSRP: $96.20You Save: $31.86 (34%)
Jeep Grand Cherokee Thermostat Housing Part Number: 53010923AB
$56.08 MSRP: $83.55You Save: $27.47 (33%)
Jeep Grand Cherokee Thermostat Housing Part Number: 5048757AA
$143.74 MSRP: $214.00You Save: $70.26 (33%)Ships in 1-2 Business Days
Jeep Grand Cherokee Thermostat Part Number: 52028185AC
$18.30 MSRP: $26.80You Save: $8.50 (32%)

Jeep Grand Cherokee Thermostat Part Number: 52028898AJ
$69.58 MSRP: $91.75You Save: $22.17 (25%)


Jeep Grand Cherokee Thermostat Part Number: 83501426AD
Jeep Grand Cherokee Thermostat
Choose OEM Thermostat that meet Jeep factory standards. Jeep designs and tests every component for precision and durability. Each Thermostat follows strict manufacturing steps to lock in quality and fit. If your Jeep Grand Cherokee matters to you, OEM parts make the smart choice. You'll get the exact look, feel, and performance you expect. Shop genuine Grand Cherokee parts at the highly competitive prices online. Enjoy a manufacturer's warranty, a hassle-free return policy, and rapid delivery. No more guesswork with off brands. Get genuine parts with exact fit and true factory performance. Shop with confidence today at JeepPartsDeal.com.
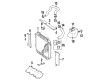
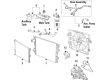
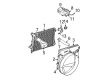
The Thermostat is, therefore, a very important component of Jeep Grand Cherokee motor vehicles as it helps in controlling temperature in the engine to an optimal level. Mounted close to the radiator and directly controlling the flow of coolant which is a closed loop control system, the Thermostat works to achieve the desired temperature. Through the years, various kinds of Thermostats has been installed in Jeep Grand Cherokee models, be it the simple bimetallic strips and even wax pellet thermostats. These devices work on the principle of change in their sizes as a result of heat so as to regulate temperature on engines. These kinds of Thermostats have improved the functionality and durability of the Jeep Grand Cherokee's cooling system thus improving the vehicles performance and comfort.
Jeep Grand Cherokee Thermostat Parts and Q&A
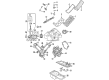
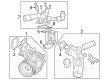
- Q: How to Service and Repair a Thermostat for a 3.7L/4.7L Engine on Jeep Grand Cherokee?A:When servicing or repairing the thermostat for the 3.7L/4.7L engine, first clean where the timing chain cover and thermostat meet. After that, mount the thermostat with the side marked by the spring facing into the groove on the timing chain cover. Attach the Thermostat Housing to the timing chain cover, then tighten the housing-to-timing chain cover bolts to 13 Nm (115 in. lbs.) torque. The housing must be fastened evenly and the thermostat needs to remain in the middle recessed spot to keep the housing from cracking, breaking the threads on the timing chain cover or allowing coolant to leak. Prepare the housing and slide the lower radiator hose onto it, then lip the splash shield in place. Take the vehicle down and top off the cooling fluid. After reattaching the negative battery cable to the battery, start and allow the engine to run for a while while you look for any leaks.
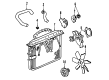
- Q: How to Maintain a Thermostat for a 4.0L Engine on Jeep Grand Cherokee?A:It is very important to check that the radiator draincock is not turned and that the system is empty before touching the thermostat, as hot and pressurized coolant can seriously injure you. Let the coolant drain into a clean empty container up until the level goes below the thermostat. Use suitable tools made for constant tension hose clamps, for instance, special clamp tool number 6094 or Snap-On clamp tool number HPC-20 for large clamps and be sure to wear eye safety while doing so. Replace constant tension clamps if needed and only use the exact numbered or lettered sources created by the manufacturer. Remove the radiator upper hose and heater hose that are connected at the Thermostat Housing and afterward disconnect the engine Coolant Temperature Sensor wiring connector. Remove the thermostat housing with bolts, the thermostat housing itself, gasket and thermostat, throw away the old gasket and clean all the contacting surfaces around the gasket and thermostat. While installing, keep the coil spring with pellet in the thermostat facing the engine and align the outer flange arrow and air bleed hole with the engine recess groove. Place the new gasket and housing, then carefully tighten all ends so the housing doesn't crack. Screw the bolts on the housing to a 22 Nm (16 ft. lbs.) torque setting and replace both the hoses on the thermostat housing and the electrical connector on the coolant temperature sensor. Secure the radiator draincock and pour the correct amount of coolant mixture into the cooling system where needed. Also, after you start the engine, watch for signs of leaking oil.


Related Jeep Grand Cherokee Parts
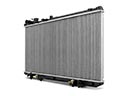 Jeep Grand Cherokee Radiator
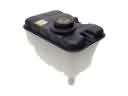 Jeep Grand Cherokee Coolant Reservoir
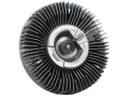 Jeep Grand Cherokee Fan Clutch
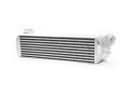 Jeep Grand Cherokee Intercooler
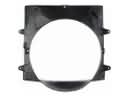 Jeep Grand Cherokee Fan Shroud
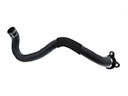 Jeep Grand Cherokee Coolant Pipe
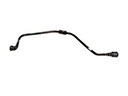 Jeep Grand Cherokee Coolant Reservoir Hose
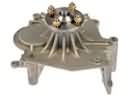 Jeep Grand Cherokee Cooling Fan Bracket
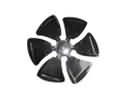 Jeep Grand Cherokee Fan Blade
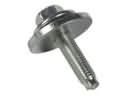 Jeep Grand Cherokee Idler Pulley Bolt
 Jeep Grand Cherokee Water Hose
 Jeep Grand Cherokee Water Pump Pulley