JeepParts
My Garage
My Account
Cart
OEM Jeep Liberty Shift Cable
Transmission Shift Cable- Select Vehicle by Model
- Select Vehicle by VIN
Select Vehicle by Model
orMake
Model
Year
Select Vehicle by VIN
For the most accurate results, select vehicle by your VIN (Vehicle Identification Number).
3 Shift Cables found


Jeep Liberty Shift Control Cable Part Number: 52109781AF
$142.72 MSRP: $216.00You Save: $73.28 (34%)Ships in 1-2 Business Days


Jeep Liberty Shift Control Cable Part Number: 52109748AB
$199.59 MSRP: $301.00You Save: $101.41 (34%)

Jeep Liberty Shift Control Cable Part Number: 52104320AA
Jeep Liberty Shift Cable
Choose OEM Shift Cable that meet Jeep factory standards. Jeep designs and tests every component for precision and durability. Each Shift Cable follows strict manufacturing steps to lock in quality and fit. If your Jeep Liberty matters to you, OEM parts make the smart choice. You'll get the exact look, feel, and performance you expect. Shop genuine Liberty parts at the highly competitive prices online. Enjoy a manufacturer's warranty, a hassle-free return policy, and rapid delivery. No more guesswork with off brands. Get genuine parts with exact fit and true factory performance. Shop with confidence today at JeepPartsDeal.com.
Jeep Liberty Shift Cable Parts and Q&A
- Q: How to Service and Repair a Shift Cable on Jeep Liberty?A:Raise and stop the vehicle while it is in PARK when you are readying to service or repair the gearshift cable. Take apart the connection between the transmission shift lever and the eyelet, then let go of the cable from its support bracket. Drop the vehicle and get rid of the console parts to reach the shift lever assembly and the shift cable. Remove the cable at the shift lever and shifter assembly bracket and next, take out the nuts holding the shift cable seal plate to the floor pan and drag the cable through the opening to the outside. Route the installed cable through the hole in the floor pan and hold the seal plate firmly to the studs, using torque of 7 Nm (65 in. lbs.) to button the nuts shut. Attach the cable from the shift cable to the bracket on the shifter assembly and be sure to push it in firmly. Then, place the floor shifter lever into PARK. If the cable is very tight, loosen the screw and slip it onto the end of the shift lever pin. Lift the vehicle again and join the shift cable to the shift cable support bracket. Put the transmission in PARK, the position toward the back on the manual shift lever and then snap the shift cable into that position. Unless the car has a shift-by-wire system, swing the vehicle down, shift into PARK and tighten the adjustment screw to 7 Nm (65 in. lbs.). Also, operate the shifter and return all console parts that had to be removed during access.
- Q: How to Remove the Shift Cable on Jeep Liberty?A:Drop the Steering Column before you disconnect the shift interlock cable. To release the parking brake, with the engine on, press the locking tab on top of the steering column cable and then pull straight on the cable. After that, remove the park-interlock cable from the steering column and also remove the floor console plus the related trim. Release the park-interlock control cable 3 from the cables above the shifter and detach the cable from its bracket. Take the park-interlock cable out of all clips and pull it free from the vehicle.


Related Jeep Liberty Parts
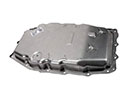 Jeep Liberty Transmission Pan
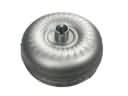 Jeep Liberty Torque Converter
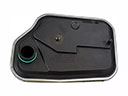 Jeep Liberty Automatic Transmission Filter
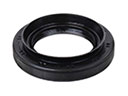 Jeep Liberty Automatic Transmission Output Shaft Seal
 Jeep Liberty Automatic Transmission Shift Levers
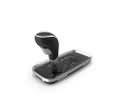 Jeep Liberty Automatic Transmission Shifter
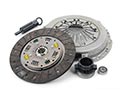 Jeep Liberty Clutch Disc
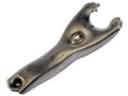 Jeep Liberty Clutch Fork
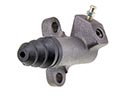 Jeep Liberty Clutch Slave Cylinder
 Jeep Liberty Manual Transmission Extension Housing Seal
 Jeep Liberty Transmission Assembly
 Jeep Liberty Transmission Gasket