JeepParts
My Garage
My Account
Cart
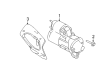
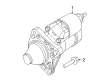
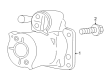
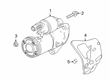
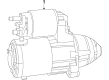
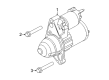
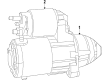
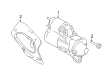
OEM Jeep Starter Motor
Starter Ignition- Select Vehicle by Model
- Select Vehicle by VIN
Select Vehicle by Model
orMake
Model
Year
Select Vehicle by VIN
For the most accurate results, select vehicle by your VIN (Vehicle Identification Number).
58 Starter motors found


Jeep Starter Part Number: 56044734AA
$144.63 MSRP: $315.00You Save: $170.37 (55%)Ships in 1-2 Business DaysProduct Specifications- Other Name: Starter - Engine; Starter Motor; Starter Motor Reman; Starters; Starter Engine


Jeep Starter Part Number: 68201259AA
$266.78 MSRP: $400.00You Save: $133.22 (34%)Ships in 1-2 Business DaysProduct Specifications- Other Name: Starter - Engine; Starter Motor; Starter Engine
- Replaces: 68142157AA


Jeep Starter Part Number: RL041579AB
$230.31 MSRP: $346.00You Save: $115.69 (34%)Ships in 1-2 Business DaysProduct Specifications- Other Name: Starter - Engine; Starter Motor; Starter Engine
- Replaces: 56041579AB, RX041579AB

Jeep Starter Part Number: R6029722AA
$183.61 MSRP: $217.00You Save: $33.39 (16%)Ships in 1-2 Business DaysProduct Specifications- Other Name: Starter - Engine; Starter Engine

Jeep Starter Part Number: 4801839AD
$274.51 MSRP: $417.00You Save: $142.49 (35%)Ships in 1-2 Business DaysProduct Specifications- Other Name: Starter - Engine; Starter Motor; Starter Engine
- Replaces: 4801839AC, 4801839AB, RL801839AB

Jeep Starter Part Number: 68084005AA
$345.23 MSRP: $522.00You Save: $176.77 (34%)Ships in 1-2 Business DaysProduct Specifications- Other Name: Starter - Engine; Starter Motor; Starter Engine

Jeep Starter Part Number: 68456071AF
$81.96 MSRP: $119.00You Save: $37.04 (32%)Product Specifications- Other Name: Starter - Engine
- Replaces: 68456071AE

Jeep Starter Part Number: 56029712AC
$396.06 MSRP: $601.00You Save: $204.94 (35%)Product Specifications- Other Name: Starter - Engine; Starter Motor; Starter Engine
- Replaces: 56029712AB
Jeep Starter Part Number: 56029783AE
$312.08 MSRP: $474.00You Save: $161.92 (35%)Ships in 1-2 Business DaysProduct Specifications- Other Name: Starter - Engine; Starter Motor
- Replaced by: 56029783AF
- Replaces: 56029783AD, 56029783AA, 56029783AB, 56029783AC

Jeep Starter Part Number: R8084005AA
$191.36 MSRP: $226.00You Save: $34.64 (16%)Ships in 1-2 Business DaysProduct Specifications- Other Name: Starter - Engine; Starter Engine

Jeep Starter Part Number: 68411139AD
$283.35 MSRP: $425.00You Save: $141.65 (34%)Ships in 1-2 Business DaysProduct Specifications- Other Name: Starter - Engine; Starter Motor
- Replaces: 68411139AC, 68439543AA

Jeep Starter - Engine Part Number: 68430862AD
$254.62 MSRP: $385.00You Save: $130.38 (34%)Ships in 1-2 Business DaysProduct Specifications- Other Name: STARTER-ENGINE


Jeep Starter Part Number: R5034555AA
$131.84 MSRP: $154.00You Save: $22.16 (15%)Ships in 1-2 Business DaysProduct Specifications- Other Name: Starter - Engine; Starter Motor; Starter Engine

Jeep Starter Part Number: 5035322AC
$600.49 MSRP: $909.00You Save: $308.51 (34%)Ships in 1-2 Business DaysProduct Specifications- Other Name: Starter - Engine; Starter Motor; Starter Engine
- Replaces: 5035322AA, 5035322AB

Jeep Starter - Engine Part Number: 68663478AA
$306.56 MSRP: $464.00You Save: $157.44 (34%)Ships in 1-2 Business DaysProduct Specifications- Other Name: STARTER-ENGINE
- Replaced by: 68663478AB

Jeep Starter Part Number: 68336451AA
$233.63 MSRP: $353.00You Save: $119.37 (34%)Ships in 1-2 Business DaysProduct Specifications- Other Name: Starter - Engine; Starter Motor; Starter Engine
Jeep Starter Part Number: 4801472AA
$250.84 MSRP: $367.00You Save: $116.16 (32%)Ships in 1-3 Business DaysProduct Specifications- Other Name: Starter - Engine; Starter Motor

Jeep Starter Part Number: 68100366AA
$402.69 MSRP: $611.00You Save: $208.31 (35%)Product Specifications- Other Name: Starter - Engine; Starter Engine
- Replaces: 4801849AA, 4801849AB, 4801424AB


Jeep Starter Part Number: 5030023AA
Product Specifications- Other Name: Starter - Engine; Starter Motor; Starter Motor Reman; Starters; Starter Engine

Jeep Starter Part Number: 56044735AC
$482.48 MSRP: $701.00You Save: $218.52 (32%)Product Specifications- Other Name: Starter - Engine; Starter Motor; Starter Engine
| Page 1 of 3 |Next >
1-20 of 58 Results
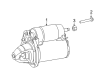
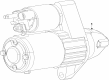
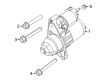
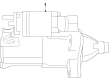
Jeep Starter Motor
OEM parts sourced directly from Jeep deliver superior quality, long lasting strength, and a precise fit you can trust. Each item goes through strict quality checks to ensure safety, toughness, and performance that matches your factory equipment. At JeepPartsDeal online shop, you'll get top-quality, budget-friendly OEM Jeep Starter Motor for your vehicle. We focus on giving you a high standard without pushing up the price. Our full selection of genuine factory products comes backed by the original manufacturer's warranty. You'll love our fast delivery, seamless shopping experience, and convenient return policy, saving you all the hassle.
Jeep Starter Motor transforms battery power to crankshaft rotation, and the engine is started immediately. Jeep owners seek dusty tracks since the brand retains chassis fat, gears hard and electronics intelligent so that quick terrain adaptation can be as expeditious as weather and as complete as mood. Jeep Selec-Terrain allows its driver to switch between snow and sand with the open-air cabin remaining noisy with the wind rather than whining wheels. Jeep is a symbol of freedom because it combines ancient steel grit with a new voice control as well as over the air updates that inject new code along the way without visiting the shop. The community rides of Jeep are important; group convoys demonstrate that a mutual badge creates trust that travels miles away before pavement and traditional round headlights bump into stout tow hooks, which means that the vehicle is already prepared even before starting. Starter Motor operates by pushing a pinion into the flywheel via a huge solenoid and transmitting torque via reduction gears when the extra muscle is needed by increased compression. Starter Motor contains an armature which has field coils or permanent magnets in order to spin as hard as it can even on frosty mornings when oil drags. OE units have a fine crank on stock compression, but high-build engines require a performance Starter Motor with larger stall torque without additional weight and bulk. The selection of the appropriate Starter Motor ensures that all the engines in the line start with the first turn and that the batteries are not subjected to unnecessary stress.
Jeep Starter Motor Parts and Q&A
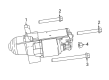
- Q: How to Effectively Service and Repair a Starter Motor on Jeep Grand Cherokee?A:To fix or repair the starter motor, cut the negative battery cable and lift and support the vehicle before you begin work. Should your vehicle be fitted with 4WD, take out the front drive shaft first. On some 4WD cars, take out the two bolts at the transmission and pry the supports partway to expose the lower starter bolt. If you have an automatic transmission, take out the two bolts that are holding the system. Make sure the back end of the starter motor housing goes behind the housing and is supported by your hands to avoid it being supported by the wiring while you move it. Pull the nose of the starter motor down so you can conveniently reach the nut screwed onto the positive battery cable harness connector eyelet that fits onto the solenoid battery terminal stud, then unscrew the wire harness connector and remove it from the starter post. Detach the positive cable wire connector from the solenoid connector on the receptacle and remove the starter. When mounting, link the solenoid wire to the starter motor, connect the battery cable with the solenoid stud and tighten the nut on the battery cable connector eyelet to 25 N.m (19 ft. lbs.), making certain the starter motor does not dangle from the wiring harness. Connect the starter motor to the transmission and, if you have an automatic transmission, slide the cooler tube bracket into the correct place. Tighten both bolts to 68 N.m (50 ft. lbs., using a torque wrench). For certain transmission systems on 4WD vehicles, install the two bolts for the support bracket at the transmission and install the front drive shaft also, when equipped with 4WD. Once you have removed the jack, attach the negative battery cable to the bottom of the battery.
- Q: How to Install a Starter Motor on a 3.8L Engine on Jeep Wrangler?A:Attach the solenoid wiring from the engine to the starter solenoid first, then hold the starter motor firmly so it doesn't swing from the wire connector. Following this, press the eyelet on the starter cable into the solenoid stud and then tighten nut 1 by following the recommended torque amount. Set the starter motor against the transmission and bolt it in place with two mounting bolts 2, tightening them according to the instructions. After that, lower your vehicle and fix the negative battery cable into place.


Related Jeep Parts
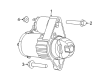
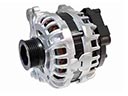 Jeep Alternator
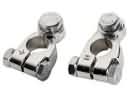 Jeep Battery Terminal
 Jeep Alternator Bracket
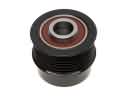 Jeep Alternator Pulley
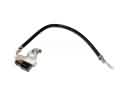 Jeep Battery Sensor
 Jeep Battery Tray
 Jeep Voltage Regulator
 Jeep Battery Cable
 Jeep Car Batteries