JeepParts
My Garage
My Account
Cart
OEM Jeep Wrangler A/C Accumulator
Accumulator- Select Vehicle by Model
- Select Vehicle by VIN
Select Vehicle by Model
orMake
Model
Year
Select Vehicle by VIN
For the most accurate results, select vehicle by your VIN (Vehicle Identification Number).
10 A/C Accumulators found


Jeep Wrangler Dehydrator Part Number: 68286748AA
$66.45 MSRP: $99.60You Save: $33.15 (34%)Ships in 1-2 Business Days

Jeep Wrangler Dehydrator Part Number: 68003495AA
$131.96 MSRP: $194.00You Save: $62.04 (32%)Ships in 1-2 Business Days

Jeep Wrangler Dehydrator Part Number: 55037600AC
$89.21 MSRP: $113.09You Save: $23.88 (22%)Ships in 1-2 Business Days
Jeep Wrangler Dehydrator Part Number: 4773764
$10.15 MSRP: $12.87You Save: $2.72 (22%)Ships in 1-2 Business Days


Jeep Wrangler Dehydrator Part Number: 55037600AD

Jeep Wrangler Dehydrator Part Number: 55036293
Jeep Wrangler Dehydrator Part Number: 55037440AB
Jeep Wrangler Dehydrator Part Number: 55037508AE
Jeep Wrangler Dehydrator Part Number: 55037441AE

Jeep Wrangler Dehydrator Part Number: 55037584AI
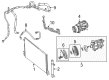
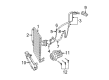
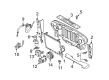
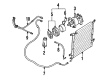
Jeep Wrangler A/C Accumulator
Choose OEM A/C Accumulator that meet Jeep factory standards. Jeep designs and tests every component for precision and durability. Each A/C Accumulator follows strict manufacturing steps to lock in quality and fit. If your Jeep Wrangler matters to you, OEM parts make the smart choice. You'll get the exact look, feel, and performance you expect. Shop genuine Wrangler parts at the highly competitive prices online. Enjoy a manufacturer's warranty, a hassle-free return policy, and rapid delivery. No more guesswork with off brands. Get genuine parts with exact fit and true factory performance. Shop with confidence today at JeepPartsDeal.com.
The A/C Accumulator in Jeep Wrangler is an important component that is used to enhance the performance and durability of air conditioning system. Its primary role is to free the air conditioning system from dirt and condensate to protect the sub components of the A/C system. This part of the cylinder is fitted with inlets and outlets of the refrigerant condenser and expansion valve through which refrigerant flows but at the same time removing any contaminants. Several types of A/C Accumulator might have been used in many Wrangler generations though the specific types are undefined. The most striking difference of these shoes majorly may lie in factors that concern design that boosts performance and compatibility within particular A/C systems. In summary, A/C Receiver Drier is indispensable for proper A/C functioning in Jeep Wranglers, to provide the premier climate control for the vehicle.
Jeep Wrangler A/C Accumulator Parts and Q&A
- Q: How to Service and Repair an A/C Accumulator on Jeep Wrangler?A:To maintain and fix the HVAC accumulator, first, take the battery's negative cable off and then capture the refrigerant from the device. Unplug the wire harness from the A/C low pressure switch and remove the plastic retaining clip that holds the suction line to the liquid line beside the accumulator. After that, unscrew the two nuts connecting the refrigerant lines to the accumulator and detach the lines, throwing away the seals from the fittings. Place plugs over the opened refrigerant line fittings and accumulator ports and loosen the nut securing the accumulator bracket to the dash panel. After removing the accumulator and band from the housing, work the accumulator and band forward until the bolt moves past the slotted hole and pull the entire assembly from the engine compartment. In case you need to, pull the A/C low pressure switch out from the accumulator. When replacing the accumulator, first add 90 milliliters (3 fluid ounces) of the right refrigerant oil to the refrigeration system. If you decide to remove the switch, install it on the accumulator with a new seal and tighten it securely. Align the accumulator into the support bracket hole and bolt it down so the retaining band is tightened to 4.5 Nm (40 in. lbs.). After opening the refrigerant line fittings and accumulator ports, take away the tape or plugs, lubricate new rubber O-rings with clean R-134a oil, place them on the openings and use only the recommended O-rings for your system. Attach the refrigerant lines to the accumulator and add the two nuts to join them, tightening each to 2.2 Nm (20 in. lbs.). Put the plastic retaining clip for the suction line onto the liquid line and connect the wire harness to the A/C low pressure switch, reconnect the battery negative cable, evacuate the refrigerant system and charge it.
- Q: How to Remove the A/C Accumulator on Jeep Wrangler?A:Before removing the A/C accumulator, disconnect and remove the negative Battery Cable. After that, remove the refrigerant from the refrigerant system. Remove the Grille from the engine after that. Following that, release the bolt that holds the A/C accumulator to the right side A/C Condenser. Remove the A/C accumulator from the A/C condenser and get rid of the O-ring seals from both pieces. After that, install plugs into the opened accumulator ports and tape over the condenser fittings. Always replace the A/C accumulator if the A/C compressor has suffered an internal failure to prevent any serious problems for the new replacement A/C compressor.


Related Jeep Wrangler Parts
 Jeep Wrangler Blend Door Actuator
 Jeep Wrangler Heater Core
 Jeep Wrangler Blower Motor
 Jeep Wrangler Blower Motor Resistor
 Jeep Wrangler A/C Compressor Clutch
 Jeep Wrangler Evaporator
 Jeep Wrangler A/C Compressor Cut-Out Switches
 Jeep Wrangler A/C Condenser
 Jeep Wrangler A/C Expansion Valve
 Jeep Wrangler A/C Hose
 Jeep Wrangler A/C System Valve Core
 Jeep Wrangler HVAC Pressure Switch