JeepParts
My Garage
My Account
Cart
OEM 2001 Dodge Ram 2500 Air Bag Control Module
SRS Airbag Module- Select Vehicle by Model
- Select Vehicle by VIN
Select Vehicle by Model
orMake
Model
Year
Select Vehicle by VIN
For the most accurate results, select vehicle by your VIN (Vehicle Identification Number).
1 Air Bag Control Module found


2001 Dodge Ram 2500 Diagnostic Module Part Number: 56043128AF
Product Specifications- Other Name: Module - Air Bag Control; Air Bag Control Module; Diagnostic Unit; Module Air Bag Control
- Item Weight: 3.00 Pounds
- Item Dimensions: 10.4 x 7.3 x 6.9 inches
- Condition: New
- Fitment Type: Direct Replacement
- SKU: 56043128AF
- Warranty: This genuine part is guaranteed by Mopar's factory warranty.
2001 Dodge Ram 2500 Air Bag Control Module Parts and Q&A
- Q: How to Service an Air Bag Control Module on 2001 Dodge Ram 2500?A: To work on the air bag Control Module, remove the negative battery cable, then sit the work area free of electricity for two minutes. Because of its impact sensor, the air bag Control Module is essential for safe air bag deployment; do not damage it by striking or dropping it, as this may result in a faulty sensor and its replacement. If you have a manual transmission, you need to remove the center floor console for removal. Automatic transmission requires you to remove the two screws that connect the trim cover to the air bag Control Module mount. Unscrew the fasteners holding the instrument panel center support bracket onto the mounting bracket, but don't take the screws out and remove the nuts keeping the center support bracket to the lower instrument panel structural support. Remove the retainer bolt from the instrument panel wire harness headed to the air bag Control Module, then fold down the center support bracket. You can disconnect the air bag Control Module from the wire harness by simply sliding and pulling the red lock in front of the connector. Without exception, replace the air bag Control Module and the bracket as one unit. Unscrew the four bolts holding the mounting bracket to the tunnel floor panel and take the module, bracket and center support bracket unit out at once. Set the air bag Control Module, mounting bracket and center support bracket onto the floor panel transmission tunnel, so the arrow on the module label faces toward the front. Fasten and secure the screws with a torque wrench to 14 Nm (125 in. lbs.). Put the wire harness connector back in, latch it, lock it by pulling the red lock and raise the center bracket. Tighten the bracket with at least 14 Nm (125 in. lbs.) of effort. Grab the side bracket, stick in the main harness and then install each screw one at a time. If your car has an automatic transmission, tighten the trim cover screws to 2.2 Nm (20 in. lbs.) and for a manual transmission, install the center floor console. Do not restore the negative connection to the car battery before performing the air bag system verification test.
Related 2001 Dodge Ram 2500 Parts
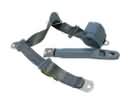 2001 Dodge Ram 2500 Seat Belt
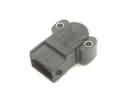 2001 Dodge Ram 2500 Throttle Position Sensor
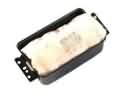 2001 Dodge Ram 2500 Air Bag
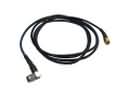 2001 Dodge Ram 2500 Antenna Cable
 2001 Dodge Ram 2500 Antenna Mast
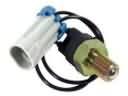 2001 Dodge Ram 2500 Back Up Light Switch
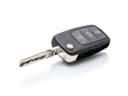 2001 Dodge Ram 2500 Car Key
 2001 Dodge Ram 2500 Clock Spring
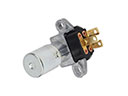 2001 Dodge Ram 2500 Dimmer Switch
 2001 Dodge Ram 2500 Headlight Switch
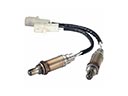 2001 Dodge Ram 2500 Oxygen Sensor
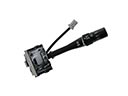 2001 Dodge Ram 2500 Wiper Switch