JeepParts
My Garage
My Account
Cart
OEM 2002 Chrysler PT Cruiser ABS Control Module
Anti Lock Brake Control Module- Select Vehicle by Model
- Select Vehicle by VIN
Select Vehicle by Model
orMake
Model
Year
Select Vehicle by VIN
For the most accurate results, select vehicle by your VIN (Vehicle Identification Number).
2 ABS Control Modules found

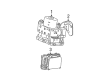
2002 Chrysler PT Cruiser Control Module Part Number: 5072660AA
Product Specifications- Other Name: Module - ABS; ABS Control Module; Module Anti-Lock Brake System; Module Anti-Lock Brakes
- Item Weight: 2.20 Pounds
- Item Dimensions: 5.8 x 4.4 x 2.5 inches
- Condition: New
- Fitment Type: Direct Replacement
- SKU: 5072660AA
- Warranty: This genuine part is guaranteed by Mopar's factory warranty.

2002 Chrysler PT Cruiser Modulator Valve Part Number: 5014869AA
Product Specifications- Other Name: HCU - ABS; ABS Hydraulic Assembly; ABS Control Module; Modulator; Hydraulic Control Unit Anti-Lock Brake System
- Condition: New
- Fitment Type: Direct Replacement
- SKU: 5014869AA
- Warranty: This genuine part is guaranteed by Mopar's factory warranty.
2002 Chrysler PT Cruiser ABS Control Module Parts and Q&A
- Q: What Precautions Are Necessary Before Removing the ABS Control Module on 2002 Chrysler PT Cruiser?A: Start the process of removing the Hydraulic Control Assembly by vacuuming all pressure out of the power brake booster. Take off the air cleaner cover and set it down and then pull the air cleaner housing straight up from its base. First, take out the negative terminal and isolate it and then release and take out the power distribution center. Take out the wiring connector from the brake fluid level switch in your master cylinder and then label the master cylinder brake lines as primary and secondary to avoid confusion. Afterward, unconnect the brake tubes from the master cylinder and put a stopper in every available tube opening. Get rid of the brake tubes from the master cylinder at the ICU Hydraulic Control Unit. Clean the area next to the master cylinder attachment with brake cleaner, remove the two nuts and pull the master cylinder out of the booster. Disconnect the tubes running to each brake at the HCU, then open the connector lock at the Controller Antilock Brake mounted to the Integrated Control Unit to remove the 24-way connector. Remove the three bolts holding the ICU to the bracket and take the ICU off the vehicle. To take the CAB off the HCU, unplug the pump/motor wiring harness from the CAB, remove the four bolts connecting the CAB and the HCU and take the CAB away from the HCU. When assembling the parts, set the CAB onto the HCU, secure it onto the HCU by tightening the four attached bolts to 2 Nm (17 in. lbs.), reattach the pump/motor wiring harness and reinstall the ICU inside the vehicle. At the end, set the ICU onto its bracket and attach it with the three bolts.
Related 2002 Chrysler PT Cruiser Parts
 2002 Chrysler PT Cruiser Brake Caliper
 2002 Chrysler PT Cruiser Brake Caliper Bolt
 2002 Chrysler PT Cruiser Brake Caliper Bracket
 2002 Chrysler PT Cruiser Brake Caliper Piston
 2002 Chrysler PT Cruiser Brake Disc
 2002 Chrysler PT Cruiser Brake Dust Shield
 2002 Chrysler PT Cruiser Brake Line
 2002 Chrysler PT Cruiser Brake Pad
 2002 Chrysler PT Cruiser Speed Sensor
 2002 Chrysler PT Cruiser Wheel Bearing Dust Cap
 2002 Chrysler PT Cruiser Wheel Cylinder
 2002 Chrysler PT Cruiser Wheel Stud