JeepParts
My Garage
My Account
Cart
OEM 2004 Jeep Liberty Washer Reservoir
Windshield Washer Reservoir- Select Vehicle by Model
- Select Vehicle by VIN
Select Vehicle by Model
orMake
Model
Year
Select Vehicle by VIN
For the most accurate results, select vehicle by your VIN (Vehicle Identification Number).
1 Washer Reservoir found


2004 Jeep Liberty Reservoir Part Number: 5066867AA
Product Specifications- Other Name: Reservoir - Washer; Washer Fluid Reservoir; Windshield Washer Reservoir; Reservoir Washer
- Item Weight: 1.80 Pounds
- Item Dimensions: 25.0 x 15.3 x 8.0 inches
- Condition: New
- Fitment Type: Direct Replacement
- SKU: 5066867AA
- Warranty: This genuine part is guaranteed by Mopar's factory warranty.
2004 Jeep Liberty Washer Reservoir Parts and Q&A
- Q: How to Maintain a Washer Reservoir on 2004 Jeep Liberty?A: Before opening the hood, make sure to turn the wheels to the right, then start the process. Pull the negative cable out of the battery and take off the top lid of the air cleaner in the right front fender wheel house. Take out the screw connecting the washer reservoir filler neck support to the top radiator crossmember, then support the car from underneath. Pull off the splash shield from the right front fender wheel house and remove the "W" clip joining the front bumper fascia to the front bumper support. Make sure there is a safe container under the washer pump/motor to get any fluid that drips. Remove the front and rear washer hoses from the outlet nipples on the washer pump/motor unit to make sure the fluid drains into your bucket. Take out the headlamp and dash wire harness connector for the washer pump/motor unit from the top of the motor housing and the connector for the washer fluid level switch from the bottom of the switch. Free the front and rear washer hoses from the reservoir compartments and their guiding parts. With a long extension and a swivel socket, remove the screw keeping the washer reservoir on the right front frame rail as you pull the front fascia forward, then take out the other screw attaching the washer reservoir at the rear to the right front frame rail. Pull out the mounting tab at the back of the washer reservoir from where it's attached to the side rail and slide the reservoir down until you can lower the filler neck into the hole by the front wheel house. To install, place the washer reservoir in the proper space in the right front wheel house and pass the filler neck into the hole there. Set the reservoir to lock the mounting tab into the right front rail slot and then fasten it with a screw. Ensure the screw is tightened at 7 Nm (65 in. lbs.). With the right swivel end on the long extension, tighten the screws on the washer reservoir to the right front frame rail firmly to 7 Nm (65 in. lbs.). Were the front and rear washer hoses into the built-in reservoir troughs and routing clips so that the rear hose is pointed toward the back and the front hose toward the front of the washer pump/motor unit. Put the headlamp and dash wire harness connector from the washer fluid level switch onto the switch's bottom and attach the connector from the washer pump or motor unit to the top of the motor housing. Secure the ends of both hoses onto the washer pump/motor's rear and front outlet nipples. Put the "W" clip in the front bumper fascia to front bumper support, fit the splash shield back, lower the car and screw the support for the washer reservoir filler neck tightly to the upper radiator crossmember (7 Nm, 65 in. lbs.). Set the air cleaner housing back into place, fill the water canister up again with the drained washer fluid and restore the battery negative cable connection.
Related 2004 Jeep Liberty Parts
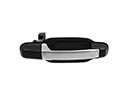 2004 Jeep Liberty Door Handle
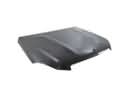 2004 Jeep Liberty Hood
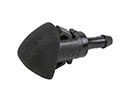 2004 Jeep Liberty Windshield Washer Nozzle
 2004 Jeep Liberty Air Deflector
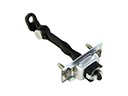 2004 Jeep Liberty Door Check
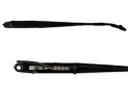 2004 Jeep Liberty Wiper Arm
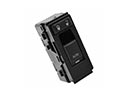 2004 Jeep Liberty Door Lock Switch
 2004 Jeep Liberty Floor Pan
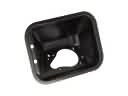 2004 Jeep Liberty Fuel Filler Housing
 2004 Jeep Liberty Windshield Wiper
 2004 Jeep Liberty Wiper Blade
 2004 Jeep Liberty Wiper Motor