JeepParts
My Garage
My Account
Cart
OEM 2005 Dodge Durango Wiper Motor
Windshield Wiper Motor- Select Vehicle by Model
- Select Vehicle by VIN
Select Vehicle by Model
orMake
Model
Year
Select Vehicle by VIN
For the most accurate results, select vehicle by your VIN (Vehicle Identification Number).
2 Wiper Motors found

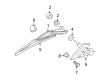
2005 Dodge Durango Rear Motor Part Number: 55077823AF
Product Specifications- Other Name: Motor - Rear Window Wiper; Back Glass Wiper Motor; Motor; Motor Rear Window Wiper; Wiper Motor
- Position: Rear
- Replaces: 55077823AE, 55077823AD, 55077823AC, 55077823AB
- Item Weight: 2.80 Pounds
- Item Dimensions: 17.0 x 14.1 x 12.1 inches
- Condition: New
- Fitment Type: Direct Replacement
- SKU: 55077823AF
- Warranty: This genuine part is guaranteed by Mopar's factory warranty.

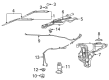
2005 Dodge Durango Wiper Motor Part Number: 5135058AD
Product Specifications- Other Name: Motor - Windshield Wiper; Windshield Wiper Motor; Front Motor
- Replaces: 5135058AB, 5135058AC
- Item Weight: 3.80 Pounds
- Condition: New
- Fitment Type: Direct Replacement
- SKU: 5135058AD
- Warranty: This genuine part is guaranteed by Mopar's factory warranty.
2005 Dodge Durango Wiper Motor Parts and Q&A
- Q: How to Maintain a Wiper Motor for Rear Windows on 2005 Dodge Durango?A: Don't forget to disconnect and isolate the battery negative cable before fixing the rear window wiper motor. Take off the rear wiper arm from the link on the rear wiper motor. Carefully take off the bezel and the rubber grommet near the outside liftgate which will help keep the liftgate panel's paint surface clean. After that, take out the trim panel from the inside of the liftgate. Take the wire harness connector off the motor at the back of the wiper, loosen and remove the three screws on the motor bracket and then pull the motor out of the liftgate. As part of the assembly, make sure the three rivet nuts connect the blades to the motor and that they are not damaged. Join the motor with the lifting device and bolt and attach the three screws on the bracket to the liftgate with a torque of 8 N.m (72 in. lbs.). Place the motor connector receptacle back into the liftgate inner panel, secure the wire harness connector to it and then put on the trim panel. On the exterior, slide the rubber bezel and grommet onto the motor output shaft and attach it to the hole in the outer panel of the liftgate. After that, place the rear wiper arm onto the output shaft and attach the negative cable from the battery.
Related 2005 Dodge Durango Parts
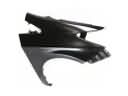 2005 Dodge Durango Fender
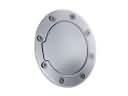 2005 Dodge Durango Fuel Door
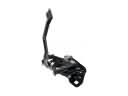 2005 Dodge Durango Hood Latch
 2005 Dodge Durango Instrument Cluster
 2005 Dodge Durango Windshield Washer Nozzle
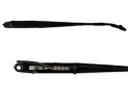 2005 Dodge Durango Wiper Arm
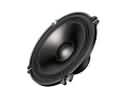 2005 Dodge Durango Car Speakers
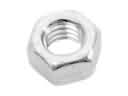 2005 Dodge Durango Exhaust Nut
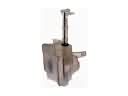 2005 Dodge Durango Washer Reservoir
 2005 Dodge Durango Windshield Wiper
 2005 Dodge Durango Wiper Blade
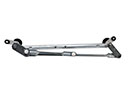 2005 Dodge Durango Wiper Pivot