JeepParts
My Garage
My Account
Cart
OEM 2006 Dodge Dakota Clock Spring
Spiral Cable Clock Spring- Select Vehicle by Model
- Select Vehicle by VIN
Select Vehicle by Model
orMake
Model
Year
Select Vehicle by VIN
For the most accurate results, select vehicle by your VIN (Vehicle Identification Number).
1 Clock Spring found


2006 Dodge Dakota Clockspring Part Number: 56049795AE
$226.60 MSRP: $334.00You Save: $107.40 (33%)Product Specifications- Other Name: Air Bag Clockspring; Clockspring Steering Column Control Module; Clockspring See Group 10 Restraints
- Replaces: 5139286AA, 56049795AB, 56049795AA, 56049795AD, 56049795AC
- Item Weight: 0.80 Pounds
- Item Dimensions: 3.3 x 4.9 x 5.4 inches
- Condition: New
- Fitment Type: Direct Replacement
- SKU: 56049795AE
- Warranty: This genuine part is guaranteed by Mopar's factory warranty.
2006 Dodge Dakota Clock Spring Parts and Q&A
- Q: How to Maintain and Fix a Clock Spring Assembly on 2006 Dodge Dakota?A: First, disable the supplemental restraint system by taking the cable from the battery negative terminal and saying, "disconnected." After two minutes, the capacitor has drained and the work can proceed. Turn the steering until you can see the front wheels are pointing straight ahead. Remove the driver air bag from the steering wheel, then pull apart the steering wheel wire harness connectors from the upper Clock Spring connectors. Make sure to fix the screws in the steering wheel puller so that they aren't damaging the Clock Spring as you take out the steering wheel. After that, take out the screw holding the tilt feature on the left side of the column and then remove the two screws connecting the upper column shroud to the lower one. Press softly inward on both edges of the upper shroud to remove the snaps, then lift the shroud up and out. Loosen the center screw from the shroud and the shroud will come loose from the steering column. Take out the screws that hold the Clock Spring to the multi-function switch mounting housing and remove the Clock Spring after removing the two instrument panel wire harness connectors from the Clock Spring housing. If you plan to keep the Clock Spring, make sure the rotor is secure so the clock springs back to center. As you install, place the Clock Spring rotor and case so they are fixed in place, slide it onto the steering column, line up its hole with the locating pin and tighten the screws. Get the connections for the instrument panel wire harness back in place, attach the lower shroud to the steering column and use the center screw to secure it. Slide the upper shroud onto the lower shroud, then put the right-side screw on top of the gearshift lever gap hider, join the shrouds by snapping them together and finally tighten the outboard screws. Attach the tilt steering column knob to the adjustment actuator and connect it with a screw. With a new Clock Spring set up, eliminate the plastic locking pin. While reinstalling the steering wheel, place the yellow rubber booted engagement dowel on the Clock Spring rotor between the fins of the steering wheel armature hub first and be certain to plug the steering wheel wire harness connectors in the proper way. After that, fit the driver air bag back in place and plug in the negative battery cable.
Related 2006 Dodge Dakota Parts
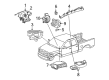
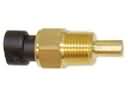 2006 Dodge Dakota Coolant Temperature Sensor
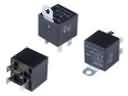 2006 Dodge Dakota Fuel Pump Relay
 2006 Dodge Dakota Ignition Switch
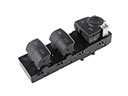 2006 Dodge Dakota Power Window Switch
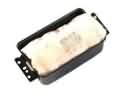 2006 Dodge Dakota Air Bag
 2006 Dodge Dakota Air Bag Control Module
 2006 Dodge Dakota Air Bag Sensor
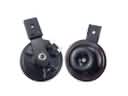 2006 Dodge Dakota Horn
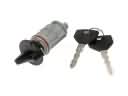 2006 Dodge Dakota Ignition Lock Assembly
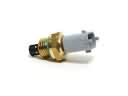 2006 Dodge Dakota Intake Manifold Temperature Sensor
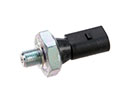 2006 Dodge Dakota Oil Pressure Switch
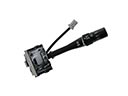 2006 Dodge Dakota Wiper Switch