JeepParts
My Garage
My Account
Cart
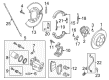
OEM Chrysler 300 Brake Caliper
Caliper- Select Vehicle by Model
- Select Vehicle by VIN
Select Vehicle by Model
orMake
Model
Year
Select Vehicle by VIN
For the most accurate results, select vehicle by your VIN (Vehicle Identification Number).
21 Brake Calipers found


Chrysler 300 Caliper Assembly, Silver, Front Passenger Side Part Number: 5174316AB
$620.33 MSRP: $941.00You Save: $320.67 (35%)Ships in 1-2 Business Days


Chrysler 300 Caliper Assembly, Black, Front Driver Side Part Number: 68144243AA
$661.21 MSRP: $1005.00You Save: $343.79 (35%)Ships in 1-2 Business Days

Chrysler 300 Caliper Assembly, Red, Front Driver Side Part Number: 5175107AB
$636.90 MSRP: $960.00You Save: $323.10 (34%)Ships in 1-2 Business Days


Chrysler 300 Caliper Assembly, Red, Front Passenger Side Part Number: 5175106AB
$636.90 MSRP: $960.00You Save: $323.10 (34%)Ships in 1-2 Business Days
Chrysler 300 Caliper Assembly, Black/Red, Rear Driver Side Part Number: 5175109AA
$440.72 MSRP: $982.00You Save: $541.28 (56%)Ships in 1-2 Business Days
Chrysler 300 Caliper, Rear Driver Side Part Number: 68548611AA
$82.71 MSRP: $180.00You Save: $97.29 (55%)Ships in 1-2 Business Days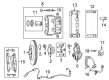
Chrysler 300 Caliper Assembly, Front Passenger Side Part Number: 68548602AA
$100.95 MSRP: $219.00You Save: $118.05 (54%)Ships in 1-2 Business Days
Chrysler 300 Brake Pads, Front Part Number: 68144213AC
$148.08 MSRP: $226.00You Save: $77.92 (35%)Chrysler 300 Caliper Assembly, Silver, Rear Passenger Side Part Number: 5174328AA
$521.98 MSRP: $791.00You Save: $269.02 (35%)Ships in 1-2 Business DaysChrysler 300 Caliper Assembly, Silver, Rear Driver Side Part Number: 5174329AA
$556.24 MSRP: $844.00You Save: $287.76 (35%)Ships in 1-2 Business DaysChrysler 300 Caliper, Black, Rear Passenger Side Part Number: 68144270AA
$590.49 MSRP: $896.00You Save: $305.51 (35%)Ships in 1-2 Business DaysChrysler 300 Caliper Assembly, Silver, Front Driver Side Part Number: 5174317AB
$620.33 MSRP: $941.00You Save: $320.67 (35%)Ships in 1-2 Business DaysChrysler 300 Caliper, Rear Passenger Side Part Number: 68548608AA
$132.31 MSRP: $199.00You Save: $66.69 (34%)Ships in 1-2 Business DaysChrysler 300 Caliper, Rear Driver Side Part Number: 68548609AA
$133.42 MSRP: $200.00You Save: $66.58 (34%)Chrysler 300 Caliper Assembly, Front Passenger Side Part Number: 68548605AA
$165.76 MSRP: $250.00You Save: $84.24 (34%)Chrysler 300 Caliper Assembly, Black, Front Passenger Side Part Number: 68144242AA
$621.43 MSRP: $941.00You Save: $319.57 (34%)Ships in 1-2 Business DaysChrysler 300 Caliper, Black, Rear Driver Side Part Number: 68144271AA
$625.85 MSRP: $948.00You Save: $322.15 (34%)Ships in 1-2 Business DaysChrysler 300 Caliper Assembly, Black/Red, Rear Passenger Side Part Number: 5175108AA
$651.58 MSRP: $982.00You Save: $330.42 (34%)Ships in 1-2 Business DaysChrysler 300 Caliper, Rear Passenger Side Part Number: 68548610AA
$137.88 MSRP: $205.00You Save: $67.12 (33%)Ships in 1-3 Business DaysChrysler 300 Caliper Assembly, Front Driver Side Part Number: 68548603AA
$139.00 MSRP: $207.00You Save: $68.00 (33%)Ships in 1-2 Business Days
| Page 1 of 2 |Next >
1-20 of 21 Results
Chrysler 300 Brake Caliper
Choose OEM Brake Caliper that meet Chrysler factory standards. Chrysler designs and tests every component for precision and durability. Each Brake Caliper follows strict manufacturing steps to lock in quality and fit. If your Chrysler 300 matters to you, OEM parts make the smart choice. You'll get the exact look, feel, and performance you expect. Shop genuine 300 parts at the highly competitive prices online. Enjoy a manufacturer's warranty, a hassle-free return policy, and rapid delivery. No more guesswork with off brands. Get genuine parts with exact fit and true factory performance. Shop with confidence today at JeepPartsDeal.com.
Chrysler 300 Brake Caliper is a very important part of Chrysler 300 brake system in that it contains the pistons that pushes the brake pad against the rotors, thus halting or slowing the movement of the vehicle. A caliper either fixed or floating is activated when the hydraulics pressure builds up when the brake pedal is engaged. The fixed calipers use multiple pistons on each side of the rotor, thus featuring high power and at the same time being intricate, the floating type, however, has to slide to apply pressure from one side and, thus, while being less complicated, may stick. Each year's Chrysler 300 has employed Fixed and Floating Brake Calipers and the main difference that stands out is how the two brake calipers work and how they perform. It has been reported that fixed calipers provide higher performance, yet they are sensitive to the rotor's size and shape, while floating calipers are easier to manage but require more constant attention otherwise they will turn inefficient due to fair wearing of the rotor. Knowledge of these differences is important in ensuring worthwhile and safe braking system of the chrysler 300.
Chrysler 300 Brake Caliper Parts and Q&A
- Q: How to Remove and Replace a Front Single Piston Brake Caliper on Chrysler 300?A:Before replacing the front single piston brake caliper, first make sure the battery negative cable is disconnected from the battery post. Set up the brakes so that the brake pedal holds in its first inch of travel. This will separate your master cylinder from the Brake Lines and hold the brake fluid in the reservoir. Raise the vehicle up, then remove the mounting nuts from the wheels and the assembly from the wheels off. Remove the banjo bolt that secures the flexible brake hose to the caliper and be sure to toss the old sealing washers with the bolt. During reinstallation, add new washers. While grasping the guide pins to stop them turning, remove the two bolts that hold the caliper's guide pin in place. Finally, take off the brake caliper from the brake adapter and pads.
- Q: How to Service and Repair a Front Single Piston Brake Caliper on Chrysler 300?A:When servicing or repairing the front single piston disc brake caliper, disconnect the negative Battery Cable from the post first. It is important to use a brake pedal holding tool and push the brake pedal a full inch past its first contact with the master cylinder, so the hydraulic brake system is disconnected and fluid does not drain when you separate the Brake Lines. Raise your vehicle, then undo the nuts and take off the tire from its mount. Take the flexible brake hose off from the caliper by pulling out the banjo bolt, removing the older sealing washers and installing new ones when you reconnect everything. After grabbing the guide pins, loosen the bolts that bind the caliper and remove the brake caliper. Pump the brake pedal to remove the fluid from the caliper, then place it in a vise, protecting it with plastic jaws. Add a soft block of wood in front of the caliper piston to stop it from hitting anything as it comes out. Use low pressure compressed air to push the brake fluid a little at a time, helping the piston exit the bore; after that, take out the piston. Take care to remove the dust boot and throw it away and then remove and discard the piston seal with a soft tool. Release the caliper bleeder screw and clean the piston bore and all drilled passages in the caliper with a suitable cleaner and drying cloth. If your caliper appears cracked, shows leaks or is damaged, fix it if possible or change it out. Clean and dry the assembly spot before applying Mopar. Use DOT 3 brake fluid for when reassembling the brakes. Apply fresh brake fluid to the piston, piston seal area and the caliper bore, then fit the new piston seal into the caliper bore's groove. Fit the updated dust boot firmly onto the piston. Push the piston into the caliper bore using your hand, then use Special Tool 9315 to make sure the dust boot is completely in the caliper counterbore. Put the bleeder screw in the proper threaded hole and tighten it to 15 Nm (125 inch lbs.). Pull the piston all the way back into the bore with hand or C-clamp pressure and a wood block before you install the caliper. Be sure to connect the caliper on the brake adapter in a way that the mounted bosses do not block the guide pins. In line with the guide pins, fit the caliper mounting adapters and thread on the bolts to 60 Nm (44 ft. lbs.) torque. Place a new washer on each side of the banjo bolt, tighten them securely to 50 Nm (37 ft. lbs.) and attach the banjo to the caliper. Set the wheel mounting nuts to 150 Nm (110 ft. lbs.) of tightness, then refit the wheel and tire to the car. Lower the vehicle, take out the brake pedal holding tool, attach the relevant negative cable to the battery and bleed the brake hydraulic system where required. Make sure the brakes work properly during a road test.


Related Chrysler 300 Parts
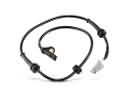 Chrysler 300 ABS Sensor
 Chrysler 300 Speed Sensor
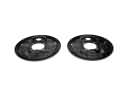 Chrysler 300 Brake Dust Shields
 Chrysler 300 ABS Control Module
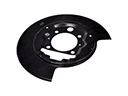 Chrysler 300 Backing Plate
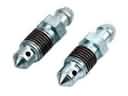 Chrysler 300 Brake Bleeder Screw
 Chrysler 300 Brake Caliper Bolt
 Chrysler 300 Brake Caliper Bracket
 Chrysler 300 Brake Line
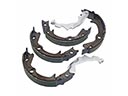 Chrysler 300 Parking Brake Shoes
 Chrysler 300 Wheel Bearing Dust Cap
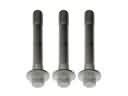 Chrysler 300 Wheel Hub Bolt