JeepParts
My Garage
My Account
Cart
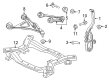
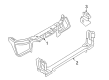
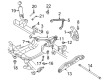
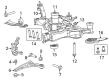
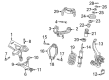
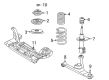
OEM Chrysler Axle Beam
Rigid Axle- Select Vehicle by Model
- Select Vehicle by VIN
Select Vehicle by Model
orMake
Model
Year
Select Vehicle by VIN
For the most accurate results, select vehicle by your VIN (Vehicle Identification Number).
96 Axle Beams found


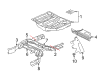
Chrysler Rear Crossmember Part Number: 4780812AD
$324.95 MSRP: $580.00You Save: $255.05 (44%)Ships in 1-3 Business DaysProduct Specifications- Other Name: Crossmember - Rear Suspension; Floor Pan Crossmember, Rear; Crossmember Rear Suspension Rear; Crossmember Rear Suspension
- Position: Rear
- Replaces: 4780812AC


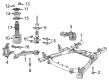
Chrysler Suspension Crossmember, Front Part Number: 68188235AF
$768.30 MSRP: $1130.00You Save: $361.70 (33%)Ships in 1-3 Business DaysProduct Specifications- Other Name: Crossmember - Front Suspension; Suspension Subframe Crossmember, Front; Crossmember; Cradle Front Suspension
- Position: Front
- Replaces: 68188235AG, 68188235AD, 68188235AC, 68188235AE, 68188235AB


Chrysler Engine Cradle, Front Part Number: 68185029AA
$916.00 MSRP: $1350.00You Save: $434.00 (33%)Ships in 1-3 Business DaysProduct Specifications- Other Name: Crossmember - Front Suspension; Suspension Subframe Crossmember, Front; Crossmember; Crossmember Front Suspension
- Position: Front
- Replaces: 68049475AA, 68049475AD, 68049475AB, 68049475AC


Chrysler Engine Cradle, Front Part Number: 5085819AJ
$698.45 MSRP: $1020.00You Save: $321.55 (32%)Ships in 1-3 Business DaysProduct Specifications- Other Name: Crossmember - Front Suspension; Suspension Subframe Crossmember, Front; Suspension Crossmember; Crossmember; Crossmember Front Suspension
- Position: Front
- Replaces: 5085819AC, 5085819AF, 5085819AG, 5085819AD, 5085819AE, 5085819AH


Chrysler Engine Cradle, Front Part Number: 68204541AB
$1219.43 MSRP: $1790.00You Save: $570.57 (32%)Product Specifications- Other Name: Crossmember - Front Suspension; Suspension Subframe Crossmember, Front; Crossmember; Crossmember Front Suspension
- Position: Front
- Replaces: 68204541AA

Chrysler Seat Reinforcement, Front Driver Side Part Number: 5096669AA
$3.52 MSRP: $192.00You Save: $188.48 (99%)Ships in 1-2 Business DaysProduct Specifications- Other Name: Crossmember - Front Floor; Seat Track Reinforcement, Left Outer; Floor Pan Crossmember, Left; Floor Crossmember; Crossmember Front Floor
- Position: Front Driver Side
- Replaces: 5134841AA, 5134840AA

Chrysler Upper Crossmember, Rear Part Number: 4780806AF
$46.03 MSRP: $264.00You Save: $217.97 (83%)Ships in 1-2 Business DaysProduct Specifications- Other Name: Crossmember - Rear Suspension; Floor Pan Crossmember, Rear Upper; Crossmember Rear Suspension Front; Crossmember Rear Suspension
- Position: Rear Upper
- Replaces: 4780806AD, 4780806AE, 4780806AC

Chrysler Floor Crossmember, Front Passenger Side Part Number: 5155114AC
$106.50 MSRP: $225.00You Save: $118.50 (53%)Ships in 1-2 Business DaysProduct Specifications- Other Name: Crossmember - Front Floor; Floor Pan Crossmember, Front Right, Right; Crossmember Front Floor
- Position: Front Passenger Side
- Replaces: 5155114AB

Chrysler Package Tray Lower Reinforcement, Rear Part Number: 68045533AD
$82.48 MSRP: $123.00You Save: $40.52 (33%)Ships in 1-3 Business DaysProduct Specifications- Other Name: Crossmember - Rear Shelf Panel; Package Tray Reinforcement, Rear Lower; Package Tray Support; Reinforcement Rear Shelf Panel
- Position: Rear Lower
- Replaces: 68045533AC

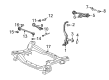
Chrysler Crossmember, Front Part Number: 68232996AD
$97.04 MSRP: $143.00You Save: $45.96 (33%)Ships in 1-3 Business DaysProduct Specifications- Other Name: Crossmember - Floor Pan; Floor Pan Crossmember, Front; Crossmember Floor Pan
- Position: Front


Chrysler Engine Cradle, Front Part Number: 4782700AH
$1028.21 MSRP: $1505.00You Save: $476.79 (32%)Product Specifications- Other Name: Crossmember - Front Suspension; Suspension Subframe Crossmember, Front; Engine Cradle, Front; Suspension Crossmember
- Position: Front
- Replaces: 4782700AC, 4782700AB, 4782700AD, 4782700AG


Chrysler Engine Cradle, Front Part Number: MR554604
Product Specifications- Other Name: Crossmember - Front Suspension; Engine Cradle, Front; Crossmember Front Suspension 2.4L Engine; Crossmember Front Suspension
- Position: Front


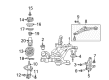
Chrysler Suspension Crossmember, Rear Part Number: MR369145
Product Specifications- Other Name: Crossmember - Rear Suspension; Suspension Subframe Crossmember, Rear; Crossmember; Crossmember Rear Suspension
- Position: Rear

Chrysler Suspension Crossmember, Rear Part Number: MB948996
Product Specifications- Other Name: Crossmember - Rear Suspension; Crossmember; Crossmember, Rear Suspension; Crossmember Rear Suspension
- Position: Rear


Chrysler Suspension Crossmember, Rear Part Number: 4895262AC
Product Specifications- Other Name: Crossmember - Rear Suspension; Suspension Subframe Crossmember, Rear; Crossmember; Crossmember Rear Suspension
- Position: Rear


Chrysler Upper Tie Bar, Front Part Number: 4805843AK
Product Specifications- Other Name: Crossmember - Front Support; Radiator Support Tie Bar, Front Upper
- Position: Front Upper
- Replaces: 4805843AJ, 4805843AG, 4805843AI, 4805843AH, 5139179AA, 5139179AB, 5139179AC, 4805843AD, 4805843AE, 4805843AF, 5139179AD


Chrysler Crossmember, Front Part Number: 52113572AA
Product Specifications- Other Name: Crossmember - Front Suspension; Torsion Bar Mount, Front; Crossmember Front Suspension
- Position: Front


Chrysler Fore/Aft Crossmember, Front Part Number: 4877087AA
Product Specifications- Other Name: Crossmember - Front Support; Engine Mount Bracket; Frame Crossmember; Motor Mount; Damper; Crossmember; Crossmember Front Suspension; Crossmember Front Support
- Position: Front


Chrysler Engine Cradle, Front Part Number: 4764448AD
Product Specifications- Other Name: Crossmember - Front Suspension; Engine Cradle, Front; Suspension Crossmember; Crossmember Front Suspension
- Position: Front
- Replaces: 4764448AC


Chrysler Engine Cradle, Front Part Number: 5272962AE
Product Specifications- Other Name: Crossmember - Front Suspension; Engine Cradle, Front; Crossmember Front Suspension
- Position: Front
- Replaces: 5272962AD, 5272962AB, 5272962AC
| Page 1 of 5 |Next >
1-20 of 96 Results
Chrysler Axle Beam
OEM parts sourced directly from Chrysler deliver superior quality, long lasting strength, and a precise fit you can trust. Each item goes through strict quality checks to ensure safety, toughness, and performance that matches your factory equipment. At JeepPartsDeal online shop, you'll get top-quality, budget-friendly OEM Chrysler Axle Beam for your vehicle. We focus on giving you a high standard without pushing up the price. Our full selection of genuine factory products comes backed by the original manufacturer's warranty. You'll love our fast delivery, seamless shopping experience, and convenient return policy, saving you all the hassle.
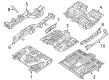
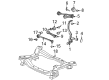
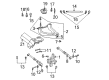
Chrysler Axle Beam connects the wheels to provide stability in handling and durability. Chrysler expanded out of 1925 foundations of stable cars and bold styling such as Airflow to reduce drag as well as allow cabins to breathe easier and effortlessly by all inside. Chrysler maintained fair and transparent prices to avoid haggling by customers and left faster, and this step earned confidence and repurchase between generations. Then Chrysler set suburbs ablaze with the first practical minivan and showed that space, sliding doors, and pleasant ride etiquette could be packed in one daily family wagon. Chrysler continues use of ride smoothness, cabin room, and utility that make road trips smoother and morning commutes less exhausting to both the consumers and the drivers. Axle Beam is an inflexible rod that connects the left and right wheels to ensure that they maintain positioning especially when the pavement becomes uneven or the load alters at a sharp curve. Placing the suspension pickup points at constant width, the Axle Beam prevents any changing of camber, maintains tire patches square, and provides steering with a clean, linear feel when creeping through traffic or screaming down an interstate. Axle Beam endures daily punishment, flexing, rusting, and pothole impacts, and it implies that the owner receives fewer surprises and tire life is increased. Axle Beam also interlocks with hard or autonomous installations, which allows one durable piece to buy sedans, minivans, and future designs that will have a similar track width and load requirements.
Chrysler Axle Beam Parts and Q&A
- Q: How to Service and Repair an Axle Beam on Rear Disc Brake on Chrysler PT Cruiser?A:For any repair or servicing of an axle beam on a car with rear disc brakes, make sure you first disconnect the negative battery cable and allow the air bag system capacitor to release. Open the cover over the air cleaner to reach the battery and then put blocks under each tire so the vehicle cannot move. After taking out the center console, lift the parking brake lever output cable to secure the automatic adjustment mechanism. Pull the rear parking brake cables off the equalizer, support the car by raising it and get rid of the wheel assembly. Pull the brake flex line away from the axle trailing arm, take off the caliper and set it in place and remove the brake rotor and dust cap. Slide the hub with the bearing off the spindle, take away the parking brake shoes and separate the parking brake actuator lever. Take out the parking brake cable by compressing the cable retainer with a 1/2 inch offset box wrench. Remove the bolts holding the parking brake cable and routing brackets to the axle trailing arm and if your car has antilock brakes, pull out the wheel speed sensor. Take out the bolts holding the disc brake adapter and spindle to the axle and afterward remove them both. If there is a watts link bell crank or stabilizer bar, remove them, place the axle on a transmission jack and take out the bolts securing the shock absorber. Detach the springs and isolators with the jack and write the position of the trailing arm brackets down. Remove the bolts joining the trailer arm, leading bracket and the axle. Check the axle for signs of damage, clean the fasteners with the correct torque and look for any worn-out welds or corroded bushings. While putting it together, attach the trailing arm forward brackets to the axle shaft and use thru-bolts to mount them from the outside in. Place the axle beam on a transmission jack, match the trailing arms with the marks from the templates and fit the axle bracket-to-body bolts, but don't tighten them yet. Fasten rubber isolators to the coil springs, put the springs on the axle spring perches and check their alignment. Place the jack to lift the springs into the brackets, after that bolt and tighten up the lower shock mounts. If you're using a rear stabilizer bar, attach the cushion retainers and tighten the bolts properly. After preparing the watts link bell crank, bolt it to the axle and place the spindle, seal and disc brake adapter. Before you tighten all, apply adhesive to the bolt threads. Attach the wheel speed sensor and related clips, direct the parking brake cable through the trailing arm and secure the cable and all of its brackets. Connect the parking brake cable to the disc brake adapter, insert the lever into the adapter as well and put back together the parking brake shoe assembly. Bring together the hub, bearing and spindle, install the new hub nut and tighten everything. Attach the brake rotor and caliper back together using the guide pin bolts, after that reattach the disc brake flex hose and wheel assembly by tightening the nuts of the wheel. Once the car is lowered, join the cables in the rear parking brake to the equalizer and check that everything is tight. Once done, unlock the automatic adjuster lockout slot. Drop the parking brake, move the cables using the lever, try the rear wheels to ensure they spin freely, reattach the battery, replace the air cleaner cover and check that pressing the brake pedal feels strong and steady before taking the car away. Then, tighten up the trailing arm to the mounting bracket pivot thru-bolts at the curb height and check that you need to do a rear wheel alignment.
- Q: How is an Axle Beam Installed Along with Its Components on Chrysler Crossfire?A:The order for installing the axle beam is the camber strut bolt (1), the trailing link bolt (1) and the lateral link bolt (1). After that, insert the track bar bolt, place the stabilizer bar link (2) and assemble the lower control arm. Lift the rear axle carrier (1) and attach it to the frame with four bolts, tightening each one to 90 Nm (66 ft. lbs.). Attach the rear axle differential carrier and after that assemble the propeller shaft assembly to the axle. Put in the fuel pump assembly, then the rear shock absorbers (1) and then the rear springs (1). Then, you should add the rear axle halfshafts and then the right and left Wheel Speed Sensors (2). Use the parking brake ribbon (2) to join the rear of the parking brake cable equalizer (1) and then fix the rear exhaust system in place. Set the disc brake calipers (1) and bolts in place and attach the wheel and tire assembly afterward. At last, fasten the rear support bracket (1) with bolts (2) that you tighten to 60 Nm (44 ft. lbs.) and verify vehicle alignment. The final torque value for the rear support bracket should be fastened at the curb weight condition.


Related Chrysler Parts
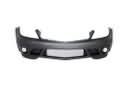 Chrysler Bumper
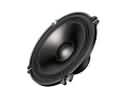 Chrysler Car Speakers
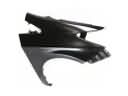 Chrysler Fender
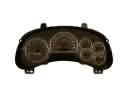 Chrysler Instrument Cluster
 Chrysler Wiper Blade
 Chrysler Air Deflector
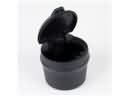 Chrysler Ashtray
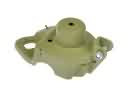 Chrysler Coil Spring Bracket
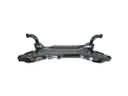 Chrysler Front Cross-Member
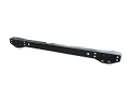 Chrysler Rear Crossmember
 Chrysler Windshield Wiper
 Chrysler Wiper Arm