JeepParts
My Garage
My Account
Cart
OEM Chrysler Crossfire Crankshaft
Crank Shaft- Select Vehicle by Model
- Select Vehicle by VIN
Select Vehicle by Model
orMake
Model
Year
Select Vehicle by VIN
For the most accurate results, select vehicle by your VIN (Vehicle Identification Number).
3 Crankshafts found

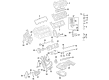
Chrysler Crossfire Crankshaft Part Number: 5097107AA
$715.31 MSRP: $2270.00You Save: $1554.69 (69%)Ships in 1-2 Business DaysChrysler Crossfire Crankshaft Part Number: 5159230AA
$76.27 MSRP: $96.69You Save: $20.42 (22%)Ships in 1-2 Business Days
Chrysler Crossfire Crankshaft Part Number: 5143037AA
$2082.79 MSRP: $2640.31You Save: $557.52 (22%)Ships in 1-2 Business Days
Chrysler Crossfire Crankshaft
Choose OEM Crankshaft that meet Chrysler factory standards. Chrysler designs and tests every component for precision and durability. Each Crankshaft follows strict manufacturing steps to lock in quality and fit. If your Chrysler Crossfire matters to you, OEM parts make the smart choice. You'll get the exact look, feel, and performance you expect. Shop genuine Crossfire parts at the highly competitive prices online. Enjoy a manufacturer's warranty, a hassle-free return policy, and rapid delivery. No more guesswork with off brands. Get genuine parts with exact fit and true factory performance. Shop with confidence today at JeepPartsDeal.com.
Chrysler Crossfire Crankshaft Parts and Q&A
- Q: How to Service and Repair a Crankshaft on Chrysler Crossfire?A:Remove the upper Oil Pan, oil pump, rear crankshaft radial seal and Timing Chain before servicing and repairing the crankshaft and ensuring the rods are untwisted as it turns. Mark the caps of the connecting rod and the connecting rod bearing to note which side they're on, then bring them out carefully without moving the bearings. Unscrew the caps on the connecting rods, keeping the caps and the bearings together and move the connecting rods away from the crankshaft. Mark the crankshaft caps before separating them. Be careful when prying out the crankshaft bearing caps, then remove the bolts from the crankshaft main bearing journal cap side, discard them and remove the remaining journal cap bolts. Pull the crankshaft from the block and get rid of the bearing shells and thrust washers from within the bottom end of the engine. All journals should be washed with solvent and dried before beginning installation. Put the upper main bearing shells on the engine's main journals, insert the thrust washers and cover the bearing areas with engine oil. Secure the crankshaft in the right place within the engine block and then fit the main bearing journal caps with the lower main bearing shells. Crankshaft main bearing journal cap bolts M8X75 and M10X90 must be tightened to prevent fracture; apply torque in the order specified: for M8X75 bolts, 20 Nm initially and rotating 90° clockwise afterwards; for M10X90, 30 Nm during the first stage and again rotating 90° clockwise during the second stage. For connecting rod bolts longer than 47.6 mm, replace them, then put the connecting rod caps and bolts in the marked locations. Also, install the oil pump, upper oil pan, timing chain and a brand new rear radial seal for the crankshaft.
- Q: How to Prepare for Crankshaft Installation, Including Bearing Selection and Proper Techniques on Chrysler Crossfire?A:Be sure to choose the proper sized upper and lower main bearings, along with the right thrust plate, before installing the crankshaft. Bearing shell identification is made easy by a color ring at the rear of each shell and by checking the crankcase for stamped numbers or punch marks placed there by the factory; for example, a 2 or two punch marks mean that you must use the Yellow shell. Letters such as r, g, b and a are engraved on each crankshaft journal and each letter stands for one color; so if there is an r, you use Red for the main bearing shell half. Thrust plates fit with the bearing caps by matching the scratched numbers "0" and "1" found on the crankshaft of the engine. Use solvent to clean all journals, then let them air dry before putting in the bearings. Put front and back bearing shells over the engine's main bearings, adding oil holes and grooves. Then fix the thrust washer. Apply a light layer of engine oil to the crankshaft and main bearing journal caps, slide the crankshaft into the engine block and install the lower main bearing shells into the bearing caps so that the anti-twist locks fit inside the recesses of the caps. Make sure to place the crankshaft main bearing journal cap bolts M8X75 and M10X90 back to avoid fracture. Put on the main bearing journal caps and use the direction set out in the specs to bolt them. M8 bolts should be tightened first by 20 Nm (15 ft. lbs.), then rotated 90° clockwise; M10 bolts should also be tightened following the same procedure at 30 Nm (22 ft. lbs.). After applying force, run the crankshaft to ensure it isn't stuck. Repair or change bolts that are as long as 47.6 mm and after that, set the connecting rod caps and bolts as described on page 3-51, together with the oil pump, upper Oil Pan, Timing Chain and a fresh crankshaft rear radial seal.

Related Chrysler Crossfire Parts
 Chrysler Crossfire Camshaft
 Chrysler Crossfire Crankshaft Pulley
 Chrysler Crossfire Engine Mount
 Chrysler Crossfire Engine Mount Bracket
 Chrysler Crossfire Exhaust Valve
 Chrysler Crossfire Intake Valve
 Chrysler Crossfire Motor And Transmission Mount
 Chrysler Crossfire Oil Pan
 Chrysler Crossfire Oil Pump
 Chrysler Crossfire Piston Ring Set
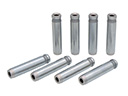 Chrysler Crossfire Valve Guide
 Chrysler Crossfire Valve Stem Seal