JeepParts
My Garage
My Account
Cart
OEM Chrysler Sebring Clock Spring
Spiral Cable Clock Spring- Select Vehicle by Model
- Select Vehicle by VIN
Select Vehicle by Model
orMake
Model
Year
Select Vehicle by VIN
For the most accurate results, select vehicle by your VIN (Vehicle Identification Number).
16 Clock Springs found


Chrysler Sebring Clockspring Part Number: 5156106AG
$527.85 MSRP: $769.00You Save: $241.15 (32%)


Chrysler Sebring Clockspring Part Number: 68003217AF
$241.33 MSRP: $356.00You Save: $114.67 (33%)

Chrysler Sebring Clockspring Part Number: 4649194AC
$305.72 MSRP: $387.56You Save: $81.84 (22%)Ships in 1-2 Business Days
Chrysler Sebring Clockspring Part Number: 4649194AB
$205.92 MSRP: $528.00You Save: $322.08 (61%)Ships in 1-2 Business Days
Chrysler Sebring Clockspring Part Number: 5156133AB
$345.79 MSRP: $504.00You Save: $158.21 (32%)Ships in 1-3 Business Days


Chrysler Sebring Clockspring Part Number: 4649130AC


Chrysler Sebring Clockspring Part Number: 4600161


Chrysler Sebring Clockspring Part Number: 68024154AB
Chrysler Sebring Clockspring Part Number: 4649092AC
Chrysler Sebring Clockspring Part Number: 4600163

Chrysler Sebring Clockspring Part Number: MR583934
Chrysler Sebring Clockspring Part Number: MR301702
Chrysler Sebring Clockspring Part Number: 56044931AB
Chrysler Sebring Clockspring Part Number: 4649193BC

Chrysler Sebring Clockspring Part Number: 8619A329
Chrysler Sebring Clockspring Part Number: 5156138AC
Chrysler Sebring Clock Spring
Choose OEM Clock Spring that meet Chrysler factory standards. Chrysler designs and tests every component for precision and durability. Each Clock Spring follows strict manufacturing steps to lock in quality and fit. If your Chrysler Sebring matters to you, OEM parts make the smart choice. You'll get the exact look, feel, and performance you expect. Shop genuine Sebring parts at the highly competitive prices online. Enjoy a manufacturer's warranty, a hassle-free return policy, and rapid delivery. No more guesswork with off brands. Get genuine parts with exact fit and true factory performance. Shop with confidence today at JeepPartsDeal.com.
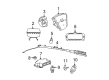
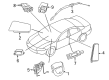
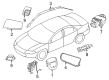
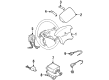
The Supplemental Restraint System (SRS) on the Chrysler Sebring depends on the Clock Spring as an important element to achieve dependable electrical connections between the airbag module and the vehicle's electrical network. The airbags deploy successfully during collisions due to this vital connection which improves safety for vehicle passengers. A Chrysler Sebring Clock Spring manages the steering wheel rotation and contains energy storage through its flat multicore cable arrangement arranged in spiral fashion. Different Chrysler Sebring models integrated unique Clock Spring versions which evolved from material advancements and mechanism improvements that integrated rotating spring brushes and circular slip rings. Many drivers choose the Chrysler Sebring Clock Spring because it stands as a dependable and high-performing automotive component. Multiple Sebring models support its compatibility which provides owners with continued operational safety and efficiency for their vehicles. The Chrysler automobile Clock Spring attracts market attention because of its solid construction along with its essential function for activating airbags that protect car passengers. The the automaker car Clock Spring stands as an affordable investment to protect safety features of the model at a typical replacement cost between $50 to $400.
Chrysler Sebring Clock Spring Parts and Q&A
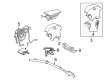
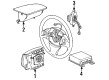
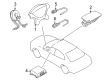
- Q: How to Safely Install a Clock Spring to Ensure Optimal Functionality on Chrysler Sebring?A:To be certain the air bags do not accidentally inflate, disable the SRS, remove the negative Battery Cable and keep it disconnected for two minutes before installing the Clock Spring assembly. Your new Clock Spring comes with a plastic locking pin already mounted on it; this should be in position until the Steering Wheel is fitted. In case the locking pin is taken out ahead of time, the Clock Spring centering process is essential to keep the Steering Angle Sensor (SAS) data lined up with the steering system, since improper installation might result in ESP shutdown and Clock Spring damage. Before you do anything, the steering wheel should be directed straight and the locking system set on your steering wheel. In case you have a new Clock Spring, use the multifunction switch jumper harness from the old unit or secure a new harness. Slip the Clock Spring over the steering column shaft from above and join together the three instrument panel connector unto the back of the Clock Spring case. Put the Clock Spring in place over the steering column lock housing and fix it with three screws, lower right first, upper left next and then upper right, checking each one is fixed to 3 Nm (27 in. lbs.) to ensure no ticking sound from steering the wheel. Install the upper and lower shrouds onto the steering column and then put the left and right multi-function switches on the Clock Spring. Lift the steering column all the way and lock it located into position, then attach your steering wheel. And last, detach the plastic locking pin from the Clock Spring rotor to help center the battery, ensuring you don't connect the battery negative cable until the system check is completed.
- Q: How to Remove the Clock Spring Assembly on Chrysler Sebring?A:Before taking out the Clock Spring assembly, make sure the supplemental restraint system is disabled by cutting the battery negative cable, waiting two minutes and then, as the capacitor discharges, tightening the cable again. A new Clock Spring for a service replacement comes with a molded plastic locking pin that needs to remain until the Steering Wheel is installed; taking this pin out too early means the Clock Spring must be re-centered. Place the steering wheel straight ahead and make sure the steering system cannot move. Take off the negative cable from the battery, then disconnect the steering wheel from the steering shaft. When using the existing Clock Spring, make sure the rotor is matched to the case. Lower your steering wheel and remove the cover from the top and the bottom of the steering wheel. Open the repair by taking out the right multi-function switch, then remove the left one. Secure the steering column lock housing in place and remove the three screws attached to it. After that, pull the Clock Spring away and unplug the three wires connected at its back from the instrument panel.


Related Chrysler Sebring Parts
 Chrysler Sebring Air Bag Control Module
 Chrysler Sebring Air Bag Sensor
 Chrysler Sebring Airbag
 Chrysler Sebring Antenna Mast
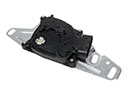 Chrysler Sebring Automatic Transmission Shift Position Sensor Switch
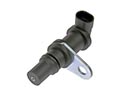 Chrysler Sebring Crankshaft Position Sensor
 Chrysler Sebring Distributor
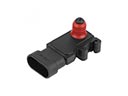 Chrysler Sebring MAP Sensor
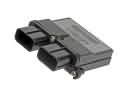 Chrysler Sebring Occupant Detection Sensor
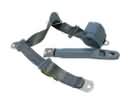 Chrysler Sebring Seat Belt
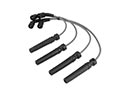 Chrysler Sebring Spark Plug Wire
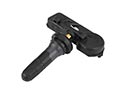 Chrysler Sebring TPMS Sensor