JeepParts
My Garage
My Account
Cart
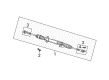
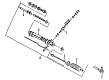
OEM Dodge Caravan Rack And Pinion
Steering Gear- Select Vehicle by Model
- Select Vehicle by VIN
Select Vehicle by Model
orMake
Model
Year
Select Vehicle by VIN
For the most accurate results, select vehicle by your VIN (Vehicle Identification Number).
11 Rack And Pinions found

Dodge Caravan Steering Gear Part Number: 4766321AF
$198.28 MSRP: $292.00You Save: $93.72 (33%)Ships in 1-3 Business DaysDodge Caravan Steering Gear Part Number: 5114164AA
$285.96 MSRP: $419.00You Save: $133.04 (32%)Ships in 1-3 Business Days
Dodge Caravan Steering Gear Part Number: 4874878AD
$391.59 MSRP: $570.00You Save: $178.41 (32%)Ships in 1-3 Business Days


Dodge Caravan Steering Gear Part Number: R8072216AC
$746.97 MSRP: $869.00You Save: $122.03 (15%)Dodge Caravan Steering Gear Part Number: 5114163AA
$242.90 MSRP: $355.00You Save: $112.10 (32%)
Dodge Caravan Steering Gear Part Number: R0400206
Dodge Caravan Gear Assembly Part Number: 4766270AB
Dodge Caravan Gear Assembly Part Number: 4766260AE
Dodge Caravan Steering Gear Part Number: R0400228
Dodge Caravan Steering Gear Part Number: R0400211
Dodge Caravan Steering Gear Part Number: 68072214AC
Dodge Caravan Rack And Pinion
Choose OEM Rack And Pinion that meet Dodge factory standards. Dodge designs and tests every component for precision and durability. Each Rack And Pinion follows strict manufacturing steps to lock in quality and fit. If your Dodge Caravan matters to you, OEM parts make the smart choice. You'll get the exact look, feel, and performance you expect. Shop genuine Caravan parts at the highly competitive prices online. Enjoy a manufacturer's warranty, a hassle-free return policy, and rapid delivery. No more guesswork with off brands. Get genuine parts with exact fit and true factory performance. Shop with confidence today at JeepPartsDeal.com.
The steering rack or also known as the rack and pinion in Dodge Caravan vehicles is the vehicle component that turns the rotary motion of the steering wheel into the straight lateral motion of the front wheels. This is referred to as the rack and pinion, in this system pinion is fixed on the steering column while the rack which is enclosed in a metal tube is connected to the wheels by means of tie rods. Dodge Caravan models mainly incorporate electric powered assisted rack and pinion steering where hydraulic fluid from an engine is helpful in providing ease to the steering system. Manual racks used to be used but the latest Dodge Caravans now use hydraulic systems for better results. Problems such as leakage, wears and taped shaft seals, crunode gear wear can impact the Steering Rack's operation and the steering may become stiff or the car may wander. As has been found in the article, there is need to ensure that proper maintenance of the Steering Rack is done to avoid problems in Dodge Caravan vehicles.
Dodge Caravan Rack And Pinion Parts and Q&A
- Q: How Does Rack And Pinion Influence Power Steering Gear Maintenance and Replacement on Dodge Caravan?A:The power steering rack and pinion are never to be serviced or adjusted; malfunction or leakage necessitates replacement of the entire assembly. Before proceeding, secure the steering column in the lockout position to avert accidental over-extension of the Clock Spring. To start, unscrew the cap off the power steering fluid reservoir and employ a siphon pump to draw out as much fluid as you can. Position the ignition key in the locked position and then twist the steering wheel to the left until it locks. While the vehicle sits on the ground, unhook the steering column shaft coupler from its connection with the rack and pinion intermediate coupler. Lift the vehicle on jack stands or perform a frame contact hoist and take off the front tires. Elevate the heat sleeve on the power steering return hose, expose its connection to the steel tube and then detach the hose and let the residual fluid drain. Hold the outside Tie Rod End stud with an 11/32 socket as you unfasten the nut that joins the outer tie rod end to the Steering Knuckle. Install Puller Special Tool Mb-990631 or Mb-991113, then employ the tool to remove the two tie rod ends from the steering knuckles. Release the two bolts and ease off the third fastener that connects the antilock brakes Hydraulic Control Unit (Hcu) to the front suspension cradle, then rotate the Hcu rearward to reach the cradle plate attaching nut and bolt. Disconnect the ten nuts and bolts affixing the cradle plate to the front suspension cradle, then lift the plate away. Ip you have All-Wheel Drive, also remove the power transfer unit. Disconnect the bracket that holds the power steering fluid tubes to the front suspension cradle. Employ an 18 mm crowfoot to detachment the power steering fluid pressure and return lines from the rack and pinion, then unfasten the three bolts and nuts attaching the rack and pinion to the front suspension cradle. Maneuver the rack and pinion downward enough to reach its intermediate coupler roll pin and then pull the roll pin out with Remover/Installer Special Tool 6831a. Disconnect the intermediate coupler from the rack and pinion shaft and take the rack and pinion assembly out of the front suspension cradle. During reinstallation, set the rack and pinion within the front suspension cradle, leaving room for the intermediate coupler. Start the roll pin into the intermediate coupler then install the rack and pinion shaft. Tap the roll pin in with a hammer, press it securely with Remover/Installer Special Tool 6831a and finally mount the rack and pinion assembly to the cradle using the three mounting bolts and nuts, tightening them to 183 Nm (135 ft. lbs.). Connect the power-steering fluid pressure and return lines, then tighten their fittings to 31 Nm (275 inch lbs.). Slide the tie-rod end into the steering knuckle and secure the attaching nut on the stud, then, using an 11/32 socket to restrain the stud, tighten the nut to 54 Nm (40 ft. lbs.). Should the vehicle be equipped with All-Wheel Drive, reinstall the power transfer unit. Fit the cradle plate onto the front suspension cradle using ten bolts and nuts and tighten them to 165 Nm (123 ft. lbs.). Reinstall the bracket for the power steering fluid tubes and thread the return line hose onto the steel tube, clamping it down with a screw-type hose clamp tightening to 2 Nm (18 inch lbs.). Confirm that the protective heat shield sleeves envelop the full length of the rubber hose and its junction to the steel tube, then align and secure them to the hoses with the tie strap. Refit the front wheels and tires, torqueing their lug nuts to 129 Nm (95 ft. lbs.). Lower the vehicle sufficiently so that the interior can be reached, then align the intermediate coupler shaft with the steering column coupler and assemble the steering column shaft coupler onto the rack and pinion intermediate coupler. Fasten the pinch bolt nut against the steering column coupler to achieve 28 Nm (250 inch lbs.) of torque. Carry out the Power Steering Pump Initial Operation service procedure to top off and bleed the power steering system, verify for leaks and correct the front toe.
- Q: How to Service and Repair Rack and Pinion Steering Gear with LHD on Dodge Caravan?A:Start by taking off the cap from the power steering fluid reservoir and then remove as much fluid as you can with a siphon pump so as not to ruin the filter. After locking the Steering Wheel straight, sit the steering wheel in place and fasten it. On the ground, disconnect the steering column shaft coupler from the rack and pinion intermediate coupler, then raise the vehicle, remove the front wheel and tire and then remove the front emissions Vapor Canister. Take out a single nut from the cooler, then remove the power steering cooler from the cradle crossmember reinforcement after removing two bolts. Use a socket to keep the stud held while you turn the nut that secures the outer Tie Rod End onto the Steering Knuckle. After removing the bolts that hold the leak detection pump to the cradle crossmember reinforcement, use Special Tool C-3894-A to undo the outer tie rods from the steering knuckles. Take out the bolts holding the rear bushings in place on both lower control arms and learn the different sizes of the other bolts connecting the car frame and the cradle crossmember. Disconnect the cradle crossmember reinforcement from both the front suspension cradle crossmember and the body of the vehicle, then remove the lower rear bushings and the reinforcement. When your vehicle has All-Wheel Drive, you should remove the power transfer unit occasionally. Loosen and take off the hoses from the rack and pinion and remove all three bolts and nuts holding the rack and pinion to the front suspension cradle. Lower the rack and pinion until the intermediate coupler roll pin is open for extraction with Special Tool 6831A. Then, release the coupler from the rack and pinion shaft. Get rid of the rack and pinion from the vehicle. When putting in the rack and pinion, set it into the front suspension cradle so the intermediate coupler will have enough room. Put the roll pin into the intermediate coupler before connecting to the rack and pinion shaft and then use the tool to force it home. Mount the rack and pinion onto the front suspension cradle and use three bolts to secure it; tighten all the bolts (14 mm) to 183 Nm and the (12 mm) bolts to 95 Nm. Fasten the nuts on the power steering fluid pressure and return hoses to 31 Nm. If necessary, connect the power transfer unit and install it again. After placing the cradle in the suspension cradle and align the fastening holes, tighten the M-14 bolts to 153 Nm and the M-12 bolts to 106 Nm. Attach the rear bushing retainer bolts for the control arm, tighten them to 61 Nm and place the crossmember and reinforcement section of the rear cradle to the vehicle body, tightening them to 163 Nm. Place the outer tie rod end into the steering knuckle and tighten the nut to 75 Nm. Connect the leak detection pump and the power steering fluid cooler back to the system and fasten the cooler with bolt head tightened to 11 Nm. Finalize by fixing the now connected hose to the power steering cooler, placing the front tire and wheel sets back and torquing their lug nuts to 135 Nm. Put the front emissions vapor canister back in place, drop the vehicle and join the intermediate shaft with the steering column coupler. Snap the assembled steering column shaft coupler onto the rack and pinion intermediate coupler and tighten the pinch bolt nut to 28 Nm. After taking off the steering wheel tool, fill and clear the power steering, check for leaks and adjust the front toe.

Related Dodge Caravan Parts
 Dodge Caravan Power Steering Pump
 Dodge Caravan Steering Wheel
 Dodge Caravan Power Steering Hose
 Dodge Caravan Power Steering Reservoir
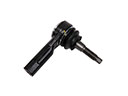 Dodge Caravan Tie Rod
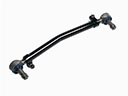 Dodge Caravan Drag Link
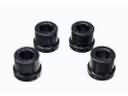 Dodge Caravan Rack & Pinion Bushing
 Dodge Caravan Steering Column Cover
 Dodge Caravan Steering Gear Box
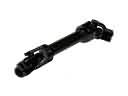 Dodge Caravan Steering Shaft
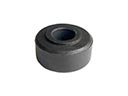 Dodge Caravan Tie Rod Bushing
 Dodge Caravan Tie Rod End