JeepParts
My Garage
My Account
Cart
OEM Dodge Dakota Rod Bearing
Engine Connecting Rod Bearing- Select Vehicle by Model
- Select Vehicle by VIN
Select Vehicle by Model
orMake
Model
Year
Select Vehicle by VIN
For the most accurate results, select vehicle by your VIN (Vehicle Identification Number).
5 Rod Bearings found


Dodge Dakota Bearings Part Number: 5012363AE
$16.87 MSRP: $25.00You Save: $8.13 (33%)Ships in 1-2 Business Days


Dodge Dakota Bearings Part Number: 68052222AB
$18.13 MSRP: $26.80You Save: $8.67 (33%)Ships in 1-2 Business Days


Dodge Dakota Rod Bearings Part Number: 2421305
$21.97 MSRP: $27.86You Save: $5.89 (22%)Ships in 1-2 Business Days
Dodge Dakota Rod Bearings Part Number: 83500300AC
$20.13 MSRP: $22.95You Save: $2.82 (13%)Ships in 1-2 Business Days
Dodge Dakota Rod Bearings Part Number: 4397658AB
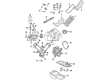
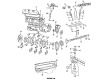
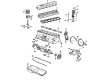
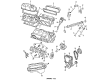
Dodge Dakota Rod Bearing
Choose OEM Rod Bearing that meet Dodge factory standards. Dodge designs and tests every component for precision and durability. Each Rod Bearing follows strict manufacturing steps to lock in quality and fit. If your Dodge Dakota matters to you, OEM parts make the smart choice. You'll get the exact look, feel, and performance you expect. Shop genuine Dakota parts at the highly competitive prices online. Enjoy a manufacturer's warranty, a hassle-free return policy, and rapid delivery. No more guesswork with off brands. Get genuine parts with exact fit and true factory performance. Shop with confidence today at JeepPartsDeal.com.
Rod Bearing is a part which plays a very important role in the enhancement of the quality of Dodge Dakota automobile. Said to be highly reliable, the Rod Bearing holds other important parts such as the crankshaft and the camshaft that must turn freely in an infinitesimal layer of oil that is autonomously provided by the engine oil pump. This anti-corrosive and precision-engineered component comes in many types with bi-metal & tri-metal bearing models available tailored according to the Dakota models' requirements. The Rod Bearing has oil holes and grooves that allow efficient supply of oil to the bearings and this greatly plays the doi in maintaining the engines efficiency and avoiding tragedy. It has evidently cut across the two Dakota generations thus afford the owners an opportunity to retain or even boost their cars' performance. Specifically, the primary configuration of the Rod Bearing consist of dry film coatings and comes with an optional eccentric, making the product a star player in automotive's high power output engines. Thus, the precise function of the Rod Bearing is of great value since it helps to determine the reliable and safe work of the vehicle engine. Considering its toughness and overall performance, the Rod Bearing is definitely one of the key additions for those willing to extend the truck's durability and capabilities of the mid-size Dodge Dakota Thus, the Rod Bearing proves the good reputation of the Dodge Dakota as the powerful and reliable mid-size pickup.
Dodge Dakota Rod Bearing Parts and Q&A
- Q: How to Ensure Proper Alignment and Clearance When Inspecting and Replacing Rod Bearings on Dodge Dakota?A:See if the rod bearings are scoring, bent, are out of alignment and if they are worn normally. Change any bearing that seems worn out in a way it shouldn't be. Make sure to inspect the journals where the connecting rods attach for signs of scoring, nicks and burrs, so you avoid abnormal Piston and Crankshaft damage caused by bent rods. Whenever the rod alignment becomes obvious from the signs of stress and damage, check the connection and change any bent or twisting rods you find. Oil the connecting rod journal and use sections of short rubber hose covered over the rod bolts when installing. Grease the top bearing guide area and place it into the connecting rod. Set up the piston and rod while using the piston ring compressor to confirm the oil squirt holes in the rods are aimed at the camshaft and the arrow on the piston is showing toward the front of the engine. Place the lower bearing insert into the bearing cap, check it's dry, then attach Plastigage right across the center of the lower insert. Slide the bearing cap and connecting rod into place and pull the bolts tight to 45 Nm (33 ft. lbs.) before turning the crankshaft to ensure the Plastigage is neither wasted nor stained. After taking off the bearing cap, measure the compressed Plastigage to estimate the gaps between the journal and bearing, compare them and ensure they are the same at each end of the insert. Should the clearance fall outside the spec, make sure the inserts are 0.0254 mm (0.001 inch) smaller than needed, put the odd size inserts one the bottom and test the clearance one more time. A diameter undersize of 0.025 mm (0.001 inch) from the 0.0762 mm (0.003 inch) original clearance results in a final clearance of 0.002 inch, fulfilling the standard. Make the Plastigage measurement again before putting together the machine to check the bearing size. When the appropriate insert is found, put it in and the cap, fasten the connecting rod bolts securely to 45 Nm (33 ft. lbs.), then fit a feeler gauge between the connecting rod and crankshaft journal flange to look at the side clearance, replacing the connecting rod if it doesn't fit the Engine Specifications.
- Q: What Is the Proper Method for Installing Rod Bearings to Ensure Optimal Assembly and Lubrication on Dodge Dakota?A:Place all of the rods on a bank, ensuring that only one bank is being worked on at a time, because connecting rods and Pistons aren't interchangeable between banks. Mark the part where the bearing sits so that you assemble it properly, since many bearing caps look alike. There is a small V-shape across the parting face of the cap; line up this V-groove with the one on the lower shell as you fit them, to ensure the engine wall is well lubricated in the adjacent side. Insert every bearing shell so that the tangs fit into their required machined grooves in both the rods and caps. Keep the taper or out-of-round on any crankshaft journals under 0.025 mm (0.001 inch). These bearings have dimensions of 0.025 mm (0.001 inch), 0.051 mm (0.002 inch), 0.076 mm (0.003 inch), 0.254 mm (0.010 inch) and 0.305 mm (0.012 inch) less than the standard. Fit the bearings in sets of two, preventing the use of paired bearings with different halves and do not touch the bearings or rods with files.


Related Dodge Dakota Parts
 Dodge Dakota Transmission Mount
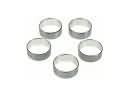 Dodge Dakota Camshaft Bearing
 Dodge Dakota Camshaft Plug
 Dodge Dakota Crankshaft Pulley
 Dodge Dakota Engine Mount Bracket
 Dodge Dakota Harmonic Balancer
 Dodge Dakota Lash Adjuster
 Dodge Dakota Piston
 Dodge Dakota Piston Ring Set
 Dodge Dakota Rocker Arm Pivot
 Dodge Dakota Timing Chain Tensioner
 Dodge Dakota Timing Cover Gasket