JeepParts
My Garage
My Account
Cart
OEM Dodge Neon Automatic Transmission Filter
AT Filter- Select Vehicle by Model
- Select Vehicle by VIN
Select Vehicle by Model
orMake
Model
Year
Select Vehicle by VIN
For the most accurate results, select vehicle by your VIN (Vehicle Identification Number).
2 Automatic Transmission Filters found


Dodge Neon Auto Transmission Filter Part Number: 4864505AB
$43.88 MSRP: $65.00You Save: $21.12 (33%)Ships in 1-2 Business Days
Dodge Neon Auto Transmission Filter Part Number: 4269649
$8.36 MSRP: $9.45You Save: $1.09 (12%)Ships in 1-2 Business Days
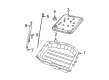
Dodge Neon Automatic Transmission Filter
Choose OEM Automatic Transmission Filter that meet Dodge factory standards. Dodge designs and tests every component for precision and durability. Each Automatic Transmission Filter follows strict manufacturing steps to lock in quality and fit. If your Dodge Neon matters to you, OEM parts make the smart choice. You'll get the exact look, feel, and performance you expect. Shop genuine Neon parts at the highly competitive prices online. Enjoy a manufacturer's warranty, a hassle-free return policy, and rapid delivery. No more guesswork with off brands. Get genuine parts with exact fit and true factory performance. Shop with confidence today at JeepPartsDeal.com.
The Performance of the Automatic Transmission Filter in Dodge Neon vehicles Knowing Automatic Transmission Filter is quite important since it serves to eliminate the small particles of dirt that may affect the proper operation of the transmission in automobiles. They facilitate that the transmission fluid, which is crucial for lubrication, cooling and in supplying the force required to operate the gears stays clean. Most of the Dodge Neon models come equipped with an internal Automatic Transmission Filter which is designed to be unobtrusive and can be accessed rather easily for replacement behind a simple removeable fluid pan. There may also be some Neons that use in-line filters that can be placed between the transmission as well as the fluid cooler and these have the capacity to filter out even the smallest of dangerous particle without preventing circulation of the fluid. Furthermore, there is spin-on or cartridge type filters that are external and used in some applications to make it easier to access and replace the filters frequently.
Dodge Neon Automatic Transmission Filter Parts and Q&A
- Q: How to Service and Repair an Automatic Transmission Filter on Dodge Neon?A:The first part of servicing your A/T fluid filter is to lift the vehicle with a hoist and put a container under the transaxle Oil Pan to catch the oil. Loose the bolts on the pan, then tap one part of the pan to get it to come free, letting the fluid drain. Replace the filter and O-ring on the lower side of the valve body, tighten the retaining screws to 5 Nm (40 in. lbs.). Clean the oil pan and magnet, install the new pan back in place using Mopar Silicone Adhesive and tighten the bolts to 19 Nm (165 in. lbs.). Insert a funnel into the hole in your dipstick, pour in four quarts of Mopar ATF +4 (Automatic Transmission Fluid) Type 9602, turn on the engine and allow it to idle for at least one minute. Have the parking and service brakes on and briefly move the lever to each position until you're in park or neutral. Set the transaxle fluid level so that the dipstick registers 3 mm (1/8 inch) below the "ADD" mark, then check it after the transaxle reaches normal temperature of 180 °F. Place the dipstick securely in its spot to avoid dirt contaminating the transaxle. After driving the car to full operating temperature, fit the clean and dry fluid exchanger filled with ATF +4 Type 9602 to the vehicle and follow the instructions from the manufacturer. Following the exchange, check both the oil level and overall condition, replenishing with Mopar ATF +4 Type 9602 as needed and tightening the transmissions cooler lines to 2 Nm (18 in. lbs.) torque. Ensure that the transaxle is fully warmed up, pick a suitable fluid vacuuming equipment, place the suction tube into the dipstick tube so it reaches the bottom of the transaxle oil pan for complete evacuation. Following drainage, cut off the suction line, put four quarts of Mopar ATF +4 Type 9602 into the fill hole through the dipstick, engine start and check the fluid level as before.
- Q: How to Replace an Automatic Transmission Filter and Fluid on Dodge Neon?A:Place the vehicle up on a hoist and then place a container under the Oil Pan to drain the fluid. After loosening the pan bolts, tap one corner to get the pan to release the fluid before you can take it out. After that, remove the Oil Filter-to-valve body screws and pull out the oil filter and gasket. First, put in a new filter and gasket and then clean the oil pan and magnet. Once more, apply new Mopar® Silicone Rubber Adhesive Sealant and torque the oil pan bolts to the correct value of 19 Nm (165 inch lbs.). Input four quarts of Mopar® ATF +4 through the dipstick. After you've turned on the engine and let it idle, briefly select each position with your selector lever and then move it to park or neutral before parking. Check the dipstick to find the transaxle fluid level, then add more fluid so it is 3 mm (1/8 inch) under the "ADD" mark and re-check the level once the vehicle is at its normal operating temperature (180°F). Be sure the dipstick is properly into the transaxle to keep it clean. Instead, choose the dipstick tube fluid suction way, make sure the transaxle is warm, ensure the fluid pump works well and put the suction line down the dipstick tube, ensuring it reaches the lowest level of the oil pan. When the suction line is removed, pour in four quarts of Mopar® ATF +4 (Type 9602), run the engine and check the ATF level slowly as you did earlier.


Related Dodge Neon Parts
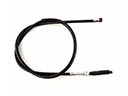 Dodge Neon Clutch Cable
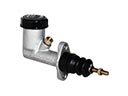 Dodge Neon Clutch Master Cylinder
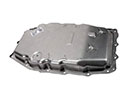 Dodge Neon Transmission Pan
 Dodge Neon Automatic Transmission Shift Levers
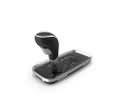 Dodge Neon Automatic Transmission Shifter
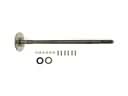 Dodge Neon Axle Shaft
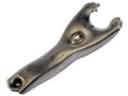 Dodge Neon Clutch Fork
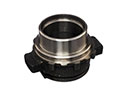 Dodge Neon Clutch Release Bearing
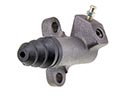 Dodge Neon Clutch Slave Cylinder
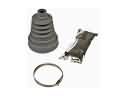 Dodge Neon CV Boot
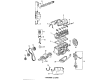
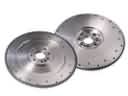 Dodge Neon Flywheel
 Dodge Neon Pressure Plate