JeepParts
My Garage
My Account
Cart
OEM Dodge Nitro A/C Compressor
Air Conditioning Compressor- Select Vehicle by Model
- Select Vehicle by VIN
Select Vehicle by Model
orMake
Model
Year
Select Vehicle by VIN
For the most accurate results, select vehicle by your VIN (Vehicle Identification Number).
3 A/C Compressors found


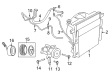
Dodge Nitro Compressor Part Number: 55111506AC
$552.94 MSRP: $811.00You Save: $258.06 (32%)Ships in 1-3 Business Days
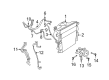
Dodge Nitro Compressor Part Number: 55111406AD
$483.94 MSRP: $729.00You Save: $245.06 (34%)Ships in 1-2 Business DaysDodge Nitro Compressor Part Number: 2AMA1412AA
$226.53 MSRP: $274.00You Save: $47.47 (18%)Ships in 1-2 Business Days
Dodge Nitro A/C Compressor
Choose OEM A/C Compressor that meet Dodge factory standards. Dodge designs and tests every component for precision and durability. Each A/C Compressor follows strict manufacturing steps to lock in quality and fit. If your Dodge Nitro matters to you, OEM parts make the smart choice. You'll get the exact look, feel, and performance you expect. Shop genuine Nitro parts at the highly competitive prices online. Enjoy a manufacturer's warranty, a hassle-free return policy, and rapid delivery. No more guesswork with off brands. Get genuine parts with exact fit and true factory performance. Shop with confidence today at JeepPartsDeal.com.
Dodge Nitro A/C Compressor Parts and Q&A
- Q: How to Remove and Replace a Visteon A/C Compressor Clutch on Dodge Nitro?A:Secure the field coil's positioning tabs and wires in the right spot near the compressor front so as not to risk damage. Put the field coil tabs into the front recess, take out the clutch and fix the field coil together using a puller, compressor field coil installer and compressor field coil installer spacer (all in Kit 9349). After that, set the lead and bracket of the clutch field coil wire over the A/C compressor and fix the bracket with a 4 Nm (35 in. lbs.) torque screw. Position the pulley and bearing assembly squarely in front of the A/C compressor and notice a sound change during tapping shows you have bottomed out on the compressor housing. Attach the clutch pulley installer (Kit 9349's Special Tool 9355) and begin tapping the pulley and bearing type assembly against the compressor until it seats all the way and locks the snap ring firmly into place to avoid failure. Fix the snap ring (2) onto the A/C compressor using special tool 9764 to make sure it's seated and tight. Be sure there is enough space for the clutch field coil wire lead between the compressor housing and the pulley and bearing assembly. If you are installing a clutch for the first time, use the original shims or if there wasn't a clutch before, insert the 1.0, 0.50 and 0.13 millimeter (0.040, 0.020 and 0.005 inch) shims from the kit. Shim the clutch on the shaft, then strap-wrench in the bolt to hold the plate onto the compressor, ensuring the plate stays still as you tighten it to 15 Nm (133 in lbs.). Use 90° wire gauges to check the distance between the clutch plate and the pulley and bearing assembly. Make shim adjustments so the air gap is 0.35 to 0.65 millimeter wide (0.014 to 0.025 inch). Fit the compressor onto the mounting bracket, add and tighten the bolts, attach the wire harness to the clutch field coil connector, add the accessory Drive Belt, reconnect the negative Battery Cable and complete the Clutch Break-in Procedure.

Related Dodge Nitro Parts
 Dodge Nitro Heater Core
 Dodge Nitro Blend Door Actuator
 Dodge Nitro A/C Condenser
 Dodge Nitro Evaporator
 Dodge Nitro A/C Accumulator
 Dodge Nitro A/C Expansion Valve
 Dodge Nitro A/C Hose
 Dodge Nitro A/C Service Cap
 Dodge Nitro A/C Switch
 Dodge Nitro A/C System Valve Core
 Dodge Nitro Blower Control Switches
 Dodge Nitro HVAC Pressure Switch