JeepParts
My Garage
My Account
Cart
OEM Dodge Ram 2500 Van Blower Motor
A/C Heater Blower Motor- Select Vehicle by Model
- Select Vehicle by VIN
Select Vehicle by Model
orMake
Model
Year
Select Vehicle by VIN
For the most accurate results, select vehicle by your VIN (Vehicle Identification Number).
3 Blower Motors found


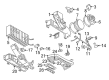
Dodge Ram 2500 Van Blower Motor, Front Part Number: 5015869AA
Dodge Ram 2500 Van Blower Motor Part Number: 5015868AA
$116.70 MSRP: $172.00You Save: $55.30 (33%)
Dodge Ram 2500 Van Blower Motor Part Number: 4638058AB
Dodge Ram 2500 Van Blower Motor
Choose OEM Blower Motor that meet Dodge factory standards. Dodge designs and tests every component for precision and durability. Each Blower Motor follows strict manufacturing steps to lock in quality and fit. If your Dodge Ram 2500 Van matters to you, OEM parts make the smart choice. You'll get the exact look, feel, and performance you expect. Shop genuine Ram 2500 Van parts at the highly competitive prices online. Enjoy a manufacturer's warranty, a hassle-free return policy, and rapid delivery. No more guesswork with off brands. Get genuine parts with exact fit and true factory performance. Shop with confidence today at JeepPartsDeal.com.
Dodge Ram 2500 Van Blower Motor Parts and Q&A
- Q: How to service the front and rear blower motors on Dodge Ram 2500 Van?A:Always start with unplugging the blower motor's wire harness connector and then unlatch and isolate the battery negative cable. Unfasten the blower motor cooling tube from its nipple, free up the three screws holding the motor plate and take out the assembly from the blower motor assembly from the blower motor assembly from the blower housing cover. Adjust the air conditioning suction and discharge hoses to aid the vehicle's removal if it has air conditioning. Following this, you should remove the retainer clip on the blower motor spin and take out the wheel from it. The rear blower motor only works on models featuring a rear heater-A/C, so to replace the motor begin with disconnecting and isolating the battery negative cable, then remove the rear heater-A/C unit lid, vertical duct and horizontal duct and finally the upper housing. Open the upper housing and unscrew the three screws holding the blower motor mounting plate. After that, take out the blower motor assembly. Take out the retainer clip from the center of the blower wheel, then pull the wheel off the shaft of the blower motor. Put the blower wheel's hub onto the shaft of the motor, lining up the flat part inside the hub with the flat on the shaft. Put the retainer clip over the other side of the blower wheel, making certain the ears are lined up in the right position. Lay a very small amount of RTV rubber sealant onto the rubber seal at the blower motor end, position the seal and isolator unit on the motor mounting plate and close them onto the bosses on the cover. First, secure the mounting plate with the blower motor using the three supplied screws and tighten them to about 20 in. lbs., then put in the blower motor cooling tube, connect the wire harness and attach the negative battery cable again. To install the rear blower motor, take the same first actions for the blower wheel, position the rubber seal and isolator unit on the mounting plate, line up the blower motor and seal with the upper housing bosses and press the isolators into place. After screwing in the mounting plate with Nm (20 in. lbs.) torque, put back the upper housing, horizontal duct, vertical duct and rear heater-A/C cover and attach the battery negative cable only when finished.

Related Dodge Ram 2500 Van Parts
 Dodge Ram 2500 Van A/C Compressor
 Dodge Ram 2500 Van A/C Compressor Clutch
 Dodge Ram 2500 Van A/C Compressor Cut-Out Switches
 Dodge Ram 2500 Van A/C Condenser
 Dodge Ram 2500 Van A/C Expansion Valve
 Dodge Ram 2500 Van A/C Hose
 Dodge Ram 2500 Van Blend Door Actuator
 Dodge Ram 2500 Van Blower Control Switches
 Dodge Ram 2500 Van Blower Motor Resistor
 Dodge Ram 2500 Van Evaporator
 Dodge Ram 2500 Van Heater Core
 Dodge Ram 2500 Van HVAC Pressure Switch