JeepParts
My Garage
My Account
Cart
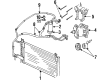
OEM Dodge Ram 3500 A/C Clutch
Air Conditioning Clutch- Select Vehicle by Model
- Select Vehicle by VIN
Select Vehicle by Model
orMake
Model
Year
Select Vehicle by VIN
For the most accurate results, select vehicle by your VIN (Vehicle Identification Number).
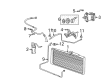
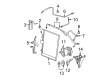
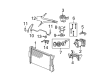
8 A/C Clutches found


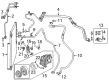
Dodge Ram 3500 Clutch Coil Part Number: 5003681AA
$185.30 MSRP: $279.00You Save: $93.70 (34%)Ships in 1-2 Business Days
Dodge Ram 3500 Clutch Coil Part Number: 5016127AB

Dodge Ram 3500 Clutch Part Number: 5183899AA

Dodge Ram 3500 Clutch & Pulley Part Number: 5072658AA

Dodge Ram 3500 Clutch Coil Part Number: 4882009
Dodge Ram 3500 Clutch & Pulley Part Number: 4882008
Dodge Ram 3500 Clutch Coil Part Number: 4746789

Dodge Ram 3500 Clutch & Pulley Part Number: 4746786
Dodge Ram 3500 A/C Clutch
Choose OEM A/C Clutch that meet Dodge factory standards. Dodge designs and tests every component for precision and durability. Each A/C Clutch follows strict manufacturing steps to lock in quality and fit. If your Dodge Ram 3500 matters to you, OEM parts make the smart choice. You'll get the exact look, feel, and performance you expect. Shop genuine Ram 3500 parts at the highly competitive prices online. Enjoy a manufacturer's warranty, a hassle-free return policy, and rapid delivery. No more guesswork with off brands. Get genuine parts with exact fit and true factory performance. Shop with confidence today at JeepPartsDeal.com.
Dodge Ram 3500 A/C Clutch is one of the key components that speaks about the line of the cars that are strong and effective. This A/C Clutch is used for pulling-in the A/C compressor to increase the cooling rate when the A/C apparatus is on. Popular for its reliability, the Dodge Ram 3500 A/C Clutch is critical to regulate the comfort and security of the occupants as well as the climate control of automobiles. A compatibility with different models and Rams increases its importance, since it combines with the A/C circuits of the massive Ram 3500 models. The Dodge Ram 3500 A/C Clutch does not occupies a regular space in the market as it has been shaped in a way that does not create possible ways the unit can fail and boost up the unique performance. What it can do is to properly control the operation of the compressor which is a core element in A/C system and thus enhance the general efficiency of the car as well as longevity of the A/C system. Furthermore, the Dodge Ram 3500 A/C Clutch comes in with an engineering designed to serve the heavy duty tasks hence it is an added advantage for the users of the trucks. As one of the most technologically reliable products in the Dodge Ram series, it can be said that the Dodge Ram 3500 A/C Clutch reflects the brand's high standards of quality, and therefore, its promise that owners of a Ram 3500 will not be let down regardless of whether they are using the car for work or pleasure.
Dodge Ram 3500 A/C Clutch Parts and Q&A
- Q: How to Properly Burnish a New A/C Clutch After Installation on Dodge Ram 3500?A:Following installation, let the compressor clutch switch ON for five seconds and then OFF for five seconds about 20 times. While you go through the process, put the A/C Heater in Recirculation Mode, place the blower motor on the highest setting and keep your engine's speed at between 1500 and 2000 rpm. Burnishing will correctly fit the friction surfaces together and make the clutch stronger.
- Q: How to Service and Repair an A/C Clutch on Dodge Ram 3500?A:Before you work on the compressor clutch, independent of the battery negative cable and release the compressor clutch coil wire harness. Use Special Tool 6462 from Kit 6460 to hold the clutch plate still while you remove the hex nut, keeping the two pins of the spanner wrench in the holes. After that, disconnect the clutch plate and clutch shims and then remove the front housing snap ring with snap ring pliers. With the lip of the rotor puller, installed into the snap ring groove, add the shaft protector (Special Tool C-6141-2 from Kit 6460). Using the through-bolts supplied (Special Tool C-6461), put the puller onto the front of the rotor until pins are inserted into the flange and tighten them. After that, push in the center bolt and turn clockwise until you pull the pulley free. Unscrew the screw and retainer from the clutch coil lead wire harness, then pull out the snap ring on the compressor hub and slide the clutch field coil away. Check the wear on the contact surfaces of the clutch pulley and front plate and choose to replace them if too much wear or damage are found. Look at the friction parts and the compressor shaft and nose; if oil is found on the front cover's felt, it means the shaft seal is bad and you should replace the compressor. If the clutch pulley bearing is rough or if there is too much grease leaking, change it as required. Initially, add the clutch field coil and snap ring and then attach the clip from the clutch coil lead wire harness to the front of the compressor using a retaining screw. Square up the rotor assembly near the front housing hub, then add the handle (Special Tool 6464 from Kit 6460) into the driver (Special Tool 6143 from Kit 6460). Insert the driver tool into the bearing cavity on the rotor so that the leading edge of the assembly touches the rotor's bearing inner race. While tapping the driver, move the rotor and listen for a different noise. Put in the outer front rotor snap ring, so the bevel side is outward and correctly in place or the clutch will not function properly. Start by fitting the clutch shims onto the compressor shaft, then the clutch plate and use a shaft protector (the featured tool from Kit 6460) to tap the clutch plate until you hear it bottom out against the shims. Screw the hex nut located on the compressor shaft until you reach a torque of 14.4 Nm (10.5 ft. lbs.). Measure the clutch air gap with the feeler gauge, changing the shims as required to meet the needs of between 0.41 mm and 0.79 mm (0.016 inch and 0.031 inch). Make sure the parts are even around the circumference through light prying or tapping. Always place the shims that come with the clutch when mounting a new clutch. Lastly, follow the steps you took to take things out of the game to setup everything again. For proper seating and more strength from the clutch, run the new compressor clutch around 20 times (five seconds each at full-on and full-off) along with full air-conditioning and high-speed fan, plus an engine running at about 1500 to 2000 rpm.


Related Dodge Ram 3500 Parts
 Dodge Ram 3500 A/C Accumulator
 Dodge Ram 3500 A/C Compressor
 Dodge Ram 3500 A/C Compressor Cut-Out Switches
 Dodge Ram 3500 A/C Condenser
 Dodge Ram 3500 A/C Expansion Valve
 Dodge Ram 3500 A/C Hose
 Dodge Ram 3500 A/C Service Cap
 Dodge Ram 3500 Blend Door Actuator
 Dodge Ram 3500 Blower Motor
 Dodge Ram 3500 Blower Motor Resistor
 Dodge Ram 3500 Heater Core
 Dodge Ram 3500 HVAC Pressure Switch