JeepParts
My Garage
My Account
Cart
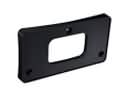
OEM Dodge Rear Crossmember
Rear Suspension Crossmember- Select Vehicle by Model
- Select Vehicle by VIN
Select Vehicle by Model
orMake
Model
Year
Select Vehicle by VIN
For the most accurate results, select vehicle by your VIN (Vehicle Identification Number).
83 Rear Crossmembers found


Dodge Rear Crossmember Part Number: 4780812AD
$324.95 MSRP: $580.00You Save: $255.05 (44%)Ships in 1-3 Business DaysProduct Specifications- Other Name: Crossmember - Rear Suspension; Floor Pan Crossmember, Rear; Crossmember Rear Suspension Rear; Crossmember Rear Suspension
- Position: Rear
- Replaces: 4780812AC


Dodge Floor Crossmember, Rear Part Number: 68160821AA
$90.13 MSRP: $134.00You Save: $43.87 (33%)Ships in 1-3 Business DaysProduct Specifications- Other Name: Crossmember - Rear Floor; Rear Body Reinforcement, Rear; Floor Pan Crossmember, Rear; Sill Panel; Rear Body Reinforcement; Crossmember Rear Floor
- Position: Rear
- Replaces: 68043160AA, 68043160AB


Dodge Suspension Crossmember, Rear Part Number: 5151023AI
$795.78 MSRP: $1170.00You Save: $374.22 (32%)Ships in 1-3 Business DaysProduct Specifications- Other Name: Crossmember - Rear Suspension; Crossmember Rear Suspension
- Position: Rear


Dodge Rear Crossmember Part Number: 5014458AD
$89.60 MSRP: $103.00You Save: $13.40 (14%)Ships in 1-2 Business DaysProduct Specifications- Other Name: Crossmember - Rear Floor; Floor Pan Crossmember, Rear; Crossmember Rear Floor
- Position: Rear

Dodge Crossmember Part Number: 68223429AC
$239.06 MSRP: $353.00You Save: $113.94 (33%)Ships in 1-3 Business DaysProduct Specifications- Other Name: Crossmember - Skid Plate
- Replaced by: 68763838AA
- Replaces: 68223429AB, 68055148AB, 68055148AA

Dodge Rear Crossmember Part Number: 55113037AA
$159.10 MSRP: $1010.00You Save: $850.90 (85%)Ships in 1-2 Business DaysProduct Specifications- Other Name: Crossmember - Floor Pan; Crossmember Floor Pan

Dodge Upper Crossmember, Rear Part Number: 4780806AF
$46.03 MSRP: $264.00You Save: $217.97 (83%)Ships in 1-2 Business DaysProduct Specifications- Other Name: Crossmember - Rear Suspension; Floor Pan Crossmember, Rear Upper; Crossmember Rear Suspension Front; Crossmember Rear Suspension
- Position: Rear Upper
- Replaces: 4780806AD, 4780806AE, 4780806AC

Dodge Floor Crossmember, Rear Part Number: 55113000AB
$175.14 MSRP: $389.00You Save: $213.86 (55%)Ships in 1-2 Business DaysProduct Specifications- Other Name: Crossmember - Rear Floor; Crossmember Rear Floor; Crossmember Floor Pan
- Position: Rear

Dodge Crossmember Assembly, Rear Part Number: 68004029AA
$431.68 MSRP: $808.00You Save: $376.32 (47%)Ships in 1-2 Business DaysProduct Specifications- Other Name: Crossmember - Rear Floor; Floor Support, Rear; Crossmember Rear Floor
- Position: Rear


Dodge Rear Crossmember, Driver Side Part Number: 68525585AA
$64.52 MSRP: $95.00You Save: $30.48 (33%)Ships in 1-3 Business DaysProduct Specifications- Other Name: Crossmemb - Rear Floor; Floor Pan Crossmember, Rear Left
- Position: Rear Driver Side
- Replaces: 55372693AA

Dodge Package Tray Lower Reinforcement, Rear Part Number: 68045533AD
$82.48 MSRP: $123.00You Save: $40.52 (33%)Ships in 1-3 Business DaysProduct Specifications- Other Name: Crossmember - Rear Shelf Panel; Package Tray Reinforcement, Rear Lower; Package Tray Support; Reinforcement Rear Shelf Panel
- Position: Rear Lower
- Replaces: 68045533AC

Dodge Rear Crossmember, Driver Side Part Number: 68525583AA
$91.15 MSRP: $135.00You Save: $43.85 (33%)Ships in 1-3 Business DaysProduct Specifications- Other Name: Crossmemb - Rear Floor; Floor Pan Crossmember, Rear Left
- Position: Rear Driver Side
- Replaces: 55372677AA

Dodge Front Crossmember, Rear Upper Part Number: 68030677AG
$140.49 MSRP: $208.00You Save: $67.51 (33%)Ships in 1-3 Business DaysProduct Specifications- Other Name: Crossmember - Rear Suspension; Suspension Subframe Crossmember, Rear; Floor Pan Crossmember, Rear Upper; Suspension Crossmember; Upper Crossmember; Crossmember Rear Suspension Front
- Position: Rear Upper
- Replaces: 68030677AA, 68030677AF, 68030677AB, 68030677AD, 68030677AE, 68030677AC

Dodge Floor Crossmember, Rear Part Number: 68472031AA
$190.34 MSRP: $280.00You Save: $89.66 (33%)Ships in 1-3 Business DaysProduct Specifications- Other Name: C Member - Rear Floor; Crossmember Rear Floor
- Position: Rear

Dodge Front Crossmember, Rear Part Number: 5067952AD
$197.14 MSRP: $290.00You Save: $92.86 (33%)Ships in 1-3 Business DaysProduct Specifications- Other Name: Crossmember - Rear Floor; Crossmember Rear Floor
- Position: Rear
- Replaces: 5067952AC, 5067952AB


Dodge Rear Crossmember Part Number: 68141706AA
$239.06 MSRP: $353.00You Save: $113.94 (33%)Ships in 1-3 Business DaysProduct Specifications- Other Name: Crossmember - Rear Box; Floor Pan Crossmember, Rear; Truck Bed Floor Sill, Rear; Crossmember Rear Box
- Position: Rear
- Replaces: 55275528AD, 55275528AB


Dodge Suspension Crossmember, Rear Part Number: MR369145
Product Specifications- Other Name: Crossmember - Rear Suspension; Suspension Subframe Crossmember, Rear; Crossmember; Crossmember Rear Suspension
- Position: Rear

Dodge Suspension Crossmember, Rear Part Number: MB948996
Product Specifications- Other Name: Crossmember - Rear Suspension; Crossmember; Crossmember, Rear Suspension; Crossmember Rear Suspension
- Position: Rear


Dodge Suspension Crossmember, Rear Part Number: 4783361
Product Specifications- Other Name: Crossmember - Rear Suspension; Floor Pan Crossmember, Rear; Crossmember Rear Suspension
- Position: Rear


Dodge Suspension Crossmember, Rear Part Number: 4895262AC
Product Specifications- Other Name: Crossmember - Rear Suspension; Suspension Subframe Crossmember, Rear; Crossmember; Crossmember Rear Suspension
- Position: Rear
| Page 1 of 5 |Next >
1-20 of 83 Results
Dodge Rear Crossmember
OEM parts sourced directly from Dodge deliver superior quality, long lasting strength, and a precise fit you can trust. Each item goes through strict quality checks to ensure safety, toughness, and performance that matches your factory equipment. At JeepPartsDeal online shop, you'll get top-quality, budget-friendly OEM Dodge Rear Crossmember for your vehicle. We focus on giving you a high standard without pushing up the price. Our full selection of genuine factory products comes backed by the original manufacturer's warranty. You'll love our fast delivery, seamless shopping experience, and convenient return policy, saving you all the hassle.
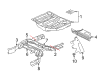
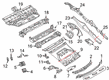
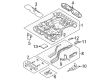
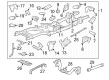
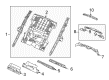
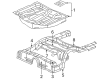
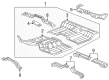
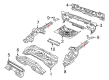
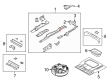
The Dodge Rear Crossmember gripes the back end of the car stiff with the stress of the drive. Dodge started in a shoddy machine shop and soon realized steel could run faster than talk. In 1914, Dodge also introduced the first all-steel body during the production process and created its strength reputation. Dodge continued to stack raw power with HEMI blocks, Viper experiments and new Fratzonic roar which lets electric miles still sound rude. This is muscle business and the company drives the point home using drive modes named Drag, Donut, and Sport yet with a hush-button Stealth mode. Rear Crossmember is located between the suspension rails low and supports the weight of engine and transmission, holds the body together on the bottom and keeps it straight even hit the potholes and the torque is gone hard off the line. Periodic inspections are applied to detect rust prior to the Rear Crossmember weakening and the drivetrain drifting. The construction use of heavy steel allows the Rear Crossmember to enable a better turn-in and a smoother ride to drivers and an added safety margin against frame flex. Control arms and exhaust brackets also mount to its mounting points without any additional weight punishment.
Dodge Rear Crossmember Parts and Q&A
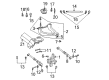
- Q: How to Service and Repair a Rear Crossmember on Dodge Caliber?A:To restore or repair the rear cross-member, start with elbow grease by taking out the park brake shoes and cable from the lever. After that, remove the hair pin clip and disconnect the brake cable from the backing plate. Unbolt (2) to separate the brake line (1) from the trailing arm (3) and follow with removing bolt (1) and clip (2) to take apart brake line (3). Take the wheel speed sensors off the side of the vehicle and keep them away until the crossmember is ready to be removed. Take the rear drive module out via the panel behind the battery boxes if it is part of the vehicle. Next, unscrew the cotter pins, nuts and assemble after doing so. After that, take out the lower strut bolts and the bolts from the trailing link bushings. Use an appropriate lifting device to hold the rear cradle and then take out the bolts to drop the cradle assembly from the vehicle. Take off the nuts from the lower stabilizer link, then take off the bolts from the lower link at the cradle, as well as the two upper bolts still attached to the cradle. Take away the two toe link cam bolts (1) located at both the cradle and the suspension knuckle assemblies. Take out the stabilizer bushing bolts (1) to disconnect the stabilizer bar rod from the cradle.
- Q: How to Service a Rear Crossmember on Dodge Charger?A:The first thing to do when replacing the rear cross-member is to cut off the connection to the battery's negative cable. Lift the vehicle and then disconnect the nuts and assemble the wheels from the rear wheels. Someone should press the brakes so that hub rotation is stopped and then remove the two hub nuts from the half shafts. After that, take off the rear exhaust system and the rear differential. Take out the right side axle half shaft from the hub and bearing, then part the right rear parking brake cable at its connection to the front parking brake cable. Disconnect the left rear parking brake cable by removing the equalizer, leaving the other cable still attached. Separate the screw between the front parking brake cable routing bracket and the front side of the rear crossmember. Take out the J-nut at the same place. Should your car have standard or premium disc brakes, keep the guide pins from rotating and get rid of the brake caliper guide pin bolts, then lift the caliper and pads off the brake adapter, pulling the caliper through the suspension and hanging it above the rear suspension with a bungee cord. To insert pistons into the caliper, only use a trim stick or a similar tool that won't damage the metal. If you have SRT8 disc brakes, wedge the trim stick between the brake pad and the rotor's outside edge to press the pads against each piston until the caliper half of the disc is completely housed. With the transmission jack under the spring link, access the bolt on the brake caliper lower mount, then remove both mounting bolts and the brakes with pads and suspend the assembly. Take the wheel speed sensor connectors out of the wiring harness connector in the luggage pan under the floor and remove the left wheel speed sensor from the clips along the rear of the crossmember. Loosen the lower mounting bolt and nut on both sides of the vehicle, removing the shock absorbers and then mark the positions of the rear crossmember in the sheet metal near each mount hole. Brace the engine cradle with jack stands at its front and then raise a utility jack from under the center of the rear crossmember to secure everything. Disconnect the fuel filler tube and, if there is AWD, keep track of the spacers on either side of the crossmember when removing those bolts. Loosen both sets of bolts that hold the crossmember in place, then slowly lift the vehicle with a jack until the crossmember is at a comfortable height for working. Come off with the bolts holding the stabilizer bar to the stabilizer link and then unscrew the bolts connecting each stabilizer bar cushion retainer to the crossmember, taking out the bar and its attachments. Tackle the retainer fingers by putting a 13mm 12-point box wrench on the cable strand and press down, releasing each folded retainer stage of the parking brake cable, reaching for the coil springs & isolators from the corresponding spring links, with one item on your right and another on your left. Take out the screws holding the parking brake cable routing guide to the crossmember and also remove the J-nuts. When putting on the bolts during installation, check the direction in which you unscrew the fasteners from any rear suspension link when removing them. Remove the bolts holding the spring link to the crossmember and, while blocking the toe adjustment cam bolt, remove the toe link's nut at the crossmember. Move the cam bolt on the toe link backward out of the crossmember and the link, then remove all the bolts and nuts attaching them to the crossmember. In the end, take care to lift up the knuckle with the links and parking brake cable still attached from the rear suspension crossmember and take the crossmember off the jack.