JeepParts
My Garage
My Account
Cart
OEM Dodge Stratus A/C Clutch
Air Conditioning Clutch- Select Vehicle by Model
- Select Vehicle by VIN
Select Vehicle by Model
orMake
Model
Year
Select Vehicle by VIN
For the most accurate results, select vehicle by your VIN (Vehicle Identification Number).
6 A/C Clutches found

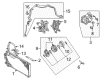
Dodge Stratus Clutch Part Number: MR500339
$74.98 MSRP: $95.05You Save: $20.07 (22%)Ships in 1-2 Business Days
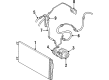
Dodge Stratus Clutch Part Number: 4762849
$102.04 MSRP: $129.36You Save: $27.32 (22%)Ships in 1-2 Business DaysDodge Stratus Clutch Part Number: MR500254

Dodge Stratus Pulley Part Number: MR500233
Dodge Stratus Pulley Part Number: MR460108

Dodge Stratus Repair Kit Part Number: MR315936
Dodge Stratus A/C Clutch
Choose OEM A/C Clutch that meet Dodge factory standards. Dodge designs and tests every component for precision and durability. Each A/C Clutch follows strict manufacturing steps to lock in quality and fit. If your Dodge Stratus matters to you, OEM parts make the smart choice. You'll get the exact look, feel, and performance you expect. Shop genuine Stratus parts at the highly competitive prices online. Enjoy a manufacturer's warranty, a hassle-free return policy, and rapid delivery. No more guesswork with off brands. Get genuine parts with exact fit and true factory performance. Shop with confidence today at JeepPartsDeal.com.
Dodge Stratus A/C Clutch is one of the significant parts of car's air conditioning, widely famous for durability and efficiency on Stratus vehicles manufactured between 1995 and 2005. This A/C Clutch starts functioning by attracting a drum situated in the belt pulley of an A/C compressor and that kind of makes sure the compressor only works when needed, and therefore increasing the efficiency of the vehicle. This A/C clutch is suitable for the sedan type and the coupe type of the Dodge Stratus thus being useful to all Stratus car owners who want to ensure that the A/C system of their car is in the premier conditions it can be in. It plays the nice role of contributing to the A/C system as any failure results to reduced ability to cool thus affecting the comfort of the ride and safety. The Dodge Stratus A/C Clutch can be considered among the outstanding automotive products in the market because of the sturdiness of the component and its ability to be easily installed without causing additional harm to the A/C system. Also, due to the sharp engaging and disengaging switch of the A/C Clutch, the fuel efficiency also helps to be more budget-friendly for the vehicle owners. Because of its effectiveness and efficiency now known to consumers, the Dodge Stratus A/C Clutch even though lies in between the innovations of an automotive vehicle, improve the driving moments while reinforcing the brand of Dodge in creating quality and performing vehicles. All in all, Dodge Stratus A/C Clutch proves the brand's commitment to providing reliable and efficient automobiles for people's safe and comfortable trips.
Dodge Stratus A/C Clutch Parts and Q&A
- Q: How to Service the A/C Clutch on Dodge Stratus?A:The first step for servicing the compressor clutch is to cut off the serpentine belt and disconnect the cable with the minus sign on the battery. Unplug the coil wire harness from the clutch of the compressor and remove all the compressor bolts. Hold the compressor as you take it out of the bracket. Hold the clutch plate in place using a Spanner Wrench (kit #6460 or similar), then remove the nut with a regular wrench. After that, use a Puller (6461 or the same type) to get the clutch plate out and remove the compressor clutch shims. After that, take out the snap ring on the front housing with snap ring pliers. Slide the Rotor Puller (6141-1 or similar) into the outer snap ring hole and then put the Shaft Protector (6141-2 or equivalent) on the shaft. Insert Puller Bolts (6461) or an equal number, through the puller flange and the jaws of the rotor puller and tighten them. Then, turn the puller center bolt clockwise to release the rotor pulley. Pull out the screw and retainer from the clutch coil at the front of the compressor. Also, remove the snap ring from the compressor hub and take off the clutch field coil. During installation, attach the clutch field coil and snap ring, then fit the clutch's wire harness retaining clip on the front of the compressor and tighten the screw. Set the rotor assembly in the front so it is level with the compressor housing hub and attach the pulley bearing assembly using an Installer (6871 or similar), turning the nut until it is well fitted into place. Attach the snap ring outside of the main shaft, so the bevel is showing and it stays seated, to keep the clutch and compressor safe. Reattach the compressor to the vehicle with the original clutch shims on the compressor shaft and then use a Driver (6463 or like) to put on the clutch plate and tighten the shaft nut to 14.4 Nm (10.5 ft. lbs.). To determine if the clutch meets the specification, use a feeler gauge inserted in the air gap and add or remove shims as needed, with a range of 0.41 - 0.79 mm (0.016 - 0.031 in.). Make gentle taps or slight pressure if the air gap varies. During a clutch installation on a compressor that didn't have one, use the provided shims of 1.0, 0.50 and 0.13 mm (0.040, 0.020 and 0.005 in.). Place the compressor on the mounting bracket, tighten its bolts to 41 Nm (30 ft. lbs.), put in the clutch harness, replace the serpentine Drive Belt and reattach the negative Battery Cable. Begin the engine, put the A/C system to ON, operate the engine between 1500 and 2000 rpm with the blower on high and cycle the clutch 20 times (5 seconds ON, 5 seconds OFF), as this is only necessary for a new clutch.
- Q: How to Maintain the A/C Clutch on Dodge Stratus?A:Before dealing with the A/C compressor clutch, first separate the battery power cable, remove the accessory Drive Belt and raise the car. Take the wire harness connector off the clutch field coil on the A/C system, remove the bolts securing the compressor to the bracket and carefully pull it out while supporting it. Grab your compressor clutch holding fixture (Kit 9349's Special Tool 9351) to keep the clutch stationary and unfasten the clutch bolt. The clutch plate is easy to remove either with your hands or using an 8 x 1.25 mm screw. Pull out the clutch shims and take off the snap ring that fits shell of the pulley and bearing assembly with a set of snap ring pliers. The assembly of the pulley and bearing can be taken out with your hands or a two jaw puller if required. After that, separate the screw at the clutch coil wire harness connector bracket and remove the clutch field coil using the compressor corrosive coil remover (Special Tool 9354 in Kit 9349) and a two jaw puller. While installing the clutch field coil, match the tab on the rear of the coil to the circle on the front of the compressor housing and secure the wire harness connection. Installing the clutch field coil should be done with the compressor field coil installer (9352 in Kit 9349), the included special spacer (9353 in Kit 9349) and a two jaw puller. Secure it with a screw tightened to 2 N.m (17 in. lbs.). Slide the pulley and bearing assembly into place on the compressor front hub, then hit it with the clutch pulley installer (Special Tool 9355 in Kit 9349) to push it firmly against the housing. Ensure that the part with the bevel faces out and then push the snap ring all the way in the groove. Ensure the wire of the clutch field coil does not touch the clutch pulley and add original shims or the suggested 1.0, 0.50 and 0.13 millimeter (0.040, 0.020 and 0.005 inch) shims as needed. Attach the clutch shims on the shaft and then put the clutch plate and bolt on, using the compressor clutch holding fixture (9351 in Kit 9349)-tighten the bolt to 13 N.m (115 in. lbs.). Apply a feeler gauge to measure the clutch air gap and use shims to ensure it is within 0.35 and 0.75 millimeter (0.014 and 0.030 inch), depending on the specification. Hold the compressor on the mounting bracket, fasten it with bolts tightened to 28 N.m (20 ft. lbs.) and reattach the wire harness to the compressor clutch field coil connector. Bring the car down completely, replace the accessory drive belt, hook up the negative Battery Cable and go through the C Break-in Procedure.


Related Dodge Stratus Parts
 Dodge Stratus Blower Motor Resistor
 Dodge Stratus Blend Door Actuator
 Dodge Stratus A/C Accumulator
 Dodge Stratus A/C Compressor
 Dodge Stratus A/C Compressor Cut-Out Switches
 Dodge Stratus A/C Condenser
 Dodge Stratus A/C Hose
 Dodge Stratus A/C Service Cap
 Dodge Stratus A/C System Valve Core
 Dodge Stratus Blower Motor
 Dodge Stratus Evaporator
 Dodge Stratus HVAC Pressure Switch