JeepParts
My Garage
My Account
Cart
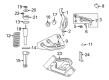
OEM Jeep Liberty Shock Absorber
Suspension Shock Absorber- Select Vehicle by Model
- Select Vehicle by VIN
Select Vehicle by Model
orMake
Model
Year
Select Vehicle by VIN
For the most accurate results, select vehicle by your VIN (Vehicle Identification Number).
8 Shock Absorbers found

Jeep Liberty Shock Absorber, Front Part Number: 52088650AH
$82.73 MSRP: $182.00You Save: $99.27 (55%)Ships in 1-2 Business Days
Jeep Liberty Shock Absorber, Rear Part Number: 52125094AG
$72.75 MSRP: $109.00You Save: $36.25 (34%)Ships in 1-2 Business Days
Jeep Liberty Shock Absorber, Front Part Number: 68155259AC
$178.40 MSRP: $270.00You Save: $91.60 (34%)Ships in 1-2 Business Days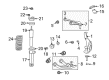
Jeep Liberty Shock Absorber, Front Part Number: 68031298AC
$128.03 MSRP: $190.00You Save: $61.97 (33%)Jeep Liberty Shock Absorber, Front Part Number: 52088650AC
Jeep Liberty Shock Absorber, Rear Part Number: 52125094AC
Jeep Liberty Shock Absorber, Rear Part Number: 68052690AB

Jeep Liberty Shock Absorber, Front Part Number: 68046314AD
Jeep Liberty Shock Absorber
Choose OEM Shock Absorber that meet Jeep factory standards. Jeep designs and tests every component for precision and durability. Each Shock Absorber follows strict manufacturing steps to lock in quality and fit. If your Jeep Liberty matters to you, OEM parts make the smart choice. You'll get the exact look, feel, and performance you expect. Shop genuine Liberty parts at the highly competitive prices online. Enjoy a manufacturer's warranty, a hassle-free return policy, and rapid delivery. No more guesswork with off brands. Get genuine parts with exact fit and true factory performance. Shop with confidence today at JeepPartsDeal.com.
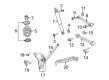
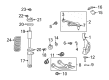
The Shock absorber in Jeep Liberty car models are an important part of the suspension system which is aimed at reducing too much bouncing of the car and makes the ride more comfortable. The Shock Absorber generates heat from the kinetic energy it receives and uses hydraulic means to alleviate shock impulses in order to increase maneuverability on difficult terrains. Jeep Liberty over the years has incorporated in its products different kinds of Shock Absorbers, these are the twin tube and mono tube types. Twin-tube shocks can be found often, they are very simple and can be gas charged for increased sturdiness. As for the shocks, mono-tube ones have better heat transfer and work better, accepting the multiaxial mounting. Other enhancements are Position Sensitive Damping (PSD) and Acceleration Sensitive Damping (ASD) that increase the car's performance and demonstrate the development of the Jeep Liberty's suspension systems.
Jeep Liberty Shock Absorber Parts and Q&A
- Q: How to Maintain the Left Side Shock Absorber on Jeep Liberty?A:Before servicing the shock on the left side, disconnect the battery, take it out with the Battery Tray and move the power center aside after unclipping it. Unplug the battery temperature sensor from the battery tray and take out the four upper nuts that keep the shock in place. Lift and hold up the vehicle, remove the left tire and disconnect the left wheel from the vehicle. After that, get rid of the lower bolt for the clevis bracket at the lower control, then take out the stabilizer link and the low Ball Joint nut. To remove the lower ball joint from the lower Control Arm, use C-4150A and then lower the control arm for access underneath that area. After removing the clevis bracket from the shock, pull the shock assembly out of the vehicle and take the spring out if you need to. For installation, if the old spring is removed, put it onto the shock, replace the shock assembly into the vehicle and tighten the four top mounting nuts on the shock to 108 Nm (80 ft. lbs.). Secure the clevis bracket to the bottom of the shock using a 65 ft/lb tightness. Insert the lower control arm into place, tighten its lower ball joint nut with 63 ft/lb or 81 Nm torque and lower the arm at the end. Clevis bracket the lower control arm, making sure the bolt is tightened to 150 Nm (110 ft. lbs.), then move on to stabilize link at the lower control arm, tightening that bolt to 136 Nm (100 ft. lbs.). Reattach the left wheel assembly and the tire, lift the vehicle back up, connect the battery temperature sensor, place the battery in the tray and connect the batteries.
- Q: How to Service and Repair a Shock Absorber on the Front Left Side on Jeep Liberty?A:At the start, turn off the car and pull out the battery, then remove the clip on the power center and put it somewhere safe and then slide out and disconnect the battery temperature sensor. On the left, take out the upper four shock mounting nuts, lift and support the vehicle and remove the left tire and wheel assembly. Wipe away any dirt or fluid from the mounting area of the lower Ball Joint, removing the bottom bolt connecting the lower Control Arm, stabilizer link and clevis bracket using C-4150A. Release the control arm by rotating it downward, remove the clevis bracket at the shock and release the shock assembly, if the spring isn't easily removed, take it out. Start by unplugging the air box on the right. After that, grab and take off two nuts that secure the cruise control servo, then remove the upper shock mounts. Raise your vehicle, secure it and then take off the side tire assembly. Next, unscrew the lower bolt holding the controls securing the bracket and shocks, remove the brake assembly and use Tool C-4150A to separate the ball joint from the control arm. To get to the clamp bracket, rotate the lower control arm downward, then unbolt the bracket at the shock and remove both. On the left side, join the spring back to the shock (if possible), add the shock assembly to the car, then fit and tighten the four upper nuts for the shock mounting to 108 Nm (80 ft. lbs.). Mount the clevis bracket at the shock, secure the bolt with 88 Nm (65 ft. lbs.), place the lower control arm upward, attach its lower ball joint nut and secure it with 81 Nm (60 ft. lbs.) of tightening. Put the clevis bracket onto the lower control arm and make sure the bolt is tightened with 150 Nm (110 ft. lbs.), then install the lower stabilizer link at the control arm and tighten the bolt with 136 Nm (100 ft. lbs.). Replace the left side tire and wheel, place the vehicle on level ground, attach the Battery Sensor wire, set the Battery Tray into the mount, add the battery and hook back up the battery cables. To install the shock on the right side, add the spring next and then place the shock to the vehicle and attach the four shock upper nuts, tightening them to 108 Nm (80 ft. lbs.). Attach the clevis bracket on the shock, tightening the bolt up to 88 Nm (65 ft. lbs.), fit the lower control arm in place, secure it with the ball joint nut and tighten that nut up to 81 Nm (60 ft. lbs.). Tighten up the clevis bracket at the lower control arm to 150 Nm (110 ft. lbs.) and mount the lower stabilizer link at the same point, fastening the bolt firmly at 136 Nm (100 ft. lbs.). After that, replace the tire and wheel assembly, position the vehicle properly, fasten the cruise control servo mounting bolts and drop the airbox into place.

Related Jeep Liberty Parts
 Jeep Liberty Ball Joint
 Jeep Liberty Control Arm
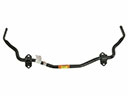 Jeep Liberty Sway Bars
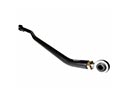 Jeep Liberty Track Bar
 Jeep Liberty Wheel Bearing
 Jeep Liberty Wheel Hub
 Jeep Liberty Axle Beam Mount
 Jeep Liberty Axle Support Bushings
 Jeep Liberty Control Arm Bushing
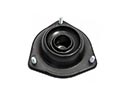 Jeep Liberty Strut Mounts
 Jeep Liberty Sway Bar Bushing
 Jeep Liberty Sway Bar Link Bushing