JeepParts
My Garage
My Account
Cart
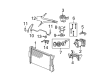
OEM 2000 Dodge Dakota A/C Clutch
Air Conditioning Clutch- Select Vehicle by Model
- Select Vehicle by VIN
Select Vehicle by Model
orMake
Model
Year
Select Vehicle by VIN
For the most accurate results, select vehicle by your VIN (Vehicle Identification Number).
3 A/C Clutches found


2000 Dodge Dakota Clutch & Pulley Part Number: 5015314AA
Product Specifications- Other Name: Clutch - A/C Compressor; A/C Compressor Clutch; Clutch; Clutch A/C Compressor
- Item Weight: 4.90 Pounds
- Item Dimensions: 6.6 x 6.6 x 2.2 inches
- Condition: New
- Fitment Type: Direct Replacement
- SKU: 5015314AA
- Warranty: This genuine part is guaranteed by Mopar's factory warranty.
2000 Dodge Dakota Clutch & Pulley Part Number: 4882008
Product Specifications- Other Name: Clutch - A/C Compressor; A/C Compressor Clutch; Clutch Coil; Clutch; Clutch A/C Compressor
- Item Weight: 6.00 Pounds
- Item Dimensions: 6.8 x 6.6 x 2.1 inches
- Condition: New
- Fitment Type: Direct Replacement
- SKU: 4882008
- Warranty: This genuine part is guaranteed by Mopar's factory warranty.
2000 Dodge Dakota Clutch & Pulley Part Number: 5016126AA
Product Specifications- Other Name: Clutch - A/C Compressor; A/C Compressor Clutch; Clutch; Compressor; Clutch A/C Compressor
- Item Weight: 6.50 Pounds
- Condition: New
- Fitment Type: Direct Replacement
- SKU: 5016126AA
- Warranty: This genuine part is guaranteed by Mopar's factory warranty.
2000 Dodge Dakota A/C Clutch Parts and Q&A
- Q: How to Service and Repair an A/C Clutch on 2000 Dodge Dakota?A: First, shut off the battery power by removing its negative link and take off all the belts connected to the compressor clutch. Elsewhere, you'll need to remove the attachment between the compressor clutch coil wire harness and the pump's clutch plate, then use Special Tool 6462 to hold the plate steady. Unscrew the clutch plate, then get rid of the shims and afterward remove the snap ring securing the front housing. Put the lip of Special Tool C-6141-1 from Kit 6460 into the snap ring groove and cover it with Special Tool C-6141-2 as a shaft cover. Set C-6461 to the special tool, mount through its bolts to the rotor puller and fully tighten the connection. Then, rotate the puller center bolt clockwise until the rotor pulley is removed. Unscrew and take out the screw and retainer from the clutch coil lead wire harness in the front housing of the compressor and next remove the snap ring from the compressor hub. Inspect if there are any problems with the clutch pulley and front plate and change them if the wear or scoring is too much. If the shaft and nose are oily and the front cover felt is soaked with oil, the seal is failing and the compressor should be replaced. If there's any roughness or leaking manage, remove the pulley and replace it. Install the clutch field coil and snap ring and then connect the cut end of the clutch coil lead wire harness to the retaining clip on the compressor front. Place the rotor assembly against the front compressor housing hub and connect the Special Tool 6464 handle to Special Tool 6143, placing the driver tool assembly into the bearing cavity of the rotor on the inner race. Guide the rotor to the end of the driver and press the handle once the rotor bottoms against the front housing hub. Make sure the bevel side of the snap ring on the outside of the external front rotor is facing toward the outside. Set the original clutch shims on the compressor shaft and push the clutch plate using the shaft protector to tap it down until it also bottoms against the shims while listening for sound changes. Install the compressor shaft hex nut and make sure it's tightened to 14.4 Nm (10.5 ft. lbs.). Insert a feeler gauge in the space between the flywheel and pressure plate and make any required shim changes to fit the requirement of 0.41 to 0.79 millimeters (0.016 to 0.031 inches). If some of the air pocket isn't even, use a small tool to gently pop or tap the filling so it becomes even. After you have installed the unit, run the clutch (ON for five seconds, OFF for five seconds) approximately twenty times, setting the heater-A/C control on recirculation, the blower motor on its highest speed and the engine between 1500 and 2000 rpm.
Related 2000 Dodge Dakota Parts
 2000 Dodge Dakota Blower Motor Resistor
 2000 Dodge Dakota Blend Door Actuator
 2000 Dodge Dakota Blower Motor
 2000 Dodge Dakota Heater Core
 2000 Dodge Dakota A/C Accumulator
 2000 Dodge Dakota A/C Compressor
 2000 Dodge Dakota A/C Compressor Cut-Out Switches
 2000 Dodge Dakota A/C Condenser
 2000 Dodge Dakota A/C Hose
 2000 Dodge Dakota Evaporator
 2000 Dodge Dakota HVAC Pressure Switch