JeepParts
My Garage
My Account
Cart
OEM 2000 Jeep Wrangler Dimmer Switch
Light Dimmer Switch- Select Vehicle by Model
- Select Vehicle by VIN
Select Vehicle by Model
orMake
Model
Year
Select Vehicle by VIN
For the most accurate results, select vehicle by your VIN (Vehicle Identification Number).
1 Dimmer Switch found


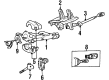
2000 Jeep Wrangler Turn Signal Switch Part Number: 56010315AA
Product Specifications- Other Name: Switch - Multifunction; Multi Purpose Switch; Signal Switch; Multifunction Left Stalk for Interior/Exterior Lights & Turn Signal Controls.
- Item Weight: 0.80 Pounds
- Item Dimensions: 4.0 x 5.5 x 7.9 inches
- Condition: New
- Fitment Type: Direct Replacement
- SKU: 56010315AA
- Warranty: This genuine part is guaranteed by Mopar's factory warranty.
2000 Jeep Wrangler Dimmer Switch Parts and Q&A
- Q: How to Service and Repair a Dimmer Switch on 2000 Jeep Wrangler?A: You should first connect the battery negative cable to remove power from the system so you can service or repair the turn signal switch. Take out the knee blocker from the panel and then get rid of the three screws connecting the lower steering shroud to the upper one. If the steering column doesn't tilt, loosen the upper steering column mounting nuts; for tilt steering, move it all the way down. Eliminate each protective covering from the top and bottom of the steering column. Next, get rid of the two screws fastening the multi-function switch water shield and bracket to the steering column top and finally the screw under the switch control stalk. Pull on the lower supporting tab of the multi-function switch water shield bracket to get the screw boss underneath the control stalk clear of any interference. Push the multi-function switch to the left side of the steering column down to bring out the water shield and bracket. After that, pull the tilt release lever for extra space to locate the two wire harness panels. Remove the multi-function switch and water shield as a complete unit after unplugging the harness connectors on the instrument panel from the multi-function switch connector receptacles. Apply the water shield to the switch and set the multi-function switch and water shield each beside its mounting location on the steering column. Plug the two wire harness connectors back together, place the multi-function switch on its mounts and lift the tilt release lever if necessary. Place the lower tab of the water shield bracket against the boss directly below the control stalk, attach the screw on the stalk and tighten it to 1.1 Nm (10 in. lbs., then install and tighten the top screws and two at the top of the steering column to 2.2 Nm (20 in. lbs.). Slide the upper and lower shrouds onto the steering column and attach them with three 2 Nm (18 in. lbs.) screws. If required, turn the two nuts attaching the non-tilt upper column mount to the dash panel column bracket studs to reach 22 Nm (200 in. lbs.) torque. After all that, attach the knee blocker to the instrument panel and restore the power by reconnecting the battery's negative cable.
Related 2000 Jeep Wrangler Parts
 2000 Jeep Wrangler Clock Spring
 2000 Jeep Wrangler Ignition Switch
 2000 Jeep Wrangler Headlight Switch
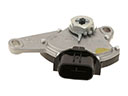 2000 Jeep Wrangler Neutral Safety Switch
 2000 Jeep Wrangler Brake Light Switch
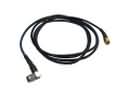 2000 Jeep Wrangler Antenna Cable
 2000 Jeep Wrangler Ignition Lock Cylinder
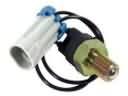 2000 Jeep Wrangler Back Up Light Switch
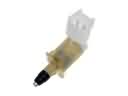 2000 Jeep Wrangler Door Jamb Switch
 2000 Jeep Wrangler Ignition Lock Assembly
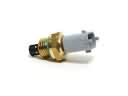 2000 Jeep Wrangler Intake Manifold Temperature Sensor
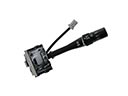 2000 Jeep Wrangler Wiper Switch