JeepParts
My Garage
My Account
Cart
OEM 2006 Jeep Grand Cherokee Brake Booster
Brake Power Booster- Select Vehicle by Model
- Select Vehicle by VIN
Select Vehicle by Model
orMake
Model
Year
Select Vehicle by VIN
For the most accurate results, select vehicle by your VIN (Vehicle Identification Number).
1 Brake Booster found


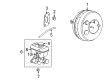
2006 Jeep Grand Cherokee Brake Booster Part Number: 5175731AA
Product Specifications- Other Name: Booster - Power Brake; Power Brake Booster; Power Booster; Booster Power Brake
- Item Weight: 11.30 Pounds
- Item Dimensions: 15.8 x 12.4 x 12.0 inches
- Condition: New
- Fitment Type: Direct Replacement
- SKU: 5175731AA
- Warranty: This genuine part is guaranteed by Mopar's factory warranty.
2006 Jeep Grand Cherokee Brake Booster Parts and Q&A
- Q: How to Service and Repair a Brake Booster on 2006 Jeep Grand Cherokee?A: Before servicing or repairing the power brake booster, empty the master cylinder, disconnect its primary line and then remove the primary line from the HCU (4). Next, take out the remaining brake line from the master cylinder and from the HCU (4), release the 4 chassis lines from the HCU (3) and pull out the HCU electrical connector (5). Take out the 3 nuts from inside the HCU bracket on the HCU (1) as well as the whole HCU and the bracket. Remove the connector (9) from the brake fluid level sensor and take off the 2 mounting nuts (8) on the master cylinder to remove it (6) from the brackets. Unhook the vacuum hose from the booster check valve (10), come out the hush panel (2) along with the steering column opening cover. Briefly remove the clip that holds the booster push rod (1) to the pedal pin (2) and glide the push rod off the pin, away from the pedal. Take out the brake lamp switch by removing the power wire connector from the switch. Unscrew all four bolts that hold the booster to the dash panel, after which you'll find three clips on the wire harness and must unclip them. With the harness moved aside, you can detach the booster and take it out. Before you install the booster, look at the check valve grommet in the booster and change it if it appears damaged. Set in a new booster dash seal, position and hold the booster in place using the two mounting holes and apply Mopar multi-mileage grease to the pedal pin. Join the booster to the studs with its attaching nuts, then tighten them to 39 Nm (29 ft. lbs.) by hand. Place the booster push rod (1) onto the end of the pedal pin, then attach it with the retainer clip. Attach the new switch to the brake lamp and once again connect the electrical connector and then install the steering column opening cover and the hush panel. Attach the vacuum hose to the booster check valve (1) and put the master cylinder in the power brake booster (1) with a new gasket and nuts. Feed the rewired wire harness back into place, fasten the routing clip (3) and plug the electrical connector for the brake fluid level (9). Fit the HCU (1) with the bracket (2) to the car's body and tighten the 2 mounting nuts, reconnect the HCU electrical cable (5) and install 4 chassis lines (3) into the HCU (4). Now, secure the secondary brake line to the HCU (4), attach the secondary brake line at the master cylinder, attach the primary brake line at the HCU and also put the primary brake line to the master cylinder, only after that start bleeding the system.
Related 2006 Jeep Grand Cherokee Parts
 2006 Jeep Grand Cherokee Brake Pad
 2006 Jeep Grand Cherokee ABS Control Module
 2006 Jeep Grand Cherokee Brake Dust Shield
 2006 Jeep Grand Cherokee Brake Line
 2006 Jeep Grand Cherokee Speed Sensor
 2006 Jeep Grand Cherokee Brake Caliper
 2006 Jeep Grand Cherokee Brake Caliper Bolt
 2006 Jeep Grand Cherokee Brake Caliper Bracket
 2006 Jeep Grand Cherokee Brake Disc
 2006 Jeep Grand Cherokee Hydraulic Hose
 2006 Jeep Grand Cherokee Wheel Stud
 2006 Jeep Grand Cherokee Yaw Sensor