JeepParts
My Garage
My Account
Cart
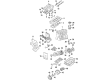
OEM 2006 Jeep Liberty Crankshaft Seal
- Select Vehicle by Model
- Select Vehicle by VIN
Select Vehicle by Model
orMake
Model
Year
Select Vehicle by VIN
For the most accurate results, select vehicle by your VIN (Vehicle Identification Number).
3 Crankshaft Seals found


2006 Jeep Liberty Rear Main Seal Part Number: 5066756AA
$85.25 MSRP: $93.20You Save: $7.95 (9%)Ships in 1-2 Business DaysProduct Specifications- Other Name: Crankshaft Oil; Crankshaft Seal; Seal Crankshaft Oil Rear
- Item Weight: 0.90 Pounds
- Item Dimensions: 6.0 x 5.9 x 0.9 inches
- Condition: New
- Fitment Type: Direct Replacement
- SKU: 5066756AA
- Warranty: This genuine part is guaranteed by Mopar's factory warranty.


2006 Jeep Liberty Rear Main Seal Part Number: 53020788AB
$32.63 MSRP: $48.35You Save: $15.72 (33%)Product Specifications- Other Name: Seal - Crankshaft Oil; Engine Crankshaft Seal, Rear; Crankshaft Seal; Seal Crankshaft Bearing Oil; Seal Crankshaft Oil Rear; Engine Crankshaft Seal
- Position: Rear
- Replaces: 68045792AA
- Item Weight: 0.70 Pounds
- Item Dimensions: 1.0 x 5.1 x 5.3 inches
- Condition: New
- Fitment Type: Direct Replacement
- SKU: 53020788AB
- Warranty: This genuine part is guaranteed by Mopar's factory warranty.


2006 Jeep Liberty Oil Seal, Front Part Number: 53021313AA
$10.49 MSRP: $15.00You Save: $4.51 (31%)Product Specifications- Other Name: Seal - Crankshaft Oil; Engine Crankshaft Seal, Front; Timing Cover Gasket; Timing Cover Seal; Crankshaft Seal; Front Crank Seal; Timing Cover Oil Seal; Engine Crankshaft Seal.
- Position: Front
- Item Weight: 1.40 Pounds
- Item Dimensions: 0.6 x 3.2 x 3.1 inches
- Condition: New
- Fitment Type: Direct Replacement
- SKU: 53021313AA
- Warranty: This genuine part is guaranteed by Mopar's factory warranty.
2006 Jeep Liberty Crankshaft Seal Parts and Q&A
- Q: How to Service and Repair a Front Crankshaft Seal on 2006 Jeep Liberty?A: Start by taking out the battery's accessory drive belt and disconnecting its negative cable to service and repair the front crankshaft seal. Now, remove the A/C compressor securing bolts and keep them saved, next empty the cooling system and disconnect the hose from the upper radiator. The next step is to disconnect the fan electrical connector within the radiator shroud, then remove both the fasteners around the shroud and the shroud and cooling fan. After removing the damper bolt with Special Tool 8513, fit Special Tool 1026 Three Jaw Puller and slowly pull the damper out. Special Tool 8511 can be used to pull out the crankshaft front seal. Before installing, thoroughly clean the damper bore and the crankshaft nose so no damage occurs. Now use Special Tools 8348 and 8512 to fit the crankshaft front seal in place and proceed to fit the vibration damper. Attach the radiator cooling fan and its shroud, the upper hose and A/C compressor. Then tighten the screws to 54 Nm (40 ft. lbs.). Then put in the additional accessory drive belt, finish refilling the coolant and securely reconnect the negative cable to the battery.
Related 2006 Jeep Liberty Parts
 2006 Jeep Liberty Cylinder Head
 2006 Jeep Liberty Oil Pan Gasket
 2006 Jeep Liberty Timing Belt
 2006 Jeep Liberty Timing Chain
 2006 Jeep Liberty Cam Gear
 2006 Jeep Liberty Crankshaft
 2006 Jeep Liberty Dipstick
 2006 Jeep Liberty Exhaust Valve
 2006 Jeep Liberty Lash Adjuster
 2006 Jeep Liberty Piston Ring Set
 2006 Jeep Liberty Timing Cover
 2006 Jeep Liberty Valve Stem Seal