JeepParts
My Garage
My Account
Cart
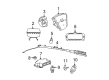
OEM 2007 Dodge Nitro Air Bag Sensor
Air Bag Impact Sensor- Select Vehicle by Model
- Select Vehicle by VIN
Select Vehicle by Model
orMake
Model
Year
Select Vehicle by VIN
For the most accurate results, select vehicle by your VIN (Vehicle Identification Number).
2 Air Bag Sensors found


2007 Dodge Nitro Air Bag Sensor, Front Part Number: 4896061AB
$82.51 MSRP: $124.00You Save: $41.49 (34%)Product Specifications- Other Name: Sensor - Impact; Air Bag Impact Sensor, Front, Rear; Impact Sensor; Front Impact Sensor; Front Sensor; Side Impact Sensor; Side Sensor; Sensor Impact C Pillar; Sensor Impact
- Position: Front
- Replaces: 4672311AA, 52851601AB, 4896061AA
- Item Weight: 0.40 Pounds
- Item Dimensions: 1.2 x 1.4 x 2.6 inches
- Condition: New
- Fitment Type: Direct Replacement
- SKU: 4896061AB
- Warranty: This genuine part is guaranteed by Mopar's factory warranty.

2007 Dodge Nitro Impact Sensor, Outer Part Number: 4896065AB
$194.09 MSRP: $282.00You Save: $87.91 (32%)Ships in 1-2 Business DaysProduct Specifications- Other Name: Sensor - Impact; Air Bag Impact Sensor, Outer; Air Bag Sensor; Side Impact Sensor; Side Sensor; Sensor Impact
- Position: Outer
- Replaces: 4896065AA
- Item Weight: 0.40 Pounds
- Item Dimensions: 2.5 x 1.2 x 1.0 inches
- Condition: New
- Fitment Type: Direct Replacement
- SKU: 4896065AB
- Warranty: This genuine part is guaranteed by Mopar's factory warranty.
2007 Dodge Nitro Air Bag Sensor Parts and Q&A
- Q: How to Safely Service and Install an Air Bag Sensor on 2007 Dodge Nitro?A: To service the front impact sensor, first cut the system off by disconnecting and isolating the vehicle's negative battery terminal and waiting several minutes for the capacitor in the air bag system to discharge. Be careful not to hit or drop the front impact sensor, as this could lead to either damage or wrong calibration; you must replace the sensor if it falls. To get to the right front impact sensor, first remove the air filter housing; to reach the left front impact sensor, lift the vehicle and unfasten the access plug from the left front wheel house liner. Put the right or left front impact sensor into the engine compartment and plug the jumper wire harness back into the sensor connector receptacle or into the body wire harness. Attach the sensor to the stud at the back of the front end module carrier, with the anti-rotation pin in its clearance notch and the connector receptacle downward. Screw the sensor onto the stud using a torque of 8 Nm (71 in. lbs.). Do not attach the negative side of the battery until the supplemental restraint system verification test is finished following any repair to its components.
Related 2007 Dodge Nitro Parts
 2007 Dodge Nitro Clock Spring
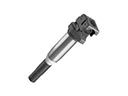 2007 Dodge Nitro Ignition Coil
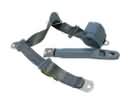 2007 Dodge Nitro Seat Belt
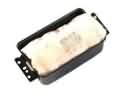 2007 Dodge Nitro Air Bag
 2007 Dodge Nitro Air Bag Control Module
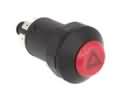 2007 Dodge Nitro Hazard Warning Switch
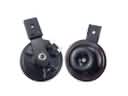 2007 Dodge Nitro Horn
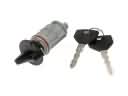 2007 Dodge Nitro Ignition Lock Assembly
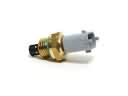 2007 Dodge Nitro Intake Manifold Temperature Sensor
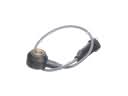 2007 Dodge Nitro Knock Sensor
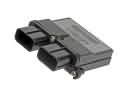 2007 Dodge Nitro Occupant Detection Sensor
 2007 Dodge Nitro Relay