JeepParts
My Garage
My Account
Cart
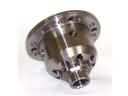
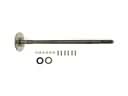
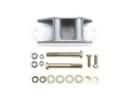
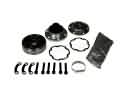
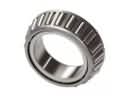
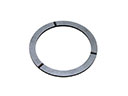
OEM Dodge CV Boot
Axle Boot- Select Vehicle by Model
- Select Vehicle by VIN
Select Vehicle by Model
orMake
Model
Year
Select Vehicle by VIN
For the most accurate results, select vehicle by your VIN (Vehicle Identification Number).
66 CV Boots found


Dodge Outer Boot Part Number: 68193955AA
$91.51 MSRP: $228.00You Save: $136.49 (60%)Ships in 1-2 Business DaysProduct Specifications- Other Name: Boot Package - Half Shaft; CV Boot; Boot Kit Half Shaft Outer


Dodge Outer Boot Part Number: 5066025AB
$51.44 MSRP: $112.00You Save: $60.56 (55%)Ships in 1-2 Business DaysProduct Specifications- Other Name: Boot Package - Half Shaft; CV Boot; Outer Boot Kit; Boots; Boot Kit Half Shaft Outer


Dodge Outer CV Joint Boot, Rear Part Number: 68267183AA
$56.68 MSRP: $124.00You Save: $67.32 (55%)Ships in 1-3 Business DaysProduct Specifications- Other Name: Boot Kit - Half Shaft; CV Joint Boot Kit, Rear Outer; CV Boot; Outer Boot; Boot; Boot Kit Half Shaft
- Position: Rear Outer


Dodge Boot Kit, Front Outer Passenger Side Part Number: 5170821AA
$74.37 MSRP: $114.00You Save: $39.63 (35%)Ships in 1-2 Business DaysProduct Specifications- Other Name: Boot Package - Half Shaft; CV Joint Boot Kit, Front Left Outer, Front Outer, Front Right Outer; CV Boot; Outer Boot; Boots; Boot Kit Half Shaft Outer
- Position: Front Outer Passenger Side


Dodge Inner CV Joint Boot, Rear Part Number: 68267180AA
$39.15 MSRP: $58.30You Save: $19.15 (33%)Ships in 1-2 Business DaysProduct Specifications- Other Name: Boot Kit - Half Shaft; CV Joint Boot Kit, Rear Inner; CV Boot; Inner Boot; Inner Joint Assembly; Boot Kit Half Shaft
- Position: Rear Inner


Dodge Boot Kit, Rear Outer Driver Side Part Number: 5014914AA
$34.62 MSRP: $43.89You Save: $9.27 (22%)Ships in 1-2 Business DaysProduct Specifications- Other Name: Boot - Half Shaft; CV Joint Boot Kit, Rear Left Outer, Rear Right Outer; Outer Boot; Boots; Boot Kit Half Shaft Outer Left And Right; Boot Kit Half Shaft Outer
- Position: Rear Outer Driver Side


Dodge Inner Boot Part Number: 5014912AA
$61.33 MSRP: $86.75You Save: $25.42 (30%)Ships in 1-2 Business DaysProduct Specifications- Other Name: Boot - Half Shaft; CV Boot; Boot Kit Half Shaft Inner

Dodge Inner Boot Part Number: 68193959AA
$57.86 MSRP: $210.00You Save: $152.14 (73%)Ships in 1-2 Business DaysProduct Specifications- Other Name: Boot Package - Half Shaft; CV Boot; Boot Kit Half Shaft Inner
Dodge Inner Boot Part Number: 68193957AA
$86.78 MSRP: $204.00You Save: $117.22 (58%)Ships in 1-2 Business DaysProduct Specifications- Other Name: Half Shaft; CV Boot; Boot Kit Half Shaft Inner
Dodge Inner Boot Part Number: 68193956AA
$59.85 MSRP: $132.00You Save: $72.15 (55%)Ships in 1-2 Business DaysProduct Specifications- Other Name: Boot Package - Half Shaft; CV Boot; Boot Kit Half Shaft Inner

Dodge Inner Boot, Front Driver Side Part Number: 5142216AA
$77.83 MSRP: $119.00You Save: $41.17 (35%)Ships in 1-2 Business DaysProduct Specifications- Other Name: Boot Kit - Half Shaft; CV Joint Boot Kit, Front Left Inner, Front Right Inner; CV Boot; Boots; Boot Kit Half Shaft
- Position: Front Inner Driver Side

Dodge Outer Boot, Front Passenger Side Part Number: 5142215AA
$69.46 MSRP: $105.00You Save: $35.54 (34%)Ships in 1-2 Business DaysProduct Specifications- Other Name: Boot Kit - Half Shaft; CV Joint Boot Kit, Front Left Outer, Front Right Outer; CV Boot; Boots; Boot Kit Half Shaft
- Position: Front Outer Passenger Side

Dodge Inner CV Joint Part Number: 68324724AA
$221.89 MSRP: $332.00You Save: $110.11 (34%)Ships in 1-2 Business DaysProduct Specifications- Other Name: Boot Kit - Half Shaft; Inner Boot

Dodge Inner Boot Part Number: 5161608AA
$55.34 MSRP: $80.10You Save: $24.76 (31%)Ships in 1-2 Business DaysProduct Specifications- Other Name: Boot Package - Half Shaft; CV Boot; Boot Kit Half Shaft Inner
Dodge Outer Boot Part Number: 68193958AA
$90.92 MSRP: $129.00You Save: $38.08 (30%)Ships in 1-2 Business DaysProduct Specifications- Other Name: Boot Package - Half Shaft; CV Boot; Boot Kit Half Shaft Outer

Dodge Inner Boot Part Number: 5066024AA
$109.72 MSRP: $117.00You Save: $7.28 (7%)Ships in 1-2 Business DaysProduct Specifications- Other Name: Boot Package - Half Shaft; CV Boot; Inner Boot Kit; Boot Kit Half Shaft Inner
Dodge Inner Boot Part Number: 5014913AA
$43.02 MSRP: $55.38You Save: $12.36 (23%)Product Specifications- Other Name: Boot Kit - Half Shaft; CV Boot; Boot Kit Half Shaft Inner


Dodge Boot Kit, Front Outer Passenger Side Part Number: 4641181
Product Specifications- Other Name: Boot - Half Shaft; CV Joint Boot Kit, Front Left Outer, Front Right Outer; CV Boot; Outer Boot; Boot Package, Outer CV; Boot Kit Half Shaft Outer; Boot Package, Inner
- Position: Front Outer Passenger Side


Dodge Outer Boot Part Number: 5083090AA
Product Specifications- Other Name: Boot Kit - Half Shaft; CV Boot; Boot Kit Half Shaft Outer


Dodge Boot Kit, Front Inner Passenger Side Part Number: 5072390AB
Product Specifications- Other Name: Boot Package - Half Shaft; CV Joint Boot Kit, Front Left Inner, Front Right Inner; CV Boot; Inner Boot; Boot Kit Half Shaft Inner
- Position: Front Inner Passenger Side
| Page 1 of 4 |Next >
1-20 of 66 Results
Dodge CV Boot
OEM parts sourced directly from Dodge deliver superior quality, long lasting strength, and a precise fit you can trust. Each item goes through strict quality checks to ensure safety, toughness, and performance that matches your factory equipment. At JeepPartsDeal online shop, you'll get top-quality, budget-friendly OEM Dodge CV Boot for your vehicle. We focus on giving you a high standard without pushing up the price. Our full selection of genuine factory products comes backed by the original manufacturer's warranty. You'll love our fast delivery, seamless shopping experience, and convenient return policy, saving you all the hassle.
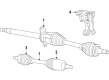
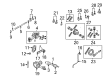
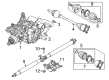
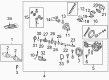
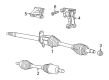
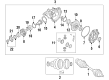
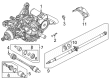
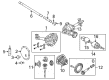
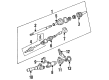
Dodge CV Boot cushions the movement of joints that move to ensure power flows without interruption even during the fight-back of the road. Dodge was a product of a machine shop in Detroit that was gritty and never forgot the capability of raw metal to withstand challenges. Dodge demonstrated durability with all-steel body that shook the brick roads and screeched its competitors to pieces. With Dodge retaining the pedal, the HEMI thunder and wild Viper rolled out to fill highways with unapologetic horsepower and attitude. Dodge puts a Fratzonic yell in electric muscle now allowing drivers to switch between Drag, Donut, Sport, or whisper-quiet Stealth. Brash styling is coupled with practical muscle such that both teens and parents have a kick each time the engine starts. The name is a promise of dirt, hard rocking excitement and machines that are made to shake off tough miles. CV Boot wraps the constant-velocity joint in stiff flexible rubber securing grease within but preventing grit; the grit would rub power transfer expensive noise. CV Boot has road splash, salt, and changes in temperature and bends every time the axle is going through a suspension dip, thus never binding. Damage on CV Boot is not only fast paced per turn but also prevents larger bills on the drivetrain by checking on the visual observation on a regular basis. CV Boot operates with front and all-wheel configurations in the collection, protecting both fixed and plunging ones with no preference to a particular model. Rubber tears and grease spurts out of the joint, and a couple of hard miles of metal on metal eats itself and leaves the axle useless just when it is needed.
Dodge CV Boot Parts and Q&A
- Q: How to Check CV Boot,Shock Absorber and Suspension Components for Wear and Damage on Dodge Neon?A:Regular checks of steering linkage and suspension components are crucial to prevent tire wear, poor ride quality, and abnormal handling. To test shock absorbers/struts, push down at each vehicle corner; if it doesn't return to level within two bounces, they may be worn. Check for fluid leakage and replace if necessary. For suspension and steering, push and pull each front tire to detect play in the system. Inspect tie-rod ends, ball joints, and steering gear boots for damage or looseness. If boots leak lubricant, consider replacing the steering gear. Lastly, check drive axle boots for damage and replace if needed.