JeepParts
My Garage
My Account
Cart
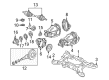
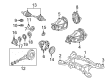
OEM Dodge Magnum Crossmember Bushing
Crossmember Mount- Select Vehicle by Model
- Select Vehicle by VIN
Select Vehicle by Model
orMake
Model
Year
Select Vehicle by VIN
For the most accurate results, select vehicle by your VIN (Vehicle Identification Number).
6 Crossmember Bushings found


Dodge Magnum Crossmember Bushing, Front Driver Side Part Number: 4895391AD
$92.37 MSRP: $138.00You Save: $45.63 (34%)Ships in 1-3 Business Days
Dodge Magnum Crossmember Bushing, Front Passenger Side Part Number: 4895390AD
$92.37 MSRP: $138.00You Save: $45.63 (34%)Ships in 1-3 Business Days


Dodge Magnum Isolator, Front Driver Side Part Number: 4895489AD
$49.82 MSRP: $72.90You Save: $23.08 (32%)Ships in 1-2 Business Days


Dodge Magnum Isolator, Front Passenger Side Part Number: 4895488AD
$49.82 MSRP: $72.90You Save: $23.08 (32%)Ships in 1-2 Business Days


Dodge Magnum Crossmember Bushing, Rear Part Number: 4782861AA
$9.11 MSRP: $13.10You Save: $3.99 (31%)Ships in 1-2 Business Days
Dodge Magnum Isolator, Rear Part Number: 4782862AA
Dodge Magnum Crossmember Bushing
Choose OEM Crossmember Bushing that meet Dodge factory standards. Dodge designs and tests every component for precision and durability. Each Crossmember Bushing follows strict manufacturing steps to lock in quality and fit. If your Dodge Magnum matters to you, OEM parts make the smart choice. You'll get the exact look, feel, and performance you expect. Shop genuine Magnum parts at the highly competitive prices online. Enjoy a manufacturer's warranty, a hassle-free return policy, and rapid delivery. No more guesswork with off brands. Get genuine parts with exact fit and true factory performance. Shop with confidence today at JeepPartsDeal.com.
Dodge Magnum Crossmember Bushing Parts and Q&A
- Q: How to Service and Repair a Rear Crossmember Bushing for Rear Mount on Dodge Magnum?A:Take the first step of rear cross-member bushing maintenance by detaching and isolating the battery's negative cable and then raise and hold up the vehicle. Take out the nuts holding the wheels to the mount and remove the tire and wheel on each side of the rear. Then, take out the rear exhaust and put alignment index marks on both ends of the propeller shaft rubber coupler and axle flange. Take off the bolts and nuts holding the propeller shaft to the axle and hold up the shaft with a bungee tied to the tank straps. At the right rear Parking Brake Cable above the axle differential, unconnect the front parking brake cable. Next, disconnect the front parking brake cable from the equalizer. Take out the single screw that connects the front parking brake cable bracket to the crossmember front flange at its rear. When working with either standard or premium disc brakes, loosen the Brake Caliper guide pin bolts, remove the brake caliper together with the adapter and pads and wedge the caliper above the suspension using a bungee cord or wire. Use the trim stick to pull the pistons back into the SRT8 brake calipers and use a transmission jack to support the spring link so you can reach the bolt on the caliper's lower mounting area. Detach the mounting bolts at the caliper and suspend the entire brake system off the car. Disconnect the wheel speed sensor connectors from their slots in the body wiring harness in the luggage compartment and remove the left wheel speed sensor cable from its clip. Take out the lower mounting bolt and the nut from each shock absorber, then mark the locations of the rear crossmember on the vehicle body at all four places. Put additional jack stands under where the engine is attached to the main chassis piece and then place a jack under the center of the rear axle differential to get it to rest on the differential case. Unbolt the fuel filler tube and next, remove both front and rear bolts on the crossmember. Pull the propeller shaft only once the bottom of the crossmember is clear of the rear axle differential and then move it down to an accessible height, propping up the rear suspension assembly on jack stands. Take out the Coil Springs along with their isolators from the spring links and arrange to cut out the marked location of the bushing on the crossmember. Place 9031-11 into the tip of the steel crossmember, screw the set-screws inside it and slide it down until it is fully seated around the bushing. Set Brace 9031-12 in place over Support 9031-11 and the bushing bore flange and snug the set-screws against the brace without going overboard. Before using Press C-4212F, lubricate the screw-drive threads for simpler operation. Lay each of the pressed tools along the bushing's path while holding them with your hands, then tighten the Press screw-drive until the bushing falls out, removing all of the tools after the bushing is removed.
- Q: How Should a Crossmember Bushing Be Installed to Maintain Ride Quality and Longevity on Dodge Magnum?A:It is necessary to install the lubricated bushing in the same spot found during the bushing removal to maintain proper ride in the car and the longevity of the bushing. Place the bushing inside the crossmember bushing bore and line up the can flange with the indicated lines. Bring the Press C-4212F, Receiver 9031-3 and Installer 9031-4 together above the bushing and crossmember and use the screw-drive to press the bushing into the crossmember. Keep going until the bushing's flanging touches its surrounding surface. After taking out the tools, see if the bushing sits correctly at the reference points. Do not fit the Coil Springs right away; instead, raise the crossmember to meet its body mounts, add the propeller shaft to the differential flange and set the Shock Absorbers in the correct holes of the spring links. Remember that the back side uses longer bolts than the front, so do not mix them. Jack up the vehicle again to where the left side crossmember bolts can be installed, however do not tighten them yet. Lower the jack so the right side of the crossmember lowers just a little, enough for installing the coils and isolators on the spring ends. Insert the coil spring with isolators into the spring pocket, adjust the spring so the top lines up with the body mount, raise the jack to position the coil spring and lower shock absorber end and stop when the lower shock hole is aligned with the spring link hole. Put the two-hole mount for the lower shock bolt in place and secure it with the nut, but don't tighten it yet. If you have AWD, place spacers above the right crossmember mount bushings before fixing the crossmember into its place. Lift up the right side of the crossmember and place the right mounting bolts, leaving them just snug. Take out all the bolts at the front and back crossmember on the left and lower just the left side of the crossmember through the jack while taking care to properly seat the isolators to install the coils. On the left as well, run the lower shock mounting bolt and nut into the hole (do not tighten them) after installing the coil spring and securing the shock absorber in position. When using AWD, attach spacers below the left crossmember mount bushings before lifting the crossmember. Hold up the left crossmembers, insert the bolts into their holes and make them snug but not too tight. Adjust the crossmember so the mounts line up with the marks drawn on the body, then take a measurement to confirm the distance between the tension link and weld flange is at least 12 mm for correct suspension movement. If the crossbar isn't far enough from the center mount, slowly bring it further back until it measures less than 12 mm, tightening all bolts to 180 Nm (133 ft. lbs.). Take out the jack beneath the rear axle differential and remove the bungee cord that is keeping the propeller shaft up. Bring the marks on the propeller shaft and rear coupler-to-axle flange together and tighten the flange bolts and nuts to 81 Nm (60 ft. lbs.). Place the fuel filler tube, clip the left rear wheel speed sensor cable on the routing clip beside the body connector and attach the left rear wheel speed sensor connector to the right one. Place the electronic speed sensor connectors into the body wiring harness connector on the floor of the luggage compartment and close the retaining clip. For cars using standard or premium disc brakes, place the caliper guide pins in the caliper adapter, lower the caliper with the hose through the rear suspension and move the caliper onto the brake pads over the caliper adapter, being careful not to cross-thread the caliper guide pin bolts. While stopping the guide pins from twisting and holding the ends, torque the guide pin bolts until you get 31 Nm (23 ft. lbs.). Put a transmission jack beneath the car's rear spring link, lift the caliper with the pads above the brake rotor and run the caliper mounting bolts in place, tightening them for 130 Nm (96 ft. lbs.) of torque. Run the Parking Brake Cable above the Rear Crossmember, move it through the equalizer above the rear axle differential and attach the front parking brake cable to the connector on the right rear cable. After putting the locating pin through the flange on the front crossmember, screw in the rear crossmember and then screw down the cable routing bracket to secure it. Next, put on the truck's rear exhaust system and connect the tires and wheels, making certain each wheel mounting nut is tightened to 150 Nm (110 ft. lbs.). After that, place the truck on stands so that the rear wheels are half an inch above the floor. Press the parking brake lever down to ensure the rear wheels don't move and then release the lever to test it. Set the vehicle on jack stands or a rack so wheels are free to move, lower the vehicle, hook the negative lead of the battery to its post, press the brake pedal several times and use the alignment rack or drive-on lift to position the car. After that, seal the shock absorber lower mounting bolt nuts at 72 Nm (53 ft. lbs.). Then, check the wheel alignment, especially for the thrust angle and shift the rear crossmember if needed to not endanger the tension link.


Related Dodge Magnum Parts
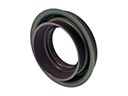 Dodge Magnum Axle Shaft Seal
 Dodge Magnum Bump Stop
 Dodge Magnum Coil Spring Insulator
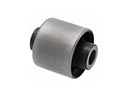 Dodge Magnum Differential Mount
 Dodge Magnum Lateral Link
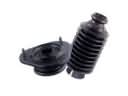 Dodge Magnum Shock and Strut Boot
 Dodge Magnum Steering Knuckle
 Dodge Magnum Suspension Strut Rod
 Dodge Magnum Sway Bar Bushing
 Dodge Magnum Sway Bar Link
 Dodge Magnum Wheel Bearing
 Dodge Magnum Wheel Hub