JeepParts
My Garage
My Account
Cart
OEM Dodge Ram 2500 Van A/C Accumulator
Accumulator- Select Vehicle by Model
- Select Vehicle by VIN
Select Vehicle by Model
orMake
Model
Year
Select Vehicle by VIN
For the most accurate results, select vehicle by your VIN (Vehicle Identification Number).
1 A/C Accumulator found

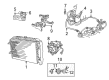
Dodge Ram 2500 Van Dehydrator Part Number: 5003270AD
$72.55 MSRP: $124.00You Save: $51.45 (42%)Ships in 1-2 Business Days
Dodge Ram 2500 Van A/C Accumulator
Choose OEM A/C Accumulator that meet Dodge factory standards. Dodge designs and tests every component for precision and durability. Each A/C Accumulator follows strict manufacturing steps to lock in quality and fit. If your Dodge Ram 2500 Van matters to you, OEM parts make the smart choice. You'll get the exact look, feel, and performance you expect. Shop genuine Ram 2500 Van parts at the highly competitive prices online. Enjoy a manufacturer's warranty, a hassle-free return policy, and rapid delivery. No more guesswork with off brands. Get genuine parts with exact fit and true factory performance. Shop with confidence today at JeepPartsDeal.com.
Dodge Ram 2500 Van A/C Accumulator Parts and Q&A
- Q: How to service and repair the A/C Accumulator on Dodge Ram 2500 Van?A:To start working on the A/C accumulator, unhook and separate the cable from the battery negative. Once done, recover all the refrigerant from the system. Remove the screw attaching the A/C accumulator to the bracket and the screw on the A/C accumulator side of the liquid line block fitting, then disconnect the fitting and apply plugs or tape over all exposed connector ends. After that, take out the screw securing the A/C accumulator outlet to the suction line jumper block fitting and detach the A/C accumulator outlet from the suction line jumper block fitting, remembering once more to install plugs in or tape over all open refrigerant line fittings only after separating the A/C accumulator from the engine compartment. Replace the tape or plug from the suction line jumper block fitting and A/C accumulator outlet, line up the A/C accumulator outlet with the suction line jumper block fitting, attach them with a screw and tighten it to 13.5 Nm (120 in. lbs.). Next, open the tape or remove the plugs at the liquid line block fitting and the A/C accumulator inlet, fit the liquid line block to the A/C accumulator inlet and secure it with a screw, keeping 13.5 Nm (120 in. lbs.) tightness. Put the negative battery cable back in place, remove the refrigerant from the system and then charge it. If you replace the A/C accumulator, add 30 milliliters (1 fluid ounce) of the refrigerant oil specified by the car's manufacturer to the refrigerant system.

Related Dodge Ram 2500 Van Parts
 Dodge Ram 2500 Van A/C Compressor
 Dodge Ram 2500 Van A/C Compressor Clutch
 Dodge Ram 2500 Van A/C Condenser
 Dodge Ram 2500 Van A/C Expansion Valve
 Dodge Ram 2500 Van A/C Hose
 Dodge Ram 2500 Van Blend Door Actuator
 Dodge Ram 2500 Van Blower Motor
 Dodge Ram 2500 Van Blower Motor Resistor
 Dodge Ram 2500 Van Evaporator
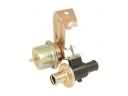 Dodge Ram 2500 Van Heater Control Valve
 Dodge Ram 2500 Van Heater Core
 Dodge Ram 2500 Van HVAC Pressure Switch