JeepParts
My Garage
My Account
Cart
OEM Jeep Commander Timing Chain
Engine Timing Chain- Select Vehicle by Model
- Select Vehicle by VIN
Select Vehicle by Model
orMake
Model
Year
Select Vehicle by VIN
For the most accurate results, select vehicle by your VIN (Vehicle Identification Number).
2 Timing Chains found


Jeep Commander Timing Chain Part Number: 53022316AC
$65.71 MSRP: $96.70You Save: $30.99 (33%)

Jeep Commander Timing Chain Part Number: 5019423AD
Jeep Commander Timing Chain
Choose OEM Timing Chain that meet Jeep factory standards. Jeep designs and tests every component for precision and durability. Each Timing Chain follows strict manufacturing steps to lock in quality and fit. If your Jeep Commander matters to you, OEM parts make the smart choice. You'll get the exact look, feel, and performance you expect. Shop genuine Commander parts at the highly competitive prices online. Enjoy a manufacturer's warranty, a hassle-free return policy, and rapid delivery. No more guesswork with off brands. Get genuine parts with exact fit and true factory performance. Shop with confidence today at JeepPartsDeal.com.
The Timing Chain is one of the vital components, which are the core of the automobile's reliability and power, responding for Jeep Commander automobiles. This metal chain is used to link the camshaft to the crankshaft, so that the valves within the engine can be properly timed for greatest effect. This Timing Chain is different from rubber timing belts because of its intended durability and long service life, especially for the higher displacement engines. Its compatibility extends to different Jeep Commander models like the XK and the new 2022 Jeep Meridian, whether for the domestic, Russian, Indonesian or, perhaps even Chinese market with its different engines. The Timing Chain is another important part that is all pivotal to the operation of the vehicle, and it brings along safety beneficiaries to the vehicle by reducing instances involving premature engine failure caused by timing complication. The highlights of the Timing Chain include its durability and necessary lubrication procedure, another fact that the Jeep Commander Timing chain stands out in the automobile market due to credibility in handling the harshest conditions that may be imposed on any car in use. Also, including a short chain drive in pushrod engines contributes to cutting noises and wears, which plays a vital role in Timing Chain's reliability. Due to its crucial role in achieving and sustaining the accuracy of the Jeep Commander's temporal management as well as its substantive role in the overall operations of the engine, the Timing Chain can be considered as an important component that contributes to the enjoyment of driving and to the protection of the Jeep Commander vehicles in the process.
Jeep Commander Timing Chain Parts and Q&A
- Q: How to Assess Timing Chain Wear on Jeep Commander?A:To see how much the timing chain has worn out, first get rid of the timing chain cover. Rotate the engine carefully clockwise until the tensioner Piston is fully extended. The distance from the secondary timing chain tensioner housing to the step on the piston should be 15 mm (0.5906 inches) or less. When the measurement is higher than the given value, the wear on the secondary timing chains is so bad that they must be changed.
- Q: How to Remove and Replace a Timing Chain on Jeep Commander?A:The first step is to gently press the secondary chain tensioner piston until the piston step is even with the tensioner body. After pulling the ratchet pawl back against its spring through the access hole on the side, push the ratchet approximately 2 mm from the front of the tensioner and drive Tensioner Pins 8514 in through the front hole of the tensioner. Very gently apply the vise pressure to pass the piston spring strength to the lock pin. Put the primary chain tensioner over the oil pump, then bolt the bracket's lower two holes and tighten them to 28 Nm (250 in. lbs.). First tighten the Torx bolt on the right side chain tensioner arm to 28 Nm (250 in. lbs.) and attach the left side chain guide with bolts tuned to the same pressure. Next, insert and tighten the left side chain tensioner arm with its Torx bolt to 28 Nm (250 in. lbs.), then attack the right side chain guide, again tighten it to 28 Nm (250 in. lbs.). Attach both secondary chains to the idler sprocket so that the openings in the idler sprocket show both of the plated links at the bottom. When the secondary timing chains are in, attach Secondary Camshaft Chain Holder 8429 to maintain their position. Line up the double plated links on the primary chain with the timing mark on the idler sprocket that's pointing at 12 o'clock. Line up the single plated link on the primary chain with the timing mark on the crankshaft sprocket that's pointing at 6 o'clock. After applying clean engine oil to the idler shaft and bushings, time the idler sprocket to the counterbalance shaft drive gear. Join the chains, crankshaft sprocket and idler sprocket into one unit, thread them through your bike's block and cylinder head, fasten the chains to keep tension using an elastic strap and test if everything fits properly. Put the timing mark from the idler sprocket gear alongside the one from the counterbalance shaft drive gear, then firmly connect the idler sprocket brake. Before putting in the idler sprocket bolt, lubricate the washer and tighten the retaining bolt to achieve 34 Nm (25 ft.lbs.). Shift the camshafts a little while you position the left sprocket's "L" dot on the chain's plated link and the right sprocket's "R" dot on the plated link of the chain. Make sure to wipe away any excess oil from the bolt so it does not over-tighten and break during installation. Uninstall Secondary Camshaft Chain Holder 8429, put the sprockets over the camshafts and install the bolts folder in position but do not tighten them right now. Check that each bolted link lines up with the pattern on the sprockets and that the two marks "V6" on the camshaft sprockets are facing 12 o'clock which ensures the plate placed between the secondary chain and the block is installed properly. Install each secondary chain tensioner and tighten its bolts to 28 Nm (250 in.lbs.), since the left and right secondary chain tensioners are not found together. There should be no loose locking pins and experts advise not to force the tensioner(s) ratchet in the wrong direction, as this can make the chains too tight. Secure Spanner Wrench 6958 and Adaptor Pins 8346 to tighten the left camshaft sprocket bolts to 122 Nm (90 ft.lbs.) and the right camshaft sprocket bolts to the same. Rotate the engine by two full revolutions and check that all the timing marks are as they should be: 12 o'clock for the primary chain idler sprocket dot, 6 o'clock for the primary chain crankshaft sprocket dot, the "V6" marks at 12 o'clock on the secondary chain camshaft sprockets and the balance shaft drive gear dot in the position of the idler sprocket gear dot. Put some engine oil on all three chains and make sure the idler gear's internal movement does not exceed 0.25 mm (0.010 in.), replacing the idler gear when this happens. After that, you should put in the timing chain cover and crankshaft damper and then you can install the cylinder head covers. Before fitting the threaded plug on the cylinder head, rub it with sealant to stop any leaking. Apply Mopar Thread Sealant with Teflon to the large threaded access plug, set it into the right cylinder head and tighten to 81 Nm (60 ft. lbs.). Put in the oil fill housing, secure the access plug on the left cylinder head and add the Power Steering Pump. After that, top off the cooler with a freon additive and join the negative cable to the battery.


Related Jeep Commander Parts
 Jeep Commander Cam Gear
 Jeep Commander Camshaft
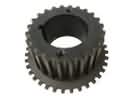 Jeep Commander Crankshaft Gear
 Jeep Commander Crankshaft Pulley
 Jeep Commander Cylinder Head Gasket
 Jeep Commander Exhaust Valve
 Jeep Commander Intake Valve
 Jeep Commander Lash Adjuster
 Jeep Commander Oil Filler Cap
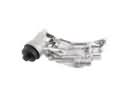 Jeep Commander Oil Filter Housing
 Jeep Commander Timing Cover
 Jeep Commander Valve Stem Seal