JeepParts
My Garage
My Account
Cart
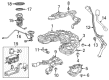
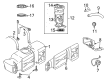
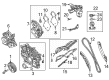
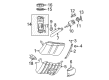
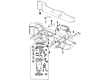
OEM Jeep Grand Cherokee Fuel Rail
Engine Fuel Rail- Select Vehicle by Model
- Select Vehicle by VIN
Select Vehicle by Model
orMake
Model
Year
Select Vehicle by VIN
For the most accurate results, select vehicle by your VIN (Vehicle Identification Number).
18 Fuel Rails found


Jeep Grand Cherokee Fuel Rail Part Number: 53034198AC
$478.50 MSRP: $646.00You Save: $167.50 (26%)


Jeep Grand Cherokee Fuel Rail Part Number: 53031102AB
$512.72 MSRP: $777.00You Save: $264.28 (35%)


Jeep Grand Cherokee Fuel Rail Part Number: 53013888AD
$125.78 MSRP: $187.00You Save: $61.22 (33%)

Jeep Grand Cherokee Fuel Rail Part Number: 5038530AB
$250.39 MSRP: $369.00You Save: $118.61 (33%)

Jeep Grand Cherokee Fuel Rail Part Number: 68148330AA
$415.52 MSRP: $872.00You Save: $456.48 (53%)Ships in 1-2 Business Days
Jeep Grand Cherokee Fuel Rail Part Number: 53010893AC
$449.74 MSRP: $679.00You Save: $229.26 (34%)
Jeep Grand Cherokee Fuel Rail Part Number: 68148329AB
$205.49 MSRP: $302.00You Save: $96.51 (32%)Ships in 1-2 Business Days
Jeep Grand Cherokee Fuel Rail Part Number: 5281481AB
$337.03 MSRP: $509.00You Save: $171.97 (34%)Ships in 1-2 Business Days

Jeep Grand Cherokee Fuel Rail Part Number: 53032903AD


Jeep Grand Cherokee Fuel Rail Part Number: 53030848AC
Jeep Grand Cherokee Fuel Rail Part Number: 53032721AA

Jeep Grand Cherokee Fuel Rail Part Number: 5014496AE

Jeep Grand Cherokee Fuel Rail Part Number: 53030440

Jeep Grand Cherokee Fuel Rail Part Number: 4591853AG
Jeep Grand Cherokee Fuel Rail Part Number: 53030435

Jeep Grand Cherokee Fuel Rail Part Number: 53030598AC
Jeep Grand Cherokee Fuel Rail Part Number: 5037480AA

Jeep Grand Cherokee Fuel Rail Part Number: 68014068AA
Jeep Grand Cherokee Fuel Rail
Choose OEM Fuel Rail that meet Jeep factory standards. Jeep designs and tests every component for precision and durability. Each Fuel Rail follows strict manufacturing steps to lock in quality and fit. If your Jeep Grand Cherokee matters to you, OEM parts make the smart choice. You'll get the exact look, feel, and performance you expect. Shop genuine Grand Cherokee parts at the highly competitive prices online. Enjoy a manufacturer's warranty, a hassle-free return policy, and rapid delivery. No more guesswork with off brands. Get genuine parts with exact fit and true factory performance. Shop with confidence today at JeepPartsDeal.com.
Jeep Grand Cherokee Fuel Rail Parts and Q&A
- Q: How to Install a Fuel Rail on a 3.7L Engine on Jeep Grand Cherokee?A:Before installing the fuel rail and injectors on a 3.7L engine, first clean the Fuel Injector machined bores inside the Intake Manifold. Rub a tiny amount of engine oil on every fuel injector O-ring to help with the installation. Fit the injector assembly into the cylinder head, each airstream guide into place so that the O-rings are not damaged. On the fuel rail, compress the section nearest the right side until the injector contacts the engine head and then squeeze the other side in the same way. Install and secure the fuel rail mounting bolts and next install the Ignition Coils. Hook the electrical connectors to the Throttle Body and every fuel injector and ensure the red slider locks it in place by pushing it into the socket. After that, gently tug on the connector to verify it is properly attached. Match up the vacuum lines to the throttle body, secure the air resonator bracket with bolts on the front side of the throttle body and clip the fuel line latch and fuel line to the fuel rail. Place the air box on the throttle body and then snap the Air Duct into the air box. The next step is to join the Battery Cable to the battery, fire up the engine and monitor for any leaks.
- Q: How to Service a Fuel Rail on Jeep Grand Cherokee?A:The first step for servicing the fuel rail is to take off the fuel tank filler tube cap and let the fuel system pressure go. You should begin by breaking the negative Battery Cable and then remove the air tube up top in the Throttle Body; some models will want air cleaner ducts to be removed as well. For each of the six Fuel Injectors, push the red slider off to the side and depress the tab so the connector releases, only after making a note of the wiring location when the factory harness is not tagged. If you can reach them, remove the oxygen sensor wiring clip nuts from the fuel rail studs and disconnect the fuel supply line latch clip and the fuel line from the fuel rail as well. Disconnect the Throttle Cable, speed control cable and automatic transmission cable from the throttle body and take out the cable routing bracket at the Intake Manifold. Brush or blow away any dirt from around the injectors, remove the fuel rail mounting nuts, then gently treat and shake the rail to help the injectors move from the manifold. If you need to, rinse every injector bore and put a little clean engine oil on every injector O-ring before setting the injectors in the right places. Attach and tighten each of the fuel rail bolts with 11 ± 3 Nm (100 ± 25 in. lbs.) torque and then plug in and lock the electrical connectors at the fuel injectors. Attach the fuel line and the latch clip, put in the protective cap on the pressure test port fitting if it is provided and put the cable routing bracket back in. Repair the throttle cable, speed control cable and automatic transmission cable at its connection on the throttle body and attach the oxygen sensor wiring clip nuts if the engine has one. After that, attach the air tube again, connect the fuel tank cap, connect the negative battery cable, restart the engine and check for fuel leaks.


Related Jeep Grand Cherokee Parts
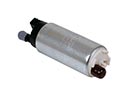 Jeep Grand Cherokee Fuel Pump
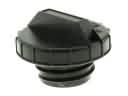 Jeep Grand Cherokee Gas Cap
 Jeep Grand Cherokee Fuel Filter
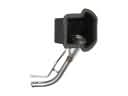 Jeep Grand Cherokee Fuel Filler Neck
 Jeep Grand Cherokee Fuel Filler Hose
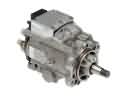 Jeep Grand Cherokee Fuel Injection Pump
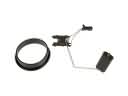 Jeep Grand Cherokee Fuel Level Sensor
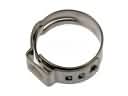 Jeep Grand Cherokee Fuel Line Clamps
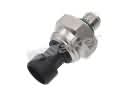 Jeep Grand Cherokee Fuel Pressure Sensor
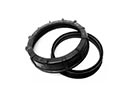 Jeep Grand Cherokee Fuel Pump Seal
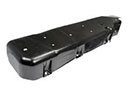 Jeep Grand Cherokee Fuel Tank Skid Plate
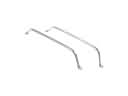 Jeep Grand Cherokee Fuel Tank Strap